
Chef Juliette
Smelt (Éperlans)
Tiny éperlans, lightly floured and fried until their tails stand crisp, arrive in a generous heap on a napkin with fried parsley and grooved lemon, a weeknight lesson in heat and restraint.
A cooking platform built around craft, culture, and the stories behind what we eat.
Created by Chef Juliette
Based on No. 369, Lapwings’ Eggs in Aspic, from Le Guide Culinaire (1907) by Auguste Escoffier
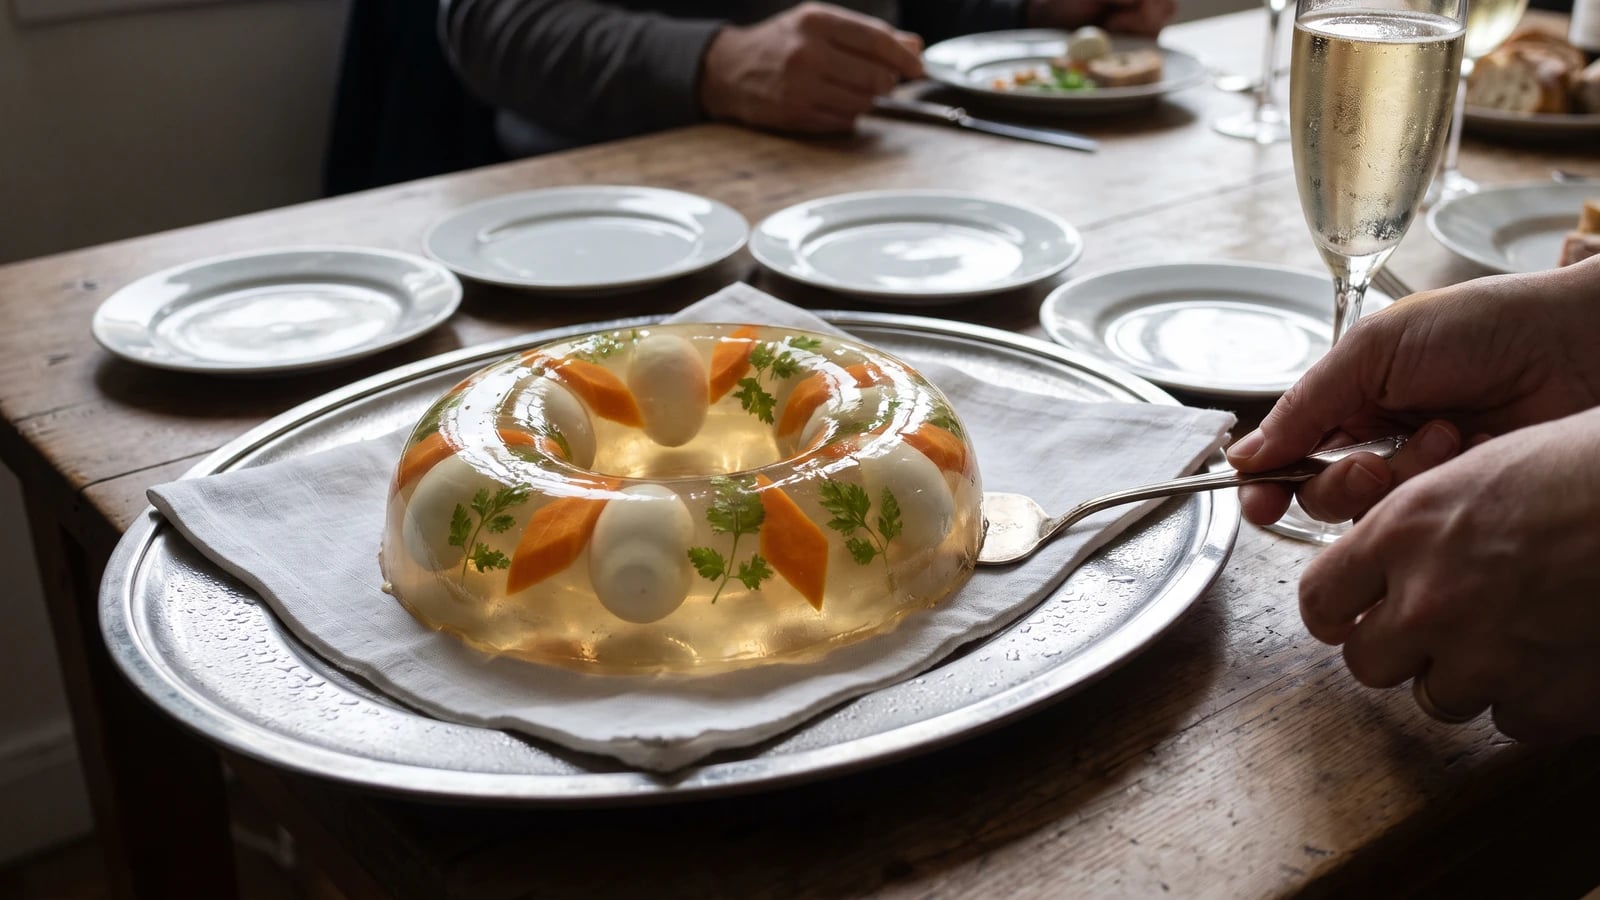
A clear aspic ring holds hard-boiled quail eggs upright, points down in the mould so they stand proud on the platter. Clarity, patient layering, and a quick unmould make the whole dish.
Œufs de vanneau en aspic (lapwings’ eggs in aspic) teaches the discipline of clarity. The jelly is not packaging. It is the dish: bright enough to catch the light, seasoned enough to taste alive when cold, and firm enough to release cleanly without becoming rubbery. Begin with genuinely clear, fat-free poultry consommé, because no decoration can hide a cloudy foundation.
The original entry assumed a saucier with a stockpot never off the fire, finished aspic waiting on command, cold-room hands, and a border mould large enough for a dining room. Your home equivalent is pale chicken consommé strengthened with measured powdered gelatin, strained carefully, and set in one five-cup metal ring. Wild lapwing eggs are protected and aren't ingredients to seek out. Farmed quail eggs provide the same small scale and pointed shape, preserving the geometry while leaving the wild bird alone. Twenty eggs allow two against breakage and make four generous appetizer portions.
Endless stock clarification was brigade scaffolding, so it goes. The thin first coat, decoration fixed with droplets of jelly, eggs placed points down, successive layers, complete chilling, and quick hot-water unmould are the dish, so every one stays. The decisive act is temperature: let each layer become firm, then add the next aspic cool enough that it cannot melt the work beneath it.
Œufs de vanneau en aspic belong to the formal Parisian repertoire of cold hors-d’œuvre, where lapwing eggs gathered from marsh and pasture were prized and displayed in brilliant jelly by the garde-manger, the cold-kitchen cook. The border mould was not ornament for its own sake: it displayed the clarity of the stock and made the point-down eggs stand upright after the aspic was turned out. Because lapwings and their nests are legally protected across much of Europe, the living home-kitchen continuation uses farmed quail eggs while preserving the original arrangement and layered method.
Quantity
20
18 for the mould and 2 against breakage
Quantity
4 cups (950 ml / 950 g)
divided
Quantity
4 packets, about 3 tablespoons (45 ml / 28 g)
Quantity
Up to 1/2 teaspoon (2.5 ml / 3 g)
only if the consommé needs it
Quantity
1, about 2 oz / 60 g
peeled and cut into 12 tiny diamonds
Quantity
12
| Ingredient | Quantity |
|---|---|
| quail eggs18 for the mould and 2 against breakage | 20 |
| very clear, fat-free chicken consommé or clarified light poultry stockdivided | 4 cups (950 ml / 950 g) |
| unflavoured powdered gelatin | 4 packets, about 3 tablespoons (45 ml / 28 g) |
| fine sea salt (optional)only if the consommé needs it | Up to 1/2 teaspoon (2.5 ml / 3 g) |
| small carrotpeeled and cut into 12 tiny diamonds | 1, about 2 oz / 60 g |
| small chervil sprigs | 12 |
Bring a small saucepan of water to a quiet boil. Lower in the quail eggs and cook for 4 minutes, keeping the water lively but not violent enough to knock them together. Transfer them immediately to ice water for 5 minutes. Crack each shell all over, begin peeling at the blunt end where the air pocket sits, and peel under cool water. Dry the eggs thoroughly and choose the 18 smoothest, keeping their pointed ends easy to identify.
Blanch the carrot diamonds in simmering water for about 90 seconds, until just tender but still bright. Blanch the chervil for 3 seconds, then move both directly to ice water. Drain and pat everything completely dry. Water trapped on the decoration can make it drift and blur the surface of the jelly.
If the consommé shows fat or sediment, chill it thoroughly, lift away every trace of fat, and pass it through damp muslin or a damp coffee filter before proceeding. Pour 1 cup (240 ml / 240 g) of the cold consommé into a bowl and sprinkle the gelatin evenly over its surface. Leave it for 5 minutes to bloom. Warm the remaining 3 cups (710 ml / 710 g) until hot but never boiling, then stir it into the bloomed gelatin until perfectly dissolved. Skim away bubbles and taste a teaspoon after chilling it on a cold saucer for 3 minutes; cold mutes seasoning, so add only as much salt as the cold sample requires. Hold the aspic in a bowl of barely warm water so it remains liquid but feels cool on a clean finger. If the gelatin forms threads or begins setting in the bowl, warm it gently and strain it again. Ça se rattrape.
Chill a clean 5-cup (1.2 L) metal border mould for 10 minutes. Spoon about 1/3 cup (80 ml / 80 g) of liquid aspic into the bottom and tilt the mould slowly until the entire base carries a thin, even coating. Set it in the refrigerator for 8 to 10 minutes, until firm enough to touch without leaving a mark.
Arrange the carrot diamonds and chervil face down on the set coating, remembering that the bottom of the mould will become the top of the finished aspic. Place a few drops of liquid jelly over each piece to fix it, then chill for 3 minutes. Cover the decoration with another 3 tablespoons (45 ml / 45 g) of aspic and chill until firmly set. This thin protective layer keeps the design from shifting when the eggs arrive.
Arrange the 18 peeled eggs evenly around the ring with their pointed ends facing down against the decorated coating. When the mould is inverted, those points will face upward and the eggs will appear to stand. Spoon in enough cool liquid aspic to come about one-third of the way up the eggs, pouring against the side of the mould rather than directly onto them. Chill for 10 to 15 minutes, until this anchoring layer is firm.
Add the remaining aspic in successive layers of about 1/2 cup (120 ml / 120 g), pouring each over the back of a spoon and chilling it until firm before adding the next. Keep the liquid jelly cool and fluid. Warm jelly melts the layer beneath and allows the eggs to float or lean; if that happens, stop pouring, chill until support returns, then straighten the eggs with two teaspoons before continuing with cooler jelly. Ça se rattrape. Finish with enough aspic to cover the blunt ends of the eggs completely and fill the mould.
Cover the filled mould without touching the surface and chill for at least 4 hours, preferably overnight. Lay a smooth, lint-free folded white napkin on a chilled platter. Dip the mould only to its rim in hot water for 4 to 5 seconds, lift it out, wipe it quickly, and invert it squarely over the napkin. Wait for the aspic to release under its own weight. If it clings, lift the mould and repeat the dip for 2 seconds rather than tugging at the jelly. Return a softened edge to the refrigerator for 10 minutes, then carry the clear ring to the table cold. À table!
1 serving (about 300g)
Culinary guides, cultural storytelling, and the editorial depth that makes cooking meaningful.
Discover Culinary ExplorerChef Juliette
Tiny éperlans, lightly floured and fried until their tails stand crisp, arrive in a generous heap on a napkin with fried parsley and grooved lemon, a weeknight lesson in heat and restraint.

Chef Juliette
Brandade de Morue turns salt cod, warm olive oil, and milk into a pale, silky emulsion: keep everything warm and add the oil slowly, then crown the generous dome with butter-fried bread.

Chef Juliette
Salt cod worked warm with cream, one patient spoonful at a time, until the rough flakes become a glossy Nîmes paste, domed generously and ringed with butter-fried croutons for the table.

Chef Juliette
Wine-poached char packed in its earthenware crock beneath butter gold: a make-ahead first course that turns careful cooling, thorough boning, and one unbroken seal into quiet abundance.