
Chef Juliette
John Dory (St. Pierre)
John Dory has the delicacy of sole and the firmness of turbot. A light flouring, a quick butter sauté, and nut-brown beurre noisette show exactly why looks never mattered.
A cooking platform built around craft, culture, and the stories behind what we eat.
Created by Chef Juliette
Based on No. 1043, Fillet of Beef (Relevé), from Le Guide Culinaire (1907) by Auguste Escoffier
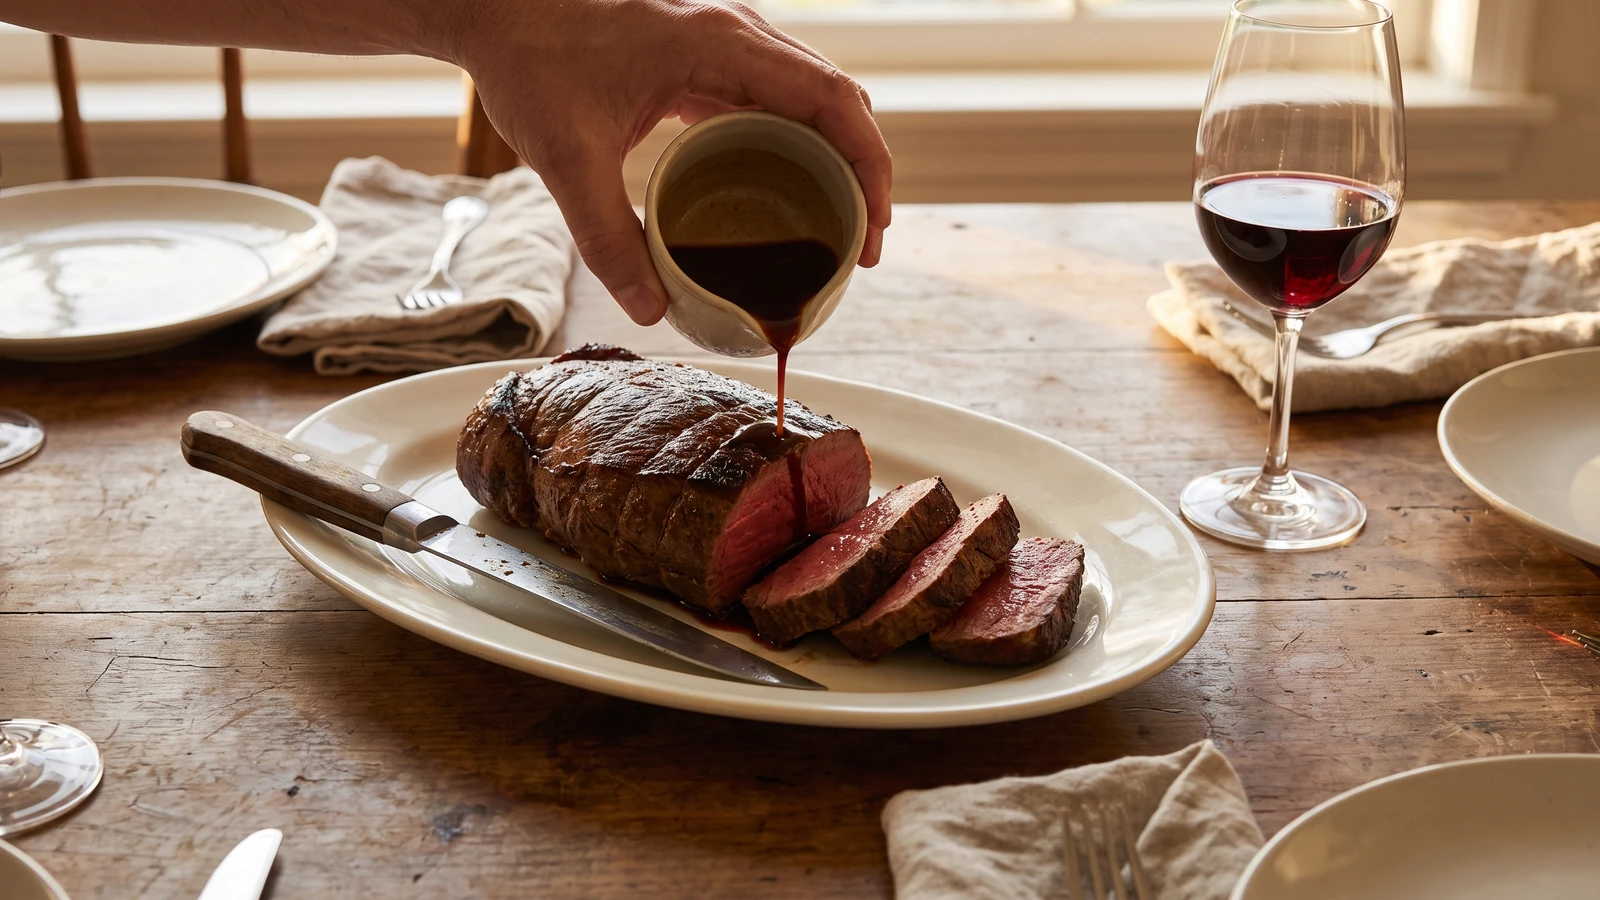
A whole rosy fillet, larded with cool fatback and poêlé beneath butter, then carved thick under glossy jus. The lesson is exact but simple: deep colour outside, red tenderness within.
Filet de Bœuf en Relevé (whole fillet of beef for the grand course) teaches the discipline a lean roast demands: colour it generously, then stop cooking before the centre loses its red. Overcook a fillet and no sauce can return its juice. A thermometer, not the clock, decides this dish.
The brigade assumed a whole fillet, a larding needle, a stockpot never off the fire, a saucier to finish the poëling liquor, and a salamander waiting if the colour lagged. Your home equivalent is a 2 lb 6 oz centre-cut fillet, a slim knife and skewer for the larding, the home-scaled Poëlings (No. 250), and the broiler only if the roast needs a final touch of bronze. The smaller cut serves four generously and cooks evenly; the size changed because there is no brigade to feed, but the method and its proportions remain. One cook, one stove, one evening.
The full brigade-size joint, sheets of pork fat, buttered paper, and a separate hand for the sauce were scaffolding. They can go. The larding, the butter-rich cooking without added liquid, the open colouring at the finish, and the rosy centre are the dish itself. Take the fillet from the oven at 118 to 120°F, before it looks finished; that single decision matters more than every flourish around it.
Filet de bœuf en relevé belonged to the formal Paris table, where the relevé was the substantial joint served after the fish and before the smaller entrées. The name describes the fillet's place in the meal, not one prescribed garnish, which is why classical cooks surrounded it with many different garnitures while keeping the beef red at the centre. Poëling simplified an elaborate practice of vegetable coatings, pork-fat wrapping, and buttered paper into covered butter cooking followed by open browning.
Quantity
1 evenly shaped piece, 2 lb 6 oz / 1.1 kg
chain and silverskin removed
Quantity
1/2 cup (120 ml / 115 g)
chilled and cut into twelve narrow batons
Quantity
2 teaspoons (10 ml / 12 g)
Quantity
1 teaspoon (5 ml / 2 g)
| Ingredient | Quantity |
|---|---|
| centre-cut beef filletchain and silverskin removed | 1 evenly shaped piece, 2 lb 6 oz / 1.1 kg |
| fully cured, ready-to-eat unsmoked pork fatbackchilled and cut into twelve narrow batons | 1/2 cup (120 ml / 115 g) |
| fine sea salt | 2 teaspoons (10 ml / 12 g) |
| freshly ground black pepper | 1 teaspoon (5 ml / 2 g) |
| Poëlings (No. 250) | 1 home-scaled preparation Poëlings (No. 250), sufficient for a 2 lb 6 oz / 1.1 kg fillet and yielding about 1 cup (240 ml / 240 g) finished jus |
Chill the fatback batons until firm enough to push without bending, about 15 minutes. Working from each end of the fillet, use a slender paring knife followed by a clean metal skewer to open twelve narrow channels parallel to the grain. Push six fatback batons in from each end, staggering them so the fat runs evenly through the meat rather than collecting in its centre. If the fat softens, chill it again; forcing a warm baton only tears the beef. If one channel opens through the side, press it closed and secure it beneath the twine. Nothing is lost.
Tie the fillet at 1 1/2-inch / 4 cm intervals so it forms an even cylinder, tightening the twine only enough to hold its shape. Season all over with the salt and leave it at cool room temperature for 30 minutes. Pat the surface dry once more, then apply the pepper. An evenly tied, dry fillet colours at the same pace from end to end; a wet or misshapen one does not.
Heat the oven to 350°F / 175°C. Set up the home-scaled Poëlings (No. 250) in a heavy lidded vessel just large enough to hold the fillet, following that preparation's own entry, then place the beef inside and coat it with the prescribed butter. Cover tightly and cook for 15 minutes. Turn and baste the fillet, cover again, and continue for 8 to 15 minutes, checking early, until the centre reaches about 105°F / 41°C. Add no liquid while the meat cooks; moisture here changes poëling into braising. If the vegetable bed threatens to catch, lower the oven and move the vessel to a higher rack rather than reaching for water.
Uncover the vessel, baste the fillet thoroughly, and raise the oven to 450°F / 230°C. Roast uncovered for 6 to 10 minutes, turning and basting once, until the surface is a deep Maillard bronze and a thermometer inserted from the side into the true centre reads 118 to 120°F / 48 to 49°C. If the colour arrives first, shield the fillet loosely with foil and lower the heat. If the temperature arrives while the surface remains pale, lift the fillet close beneath the broiler for 30 seconds at a time, turning carefully. Do not chase colour past the temperature; overcooking this lean cut is the one failure no sauce fully repairs.
Transfer the fillet to a warm platter and cover it very loosely with foil. Rest for 15 to 20 minutes; the centre should rise to about 126 to 130°F / 52 to 54°C while the juices settle back through the meat. A tight foil wrapping traps moisture and softens the browned surface, so leave room for air. Pour every resting juice into the finished sauce.
While the beef rests, complete the cooking liquor exactly as directed in Poëlings (No. 250), including its full ten-minute contact with the butter before straining and removing the excess fat. That contact extracts the savour held by the butter; it is technique, not brigade scaffolding. The finished jus should be clear, glossy, and concentrated enough to lightly coat a spoon. If it looks greasy, let it stand for a minute and skim with a cold spoon. If it is thin, reduce it gently; if it tightens too far, loosen it teaspoon by teaspoon with warm water. Ça se rattrape.
Remove every length of twine and carve the fillet across the grain into slices about 1/2 inch / 1.25 cm thick. Arrange them slightly overlapping on the warm platter so the red centre and fine streaks of fatback remain visible. Spoon just enough jus over the beef to give it a gloss, then send the rest in a warm sauceboat. Serve immediately. À table!
1 serving (about 290g)
Culinary guides, cultural storytelling, and the editorial depth that makes cooking meaningful.
Discover Culinary ExplorerChef Juliette
John Dory has the delicacy of sole and the firmness of turbot. A light flouring, a quick butter sauté, and nut-brown beurre noisette show exactly why looks never mattered.

Chef Juliette
Fresh haddock proves its delicacy in the meunière pan: a fine flour crust, moist pearly flakes, and beurre noisette sharpened with lemon and parsley, ready from one skillet in half an hour.

Chef Juliette
Éperlans à l’Anglaise turns small fish into a lesson in disciplined coating: boned smelts under a close, crisp crumb, pan-fried in clarified butter and finished with bright, half-melted maître d’hôtel butter.

Chef Juliette
Tiny smelts, shallot, mushrooms, white wine, gratin sauce, and fine bread raspings meet a fierce oven, where the fish must turn tender in the same breath the buttered crust bronzes.