Culinary Explorer

A cooking platform built around craft, culture, and the stories behind what we eat.
Discover Culinary Explorer
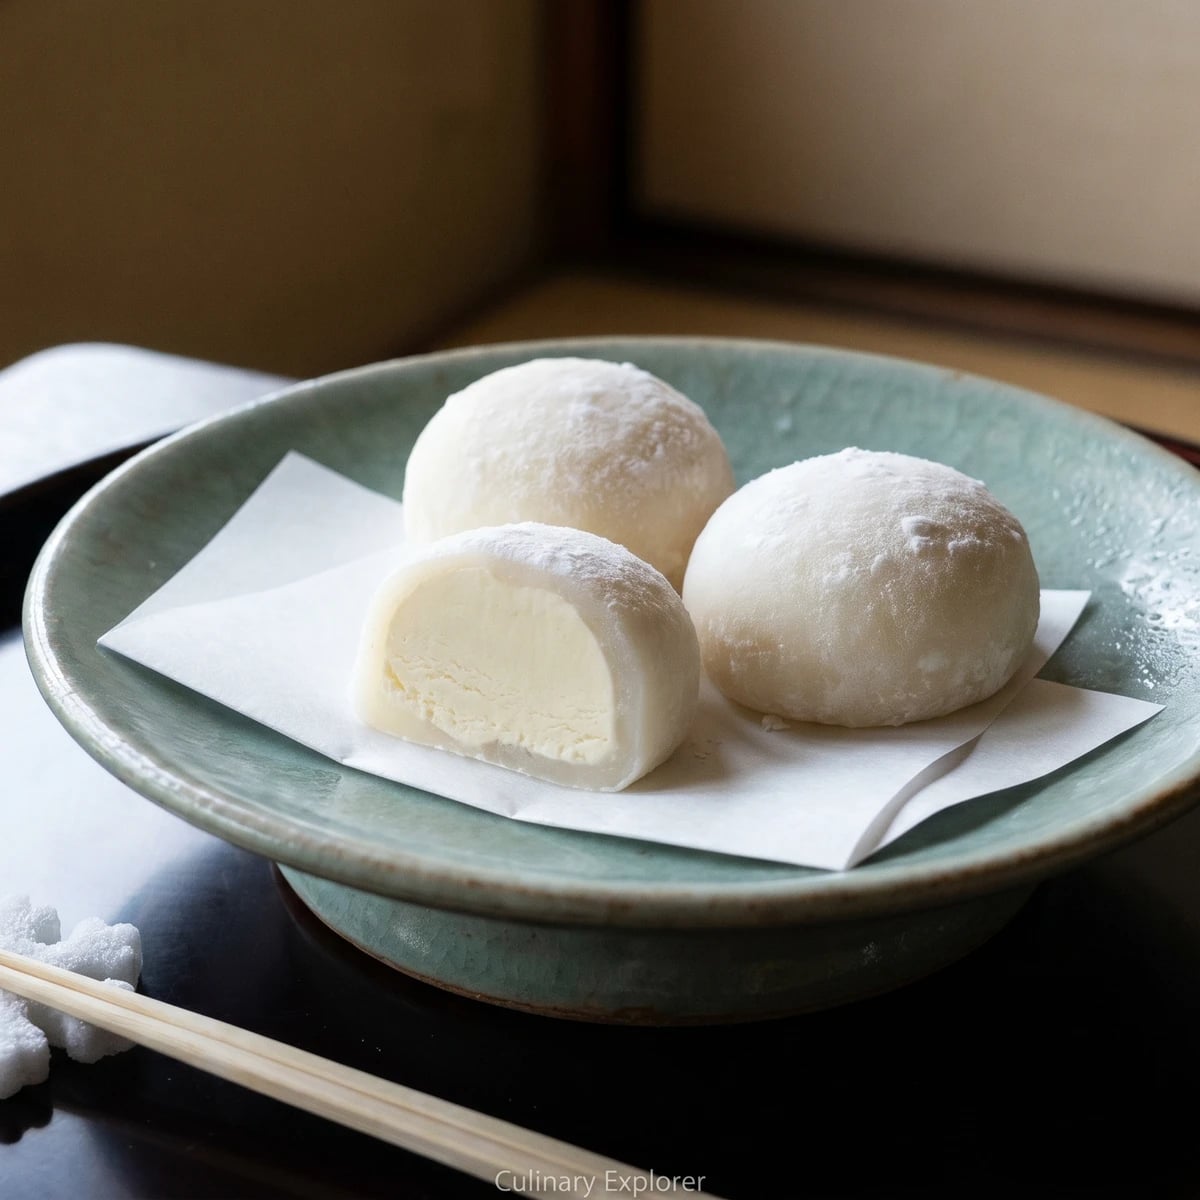
Yukimi-Style Mochi Ice Cream (雪見大福風 もちアイス)

Yukimi-Style Mochi Ice Cream (雪見大福風 もちアイス)

Created by

The trick isn't strength, it's timing: soft mochi, hard-frozen scoops, and a quick wrap before the cold and the warmth argue too much.

Desserts
Japanese
Make Ahead
Freezer Friendly
35 min
Active Time
5 min cook3 hr 40 min total
Yield10 pieces

Mochi ice cream looks like the sort of sweet that requires clever hands. It doesn't. What it requires is cold ice cream, warm mochi, and a little courage at the wrapping moment, which is not a heroic requirement. It is mostly preparation.

The one detail that decides it is thickness. Roll the mochi too thin and it tears as the ice cream freezes hard beneath it. Leave it too thick and the first bite becomes all chew and no cream. Aim for a soft skin about 3 mm thick, dusted well with potato starch, and you have the balance: a gentle pull from the mochi, then the cold sweetness underneath.

This sits beside wagashi, Japanese sweets, more than it sits beside a Western dessert course. Daifuku is the older idea: soft mochi wrapped around a filling. Here the filling is ice cream, so the freezer becomes part of the method. Work quickly, don't fuss with perfection, and leave the finished pieces a little room on the tray. Snow-viewing sweets should not look crowded.

Yukimi Daifuku was introduced by Lotte in Japan in 1981, adapting the older form of daifuku, a mochi sweet traditionally filled with sweet bean paste, to hold ice cream instead. The name means roughly snow-viewing daifuku, linking the white round sweet to yukimi, the custom of admiring snow. Mochi ice cream later became widely known abroad, especially through Japanese American makers in the late twentieth century, but the Japanese commercial model remains the reference point for this style.

The technique, the tradition, and the story behind every dish.

Discover Culinary Explorer

Ingredients

vanilla ice cream

Quantity

300g

scooped into 10 small balls and frozen firm

shiratamako (glutinous rice flour)

Quantity

100g

granulated sugar

Quantity

50g

water

Quantity

150ml

potato starch or cornstarch

Quantity

as needed

for dusting

Equipment Needed

  • Heatproof bowl
  • Wet silicone spatula
  • Rolling pin
  • 9 cm round cutter, or an overturned cup
  • Small paper cups for freezing

Instructions

  1. 1

    Freeze the scoops

    Scoop the ice cream into 10 small balls, about 30g each, and set them on a lined tray. Freeze until very hard, at least 2 hours. The mochi wrapper will be warm and soft, so the ice cream must be colder than seems polite.

  2. 2

    Mix the mochi

    Whisk the shiratamako and sugar in a heatproof bowl, then add the water little by little until smooth. Shiratamako begins as small rice-flour grains, so adding water gradually lets them hydrate evenly instead of leaving hard specks.

  3. 3

    Cook until glossy

    Cover loosely and microwave for 1 minute, stir with a wet spatula, then microwave 1 minute more. Stir again. Cook another 30 to 60 seconds, until the mochi turns translucent, sticky, and glossy. That shine tells you the starch has gelatinized, which is what gives mochi its tender pull.

  4. 4

    Roll the sheet

    Dust a tray generously with potato starch and scrape the hot mochi onto it. Dust the top, then roll or pat it into a sheet about 3 mm thick. Use enough starch that it doesn't stick, but brush away heavy clumps later. Starch is a tool here, not a second skin.

  5. 5

    Cut the rounds

    Let the sheet cool until warm, not hot, about 10 minutes. Cut 10 rounds, each about 9 cm across. If the mochi is too hot it melts the ice cream at once; if it is fully cold it stiffens and resists wrapping.

  6. 6

    Wrap quickly

    Place one mochi round in a small cup or in your palm, set a frozen ice cream ball in the center, and pull the edges together underneath. Pinch to seal, then set seam-side down in a paper cup or on the tray. Work one piece at a time and return finished pieces to the freezer as you go.

  7. 7

    Set and serve

    Freeze the wrapped mochi ice cream for at least 1 hour. Before serving, rest them at room temperature for 3 to 5 minutes, just until the mochi softens slightly. Too long and the center melts; too soon and the wrapper eats tough. There is your small window.

Chef Tips

  • Use shiratamako if you can find it. Mochiko will work, but shiratamako gives a finer, more tender chew, which matters when the sweet is eaten cold.
  • Keep the ice cream scoops small. A large scoop looks generous until it melts in your hand and teaches humility.
  • If the mochi sticks, dust the surface and your hands again. If it cracks, it has cooled too much. Warm it very briefly, only a few seconds, to make it supple again.

Advance Preparation

  • The ice cream scoops can be shaped a day ahead and kept tightly covered in the freezer.
  • Finished mochi ice cream keeps well for 1 week in an airtight container. Rest briefly before serving so the mochi returns to a tender bite.

Frequently Asked Questions

Nutrition Information

1 serving (about 60g)

Calories
125 calories
Total Fat
3 g
Saturated Fat
2 g
Trans Fat
0 g
Unsaturated Fat
1 g
Cholesterol
13 mg
Sodium
25 mg
Total Carbohydrates
25 g
Dietary Fiber
0 g
Sugars
12 g
Protein
1 g

Note: Chef personas and recipes are created with AI assistance. Cook with care: follow safe food-handling practices, check doneness with a thermometer when needed, and adapt for allergies and your kitchen.

Where cooking meets culture.

Culinary guides, cultural storytelling, and the editorial depth that makes cooking meaningful.

Discover Culinary Explorer

More from Kakigori & Frozen Sweets

Browse the full collection