
Chef Jeong-sun
Albaechu-mul-kimchi (Baby Cabbage Water Kimchi)
Tender baby napa cabbage in a clear pear-garlic brine, lightly fermented until the broth turns clean and bright, the summer kimchi a beginner can make without a kimjang floor.
A cooking platform built around craft, culture, and the stories behind what we eat.
Created by
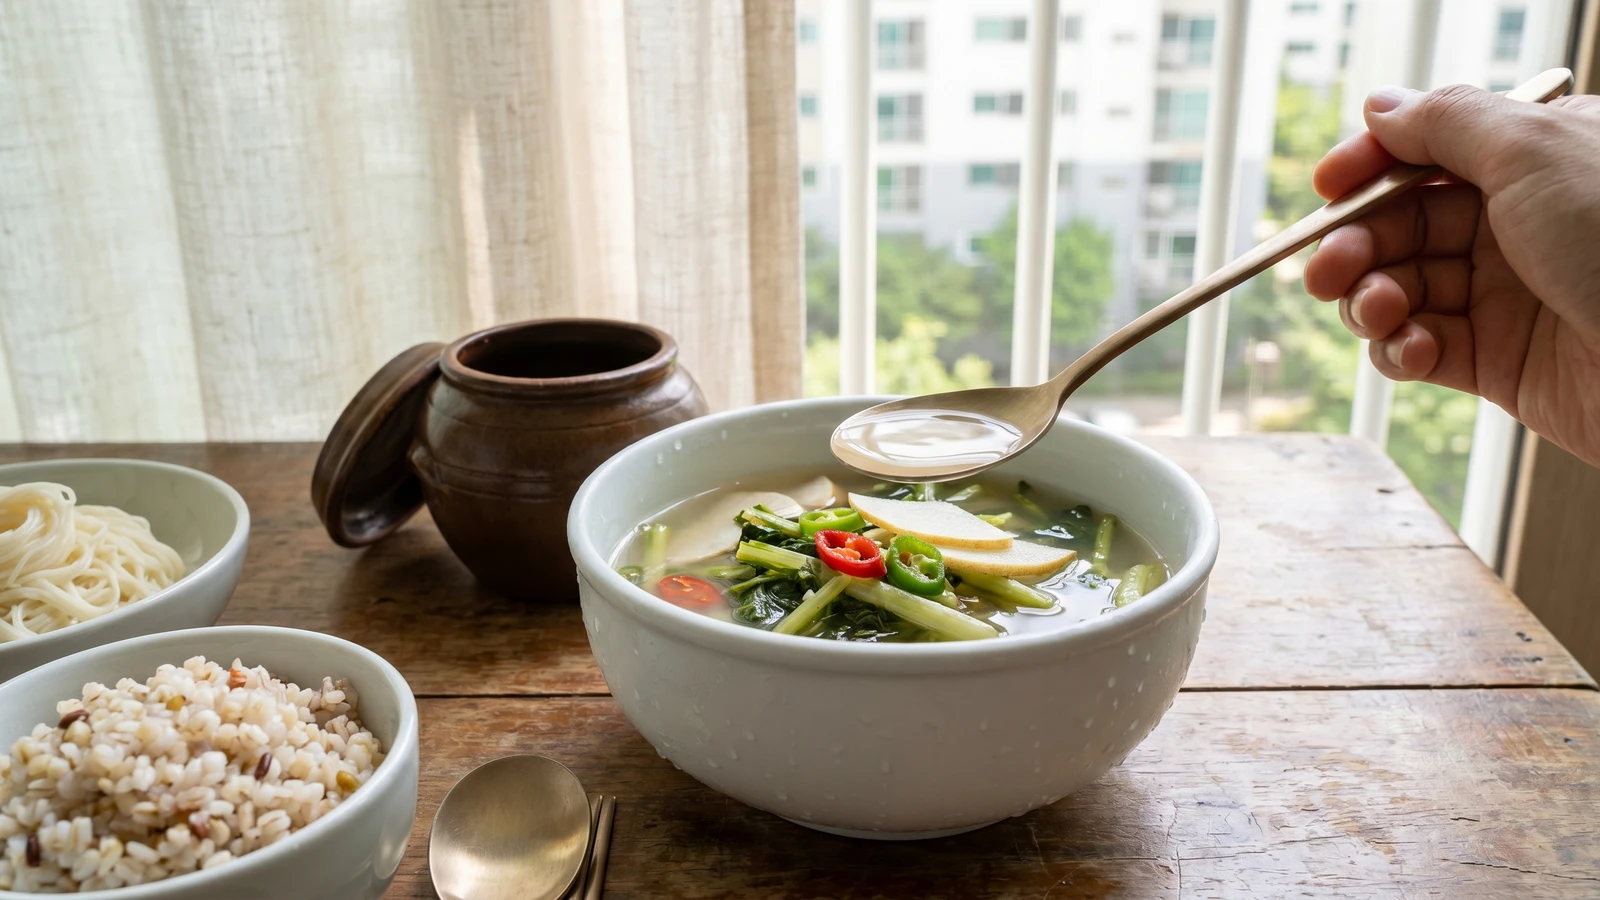
Tender young radish and its greens in a clean, lightly fermented summer brine, made pale and crisp so the leaves stay fresh and the broth is drunk as much as eaten.
Yeolmu belongs to summer. Buy it when the radishes are still thin and the greens look alive, not tired at the edges. This is not winter kimchi's heavy work. It asks for gentler hands, cleaner water, and the patience to let a pale brine become lightly sour before it goes cold.
People bruise yeolmu by treating it like cabbage. Don't. The stems snap easily, and once the leaves are crushed, the brine turns grassy and dull. Salt it briefly, rinse it as if you are washing silk, and pour the brine over after the rice paste has cooled completely. The paste feeds fermentation and gives the broth a little body; too much makes it cloudy and heavy.
My teacher Master Seong-nyeo made us taste the brine before it touched the radish. Not after. Before. Notebook 18 says 2 tablespoons coarse sea salt for 2 liters of finished brine, then adjust by the radish's own salting. 손맛 is real; I measure it anyway. Serve this with barley rice, cold noodles, or a hot bowl of kalguksu when the weather has made everyone quiet.
Yeolmu-kimchi is tied to Korea's warm months, when young radish grows quickly and is eaten before the root matures into the large winter radish used for kkakdugi and dongchimi. Water kimchi styles such as yeolmu-mul-kimchi and nabak-kimchi preserve vegetables in a lightly salted, drinkable brine, a practical summer answer to heat before household refrigeration was common. The dish remains especially loved with noodles, including yeolmu-guksu, where the chilled brine becomes the broth.
Quantity
900g
roots trimmed and cut into 2-inch lengths
Quantity
6 cups
for soaking
Quantity
1/2 cup
for salting the radish
Quantity
1 tablespoon
Quantity
1 cup
for rice paste
Quantity
7 cups
for brine
Quantity
2 tablespoons
for brine
Quantity
1 tablespoon
Quantity
1 tablespoon
Quantity
1/2
peeled and thinly sliced
Quantity
1/2
thinly sliced
Quantity
4 cloves
thinly sliced
Quantity
1 teaspoon
thinly sliced
Quantity
3
cut into 2-inch lengths
Quantity
1
sliced on the diagonal
Quantity
1
sliced on the diagonal
Quantity
1
halved lengthwise and sliced 1/4 inch thick
| Ingredient | Quantity |
|---|---|
| yeolmu (young summer radish with greens)roots trimmed and cut into 2-inch lengths | 900g |
| cold waterfor soaking | 6 cups |
| coarse sea saltfor salting the radish | 1/2 cup |
| sweet rice flour (chapssal-garu) or all-purpose flour | 1 tablespoon |
| waterfor rice paste | 1 cup |
| cold filtered waterfor brine | 7 cups |
| coarse sea saltfor brine | 2 tablespoons |
| sugar | 1 tablespoon |
| fish sauce or Korean soup soy sauce (optional) | 1 tablespoon |
| Korean pearpeeled and thinly sliced | 1/2 |
| small onionthinly sliced | 1/2 |
| garlicthinly sliced | 4 cloves |
| gingerthinly sliced | 1 teaspoon |
| scallionscut into 2-inch lengths | 3 |
| green chilisliced on the diagonal | 1 |
| red chili (optional)sliced on the diagonal | 1 |
| small cucumber (optional)halved lengthwise and sliced 1/4 inch thick | 1 |
Trim away tough root tips and yellow leaves. Cut the radish and greens into 2-inch lengths, then soak them in 6 cups cold water for 10 minutes to loosen grit. Lift the yeolmu out of the water instead of pouring the sandy water over it. Rinse once more and drain well.
Lay the yeolmu in a wide basin and sprinkle the 1/2 cup coarse sea salt mostly over the thicker stems and roots, not the tender leaves. Rest 25 minutes, turn gently once, then rest 15 minutes more. The stems should bend a little without collapsing. This short salting keeps the kimchi crisp; a long salting makes the greens tired before fermentation even begins.
Whisk 1 tablespoon sweet rice flour with 1 cup water in a small pot. Cook over medium heat, stirring, until it turns lightly glossy and just thick enough to coat a spoon, about 3 to 4 minutes. Cool it completely. Warm paste poured over yeolmu wilts the greens and makes the brine taste cooked.
Rinse the salted yeolmu in two changes of cold water, moving it with open hands. Drain in a colander for 10 minutes. Taste one stem. It should be seasoned but not salty enough to eat as banchan by itself, because the brine will finish the seasoning.
In a large bowl, whisk the cooled rice paste with 7 cups cold filtered water, 2 tablespoons coarse sea salt, 1 tablespoon sugar, and the fish sauce or soup soy sauce if using. Taste it now. It should be a little saltier than soup and only faintly sweet, because the radish will release water as it ferments. Let it taste like itself.
Put the drained yeolmu into a clean 3-liter glass jar or small onggi. Tuck in the pear, onion, garlic, ginger, scallions, chilis, and cucumber if using. Pour the brine over everything until fully covered. Press gently with a clean spoon so no leaves sit above the liquid.
Cover loosely and leave at cool room temperature for 18 to 24 hours, setting the jar on a tray in case the brine rises. When tiny bubbles gather at the edge and the brine tastes lightly sour, close the lid and refrigerate. In a very hot kitchen, check after 12 hours. In a cool kitchen, it may need 36 hours.
Chill at least 6 hours before serving. Ladle the yeolmu and plenty of brine into small bowls, with a few slices of chili and pear in each. Eat it within 2 weeks, while the greens are still crisp and the brine is clean. After that it is still useful for noodles, but it won't have the same bright bite.
1 serving (about 280g)
Culinary guides, cultural storytelling, and the editorial depth that makes cooking meaningful.
Discover Culinary ExplorerChef Jeong-sun
Tender baby napa cabbage in a clear pear-garlic brine, lightly fermented until the broth turns clean and bright, the summer kimchi a beginner can make without a kimjang floor.

Chef Jeong-sun
The kimchi from before chili, salted napa cabbage packed with radish, pear, jujube, and pine nuts in a clear brine that turns quietly tart in the jar.

Chef Jeong-sun
A pale summer cucumber kimchi, split and stuffed with radish and chives, then held in a cool pear brine so the cucumber stays clean, crunchy, and plainly itself.

Chef Jeong-sun
Flat spring bomdong cabbage, lightly brined and tucked into a clear pear-radish kimchi broth, made without chili and eaten young while the leaves still taste like spring.