
Chef Takumi
Abura Soba (油そば, brothless ramen)
Abura soba is ramen without the hiding place of soup: hot noodles, strong shōyu tare, fragrant oil, and the discipline to mix while every strand is still hot.
A cooking platform built around craft, culture, and the stories behind what we eat.
Created by
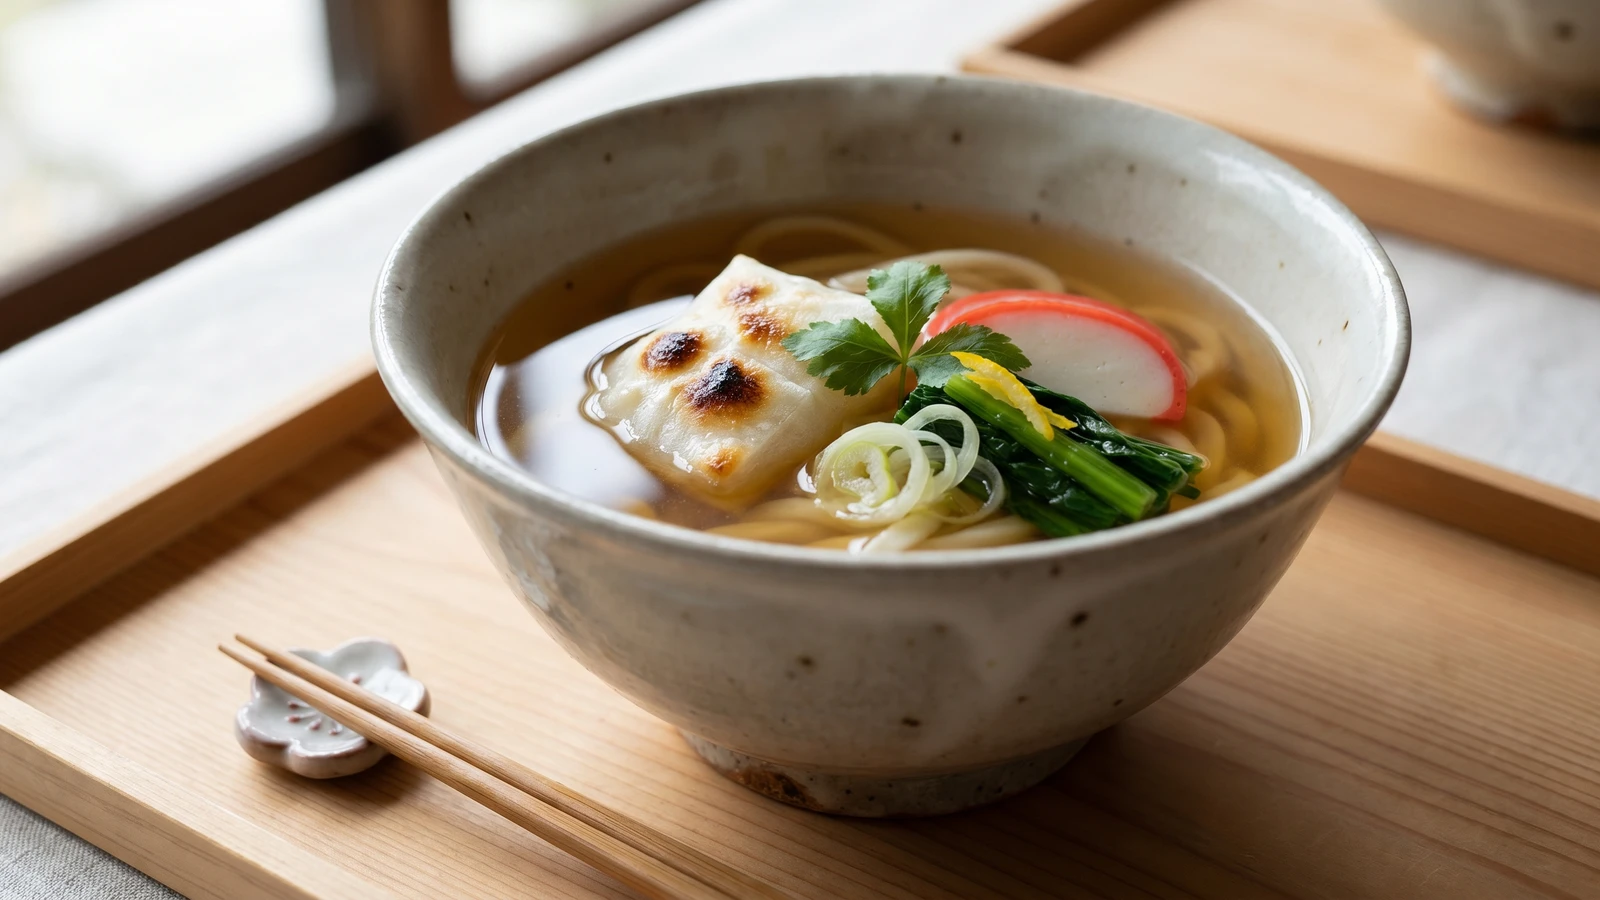
A square of grilled mochi turns a clean bowl of udon into winter food with weight, softening slowly in the dashi while the broth stays clear.
The square of mochi is why this bowl has its name. Chikara means strength, and this is strength in the most literal way: a grilled rice cake resting on udon, going soft at the edges while the center keeps a little chew. It is winter food, and it belongs naturally to the New Year table, when mochi is already in the house and should be treated with respect rather than tossed into anything that will hide it.
The dish is not difficult. It is kake udon, plain noodles in seasoned dashi, with one piece of mochi toasted separately and added at the end. That separate toasting is the detail that decides the bowl. Toast the mochi and it brings a browned rice aroma, a crisp skin, and a slow, pleasant softening in the broth. Boil it in the soup and you get cloudy dashi and a sticky pot, which is a poor bargain unless you enjoy washing pans for spiritual discipline.
Keep the broth clear and modest. Konbu and katsuobushi give you the base, usukuchi shōyu and mirin steady it, and the noodles should taste of wheat instead of salt. We leave the mochi half above the broth so you meet both textures: browned top, yielding underside. Nothing hidden. A winter bowl like this still follows the washoku sense: the method, not the menu, one good stock, one seasonal object, and room enough for each to speak.
Chikara udon belongs to kake udon, hot wheat noodles in seasoned dashi, a form that spread with urban noodle shops in the Edo period. Its name, power udon, points to the mochi, a dense rice cake tied to New Year foods and to kagami-biraki, the January opening of the New Year mirror mochi, commonly observed on January 11 with regional variations. The broth also shows a regional divide: Kansai bowls are often pale with usukuchi shōyu, while Kantō bowls more often run darker and stronger.
Quantity
1 piece (about 10g)
Quantity
5 cups
Quantity
20g
Quantity
2 tablespoons
plus more to taste
Quantity
1 tablespoon
Quantity
1/2 teaspoon
plus more to taste
Quantity
2 portions (about 400g total)
Quantity
2 pieces (about 50g each)
Quantity
1 small handful
blanched, squeezed, and cut into 2-inch lengths
Quantity
2 slices
Quantity
2
thinly sliced
Quantity
2 small sprigs or 2 thin strips
Quantity
for serving
| Ingredient | Quantity |
|---|---|
| konbu (dried kelp) | 1 piece (about 10g) |
| cold water | 5 cups |
| katsuobushi (bonito flakes) | 20g |
| usukuchi shōyu (light soy sauce)plus more to taste | 2 tablespoons |
| mirin | 1 tablespoon |
| sea saltplus more to taste | 1/2 teaspoon |
| frozen or fresh udon | 2 portions (about 400g total) |
| kiri-mochi (cut rice cakes) | 2 pieces (about 50g each) |
| komatsuna or spinachblanched, squeezed, and cut into 2-inch lengths | 1 small handful |
| kamaboko fish cake (optional) | 2 slices |
| scallionsthinly sliced | 2 |
| mitsuba or yuzu peel (optional) | 2 small sprigs or 2 thin strips |
| shichimi tōgarashi (optional) | for serving |
Wipe the konbu with a damp cloth, but don't wash it. The pale powder on the surface is flavor, not dirt. Put the konbu and cold water in a pot and bring it up slowly over low heat, about ten minutes. Pull the konbu out when the water trembles and small bubbles climb the sides, before it reaches a full boil.
Bring the konbu water just to a gentle boil, add the katsuobushi all at once, and take the pot off the heat. Leave it alone for two or three minutes, until the flakes sink. Don't stir. The flakes know their work, which is more than can be said for most spoons.
Strain the dashi through a cloth-lined strainer into a clean pot and let it drip on its own. Don't squeeze the flakes. Squeezing presses out strong, oily flavors and muddies the clean gold stock you have been guarding.
Add the usukuchi shōyu, mirin, and salt to 4 cups of the dashi. Warm it gently and taste. It should be savory and clear, a little stronger than plain soup because the udon will soften it. If it tastes thin, add a spoonful more dashi or a few drops of shōyu before you reach for more salt.
Bring a separate pot of water to a boil and cook the udon until loosened and hot, about one minute for frozen udon or according to the package for fresh noodles. Drain well. Cook the noodles separately because their surface starch would cloud the broth, and this bowl depends on clear dashi.
Toast the kiri-mochi in a Japanese fish grill, on a yakiamī grilling net, or in a toaster oven until puffed, blistered, and lightly browned, 4 to 7 minutes depending on the heat. Watch it closely. Mochi swells in its own time, then suddenly behaves like it owns the room.
Warm two deep bowls with hot water, then empty and dry them. Divide the drained udon between the bowls, ladle the seasoned dashi over the noodles, and set one grilled mochi on each bowl half above the broth. Add the greens, kamaboko if using, scallion, and mitsuba or yuzu. Serve at once, with shichimi tōgarashi on the side.
1 serving (about 850g)
Culinary guides, cultural storytelling, and the editorial depth that makes cooking meaningful.
Discover Culinary ExplorerChef Takumi
Abura soba is ramen without the hiding place of soup: hot noodles, strong shōyu tare, fragrant oil, and the discipline to mix while every strand is still hot.
Chef Takumi
Akadashi asks you to trust the dark miso. Build a clear dashi, loosen the Hatchō mame-miso gently, and the soup turns coffee-dark, savory, and clean.

Chef Takumi
Toast the rice until its skin is firm, then let it meet chicken broth, burdock, maitake, and seri. The pot looks grand, but the work is rice, broth, and patience.
Chef Takumi
Shottsuru nabe is Akita winter in one pot: clean dashi, hatahata at shun, tofu and napa cabbage carrying a salt-deep broth without anything heavy enough to hide the fish.