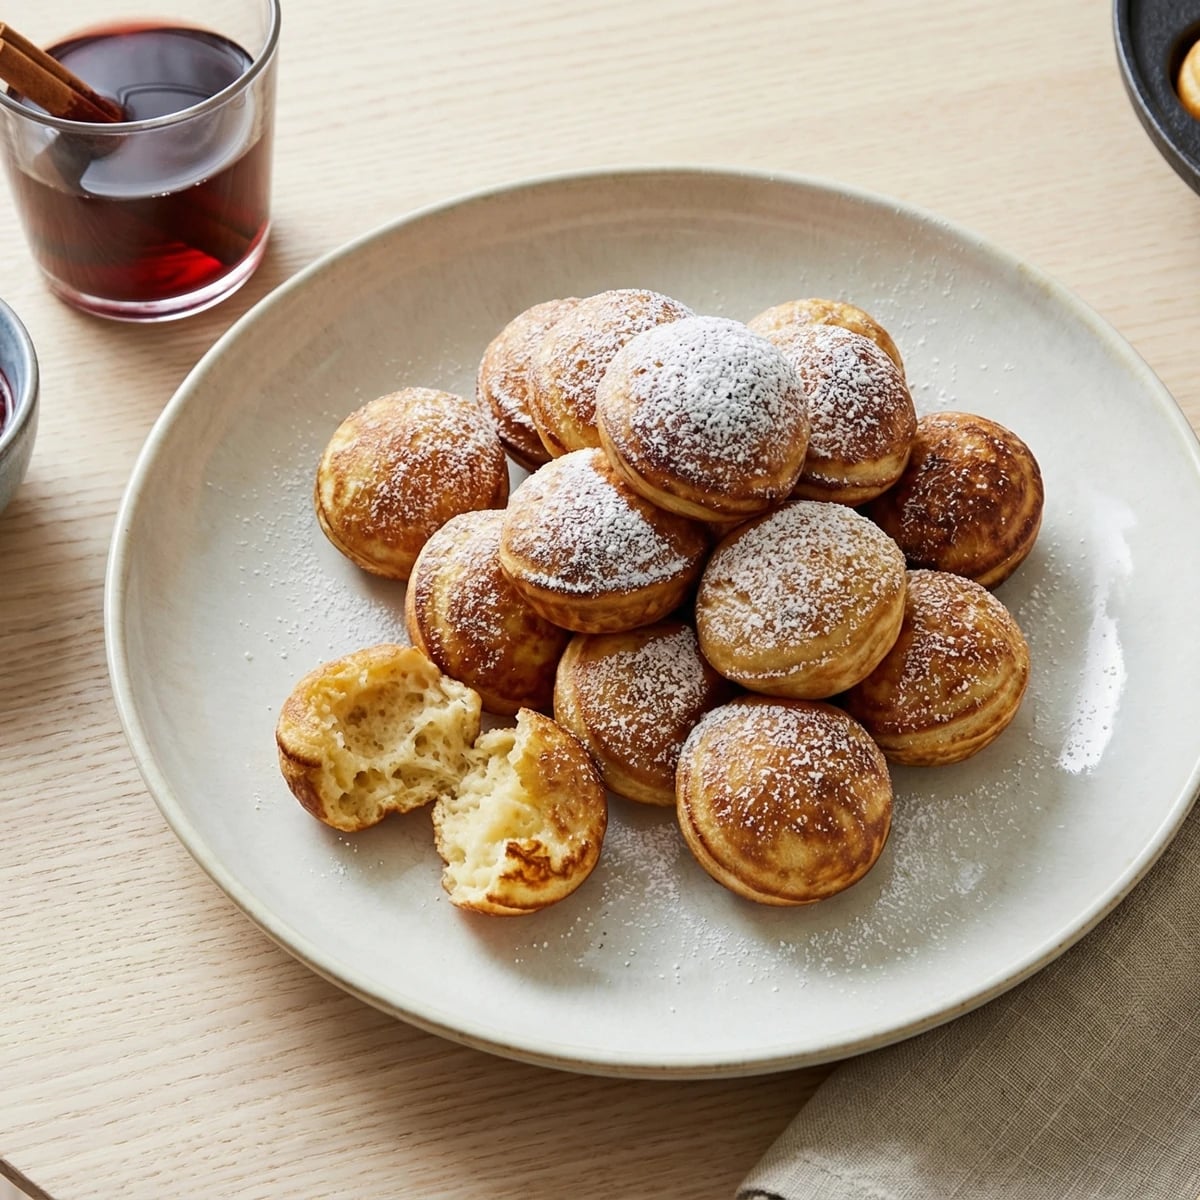
Round Danish pancake balls turned in a cast-iron pan, fluffy inside and golden outside, dusted with powdered sugar and dipped in raspberry jam. The taste of a Danish December.
Breakfast & Brunch
Danish
Christmas
Comfort Food
Special Occasion
20 min
Active Time
25 min cook•45 min total
YieldAbout 24 aebleskiver (4 servings)
December in Denmark smells like cardamom, butter, and cloves. The Christmas markets open in late November, the advent candles come out, and somewhere between the first and second Sunday of advent, aebleskiver start appearing. Not in bakeries. At home. On kitchen tables. In the hands of children standing too close to the stove, watching the pan.
The pan is the whole secret. A heavy cast-iron round with seven hemispherical wells, passed down through families or bought once and kept forever. You pour batter into the wells, let the bottoms set, and then turn, a quarter at a time, using a knitting needle or a thin wooden skewer. Each turn lets the uncooked batter flow down into the well, and by the fourth or fifth turn you have a perfect golden sphere. It sounds complicated. It isn't. It's a rhythm you pick up within the first batch, and I'll walk you through every turn so the second batch feels like something you've always known how to do.
What matters most is the air. Whipped egg whites folded into the batter are what give aebleskiver their cloud-soft centers. Skip them and you get heavy pancake balls. Include them and you get the real thing. Served warm with a generous dust of powdered sugar and a bowl of raspberry jam, eaten with your fingers while gløgg warms on the stove, this is the taste of the Danish Christmas month. The joy of waiting, finally arriving on a plate.
Aebleskiver appear in Danish cookbooks from the early 1700s, and the cast-iron pan with its distinctive hemispherical wells has been produced in Denmark continuously since at least that period. The name translates literally as apple slices, a reference to the original filling of thin apple pieces pressed into the batter, though most modern Danish households serve them plain and let the jam do the work at the table. Popular legend insists the pans originated as dented Viking shields used over open fires, a story food historians have politely dismantled for years, though it refuses to disappear because Danes like it too much to let it go.
The technique, the tradition, and the story behind every dish.
•Wooden skewer or thin knitting needle for turning
•Two mixing bowls
•Whisk or hand mixer for the egg whites
•Rubber spatula for folding
Instructions
1
Mix the dry ingredients
Sift the flour, baking powder, cardamom, sugar, and salt into a large bowl. Stir in the lemon zest. The cardamom is what makes these taste Danish rather than generic. Don't reduce it. You want it to sing quietly through the batter, and it will.
If you can grind whole cardamom pods fresh, do it. The flavor is twice as alive as pre-ground, and it's the one shortcut I'd ask you not to take.
2
Combine the wet ingredients
In a second bowl, whisk the egg yolks with the buttermilk and the cooled melted butter. The butter must be cooled, not warm. Warm butter shocks the yolks and the batter goes grainy. Pour the wet mixture into the dry and whisk just until combined. A few small lumps are fine. Overworking the batter builds gluten, and gluten gives you chewy aebleskiver instead of fluffy ones.
3
Whip the egg whites
In a clean bowl, whisk the egg whites to soft peaks. Not stiff, soft. Soft peaks fold into the batter without fighting it. Stiff peaks leave streaks of white that never fully disappear. Fold the whites into the batter in two additions, gently, with a large spoon or spatula. You're trying to keep the air in. That air is what makes the centers tender.
The whipped whites are the whole secret to the texture. Without them, aebleskiver are just thick pancakes in strange shapes. With them, the centers go cloud-soft.
4
Heat the pan
Set the aebleskiver pan over medium heat and let it warm through for a couple of minutes. The pan is the whole secret to this dish, and it needs proper heat before you start. Drop a small piece of butter into each well and let it foam. When the foam subsides and the butter smells faintly of hazelnuts, you're ready. Too cool and the batter sticks. Too hot and the outsides burn before the insides cook.
5
Fill the wells
Spoon the batter into each well until they are filled almost to the top, about three-quarters full. The batter will rise as it cooks. Work quickly so all the wells are filled within half a minute. You want them cooking at the same rate.
6
The first turn
Let the aebleskiver cook undisturbed for about a minute and a half. The edges will set and turn golden while the tops stay wet and jiggly. This is the moment. Take a wooden skewer or a thin knitting needle and slide it down the inside edge of each well, lifting the set crust and rotating the half-cooked ball a quarter turn so the raw batter flows down into the well. Don't try to turn them all the way. A quarter turn is right.
A knitting needle is the traditional tool and still the best one. A wooden skewer works. A fork does not. The tines tear the crust.
7
Keep turning
Give them another minute, then turn again, another quarter. The uncooked batter that flowed down is now setting, and each turn closes the sphere a little more. Keep turning every minute or so. By the fourth or fifth turn, the aebleskiver will be perfect golden balls, crisp outside and hollow-sounding when tapped. The first batch always teaches you the rhythm. The second batch is when you feel like you've got it.
8
Test and finish
Lift one out and insert the skewer into the centre. It should come out clean. If there's wet batter clinging to it, give them another thirty seconds. Transfer the finished aebleskiver to a warm plate and carry on with the next batch, adding a little more butter to the wells each time.
9
Serve warm
Dust the aebleskiver generously with powdered sugar and serve immediately, warm from the pan, with a bowl of raspberry jam alongside for dipping. They are meant to be eaten with your fingers, one after another, while someone pours gløgg into small glasses and the room smells of cardamom and butter. Tak for mad.
Chef Tips
•The aebleskiver pan is not optional. You cannot make these in a regular frying pan or a muffin tin. If you don't own one yet and you want to learn this dish, buy a cast-iron Danish pan. It will last the rest of your life and your children's lives.
•Season a new pan before its first use: rub it with a little oil and heat it gently for ten minutes. A well-seasoned pan releases the aebleskiver cleanly. A dry pan will fight you.
•Serve aebleskiver with gløgg in December and with strong coffee the rest of the year. Either way, warm them the same day. They don't keep, and reheating never quite brings back the texture.
•Some families fill each well with a small piece of apple or a spoonful of jam before topping with batter. It's a lovely variation, but start with plain ones first. Learn the turn before you add complications.
Advance Preparation
•The batter can be mixed up to four hours ahead and kept in the fridge. Whisk it gently before using to re-incorporate any separation, and add the whipped egg whites at the last moment, not in advance. Whites folded in early deflate and lose their purpose.
•Cooked aebleskiver can be kept warm in a low oven, 90C, while you finish the remaining batches. Pile them loosely on a baking sheet lined with a clean cloth so they don't steam and go soft.
Frequently Asked Questions
Nutrition Information
1 serving (about 355g)
Calories
575 calories
Total Fat
20 g
Saturated Fat
11 g
Trans Fat
0 g
Unsaturated Fat
8 g
Cholesterol
190 mg
Sodium
430 mg
Total Carbohydrates
83 g
Dietary Fiber
2 g
Sugars
29 g
Protein
15 g
Where cooking meets culture.
Culinary guides, cultural storytelling, and the editorial depth that makes cooking meaningful.