
Chef Jeong-sun
Agwi-jjim (Braised Monkfish with Bean Sprouts)
Firm monkfish buried under crisp soybean sprouts, minari, and a red gochugaru sauce thickened at the end; Masan's market dish asks for heat, timing, and a steady hand.
A cooking platform built around craft, culture, and the stories behind what we eat.

Created by
A small whole chicken, butterflied for a home pot, salted with restraint and fried in a thin flour-starch coat until the skin goes crisp like the Suwon market birds remembered by hand.
At the Suwon market of my childhood, tongdak was not a bucket of pieces. It was a small bird, opened enough to cook through, lowered into a black cauldron, then carried home while rice was already waiting. My mother bought it when the day had been too long for stew, and still the table filled with kimchi, pickled radish, and rice. That is comfort food too.
The misunderstanding is that Korean fried chicken began with gloss and sauce. Sauce has its place, but yennal-tongdak lives by plainer rules: a small chicken, salt that reaches the bone, a coat so thin you can still see the shape of the skin, and oil held steady. If the bird is too large, the crust browns before the thigh is safe. If the coating is thick, it becomes a shell with chicken hiding inside.
For a home kitchen I open the bird flat. The market cauldron was wide and deep; your pot is probably not. 시대가 바뀌면 음식도 바뀌어야 해요. When times change, food must change too. We can change the vessel and the cut, but not the seasoning time, the dry surface, or the oil temperature. Tonight asks for attention, a thermometer, and no crowd around the stove.
Yennal-tongdak, literally old-days whole chicken, belongs to the market style of Korean fried chicken that spread as broiler chickens and cooking oil became more available in the 1960s and 1970s. Suwon's Tongdak Street near Paldalmun Market became known for this cauldron-fried whole-bird style, with long-running shops dating to the 1970s and early 1980s. The later sauced yangnyeom chicken, popularized in the early 1980s by brands such as Pelicana, did not replace it; it made the older style easier to name.
Quantity
1, 800g to 1kg
giblets removed
Quantity
1 1/2 teaspoons, about 9g
for seasoning the chicken
Quantity
1/2 teaspoon
Quantity
1 tablespoon
Quantity
2 cloves
grated
Quantity
1/2 teaspoon
grated
Quantity
1/2 cup, about 65g
Quantity
1/3 cup, about 45g
Quantity
1 teaspoon
Quantity
1/2 teaspoon
for the coating
Quantity
1/4 teaspoon
Quantity
1 large
Quantity
2 tablespoons
Quantity
10 to 12 cups
canola, grapeseed, or soybean oil
Quantity
1 cup
Quantity
1 teaspoon salt mixed with 1/2 teaspoon black pepper
| Ingredient | Quantity |
|---|---|
| small whole chickengiblets removed | 1, 800g to 1kg |
| fine sea saltfor seasoning the chicken | 1 1/2 teaspoons, about 9g |
| freshly ground black pepper | 1/2 teaspoon |
| soju or dry rice wine | 1 tablespoon |
| garlicgrated | 2 cloves |
| fresh gingergrated | 1/2 teaspoon |
| all-purpose flour | 1/2 cup, about 65g |
| potato starch or cornstarch | 1/3 cup, about 45g |
| baking powder | 1 teaspoon |
| fine sea saltfor the coating | 1/2 teaspoon |
| ground white pepper or black pepper | 1/4 teaspoon |
| egg white | 1 large |
| cold water | 2 tablespoons |
| neutral frying oilcanola, grapeseed, or soybean oil | 10 to 12 cups |
| chikin-mu (Korean pickled radish) (optional) | 1 cup |
| salt and black pepper dip (optional) | 1 teaspoon salt mixed with 1/2 teaspoon black pepper |
Pat the chicken dry inside and out. Use kitchen shears to cut along both sides of the backbone and remove it, then turn the chicken breast-side up and press firmly on the breastbone until it lies flat. Cut two shallow slashes into each thigh, down to but not through the bone. This keeps the bird whole for the table but lets the heat reach the thick meat safely.
Mix the 1 1/2 teaspoons salt, black pepper, soju, grated garlic, and ginger. Rub it over the chicken, including the thigh slashes and the underside. Set the chicken on a rack, skin-side up, and rest it uncovered for 1 hour in the refrigerator. The salt is measured at about 1 percent of the bird's weight, enough to season to the bone without making a salty crust.
Stir together the flour, potato starch, baking powder, 1/2 teaspoon salt, and white pepper. In a separate small bowl, whisk the egg white with 2 tablespoons cold water until loose. The starch keeps the coat crisp, the flour gives color, and the egg white helps a thin layer cling without turning into heavy batter.
Wipe any wet garlic pieces from the chicken surface so they do not burn. Brush the chicken lightly with the egg-white mixture, then dust it all over with the flour-starch mixture. Shake off more than you think you should. Let it sit 10 minutes until the dry patches look slightly damp, then dust only the bare spots again. You are making a thin coat, not armor.
Pour 10 to 12 cups oil into a heavy 6 to 7 quart pot or deep wok, leaving the pot no more than half full. Heat to 165 C or 330 F and set a wire rack over a tray beside the stove. The thermometer matters here. Oil that is too cool makes the crust greasy; oil that is too hot browns the outside before the thigh is cooked.
Lower the chicken into the oil slowly, skin-side down and away from you. Fry 12 to 14 minutes, turning every 3 to 4 minutes and keeping the oil between 155 C and 165 C, or 310 F and 330 F. The chicken should be pale golden, with the coating set and the thickest thigh near 68 C or 155 F. If the oil climbs too high, lower the heat before the crust gets ahead of the meat.
Lift the chicken to the rack and rest it 8 to 10 minutes. This pause is not laziness. The juices settle, the coating dries, and the second fry can crisp the surface instead of driving moisture out all at once. Bring the oil up to 185 C or 365 F while the chicken rests.
Return the chicken to the hotter oil and fry 3 to 5 minutes, turning once, until the crust is deep golden and crisp. Check the thickest part of the thigh and breast with an instant-read thermometer; both must reach 74 C or 165 F. If the color is ready before the temperature is, move the chicken to a 180 C or 350 F oven for a few minutes rather than burning the crust.
Drain on the rack for 3 minutes, then cut the chicken into 6 to 8 pieces with kitchen scissors at the table or just before serving. Serve with chikin-mu and a small dish of salt mixed with black pepper. Sauce can sit on the side if the table insists, but once you lacquer the whole bird, it is no longer this dish.
1 serving (about 400g)
Culinary guides, cultural storytelling, and the editorial depth that makes cooking meaningful.
Discover Culinary ExplorerChef Jeong-sun
Firm monkfish buried under crisp soybean sprouts, minari, and a red gochugaru sauce thickened at the end; Masan's market dish asks for heat, timing, and a steady hand.

Chef Jeong-sun
A quick Korean rice bowl built on contrast: warm rice, cold popping flying-fish roe, chopped vegetables, gim, sesame oil, and the crisp rice bottom a hot stone bowl gives you.
Chef Jeong-sun
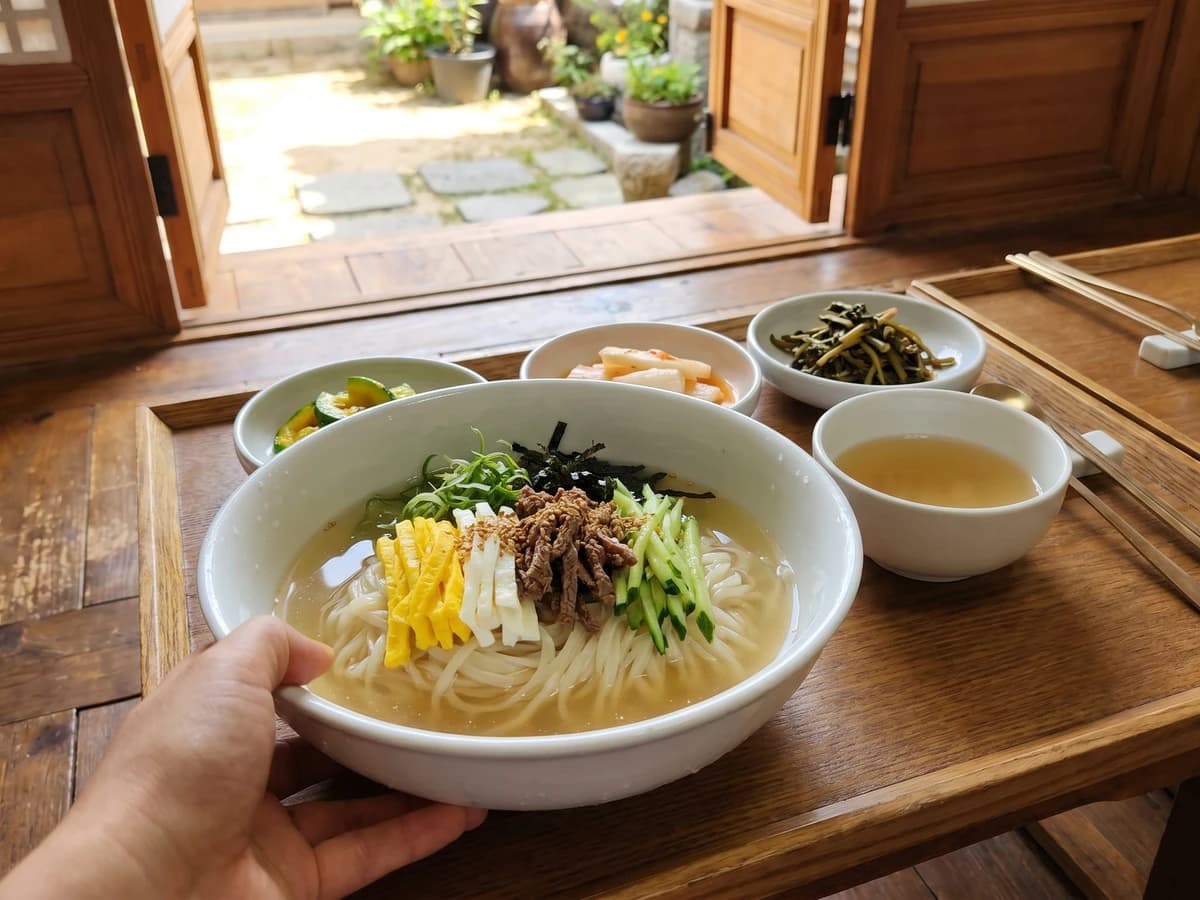
Andong's guest noodles, wheat and roasted soybean flour rolled thin, boiled and rinsed cold, then set in a clear chilled anchovy broth with careful strips of beef, egg, and cucumber.

Chef Jeong-sun
Andong's ritual-table rice served on an ordinary day: separate soy-sesame namul, warm rice, and clear radish soup, mixed without gochujang so every vegetable keeps its own voice.