Culinary Explorer

A cooking platform built around craft, culture, and the stories behind what we eat.
Discover Culinary Explorer
Raisin Butter Rolls (レーズンバターロール, Rēzun Batā Rōru)

Raisin Butter Rolls (レーズンバターロール, Rēzun Batā Rōru)

Created by

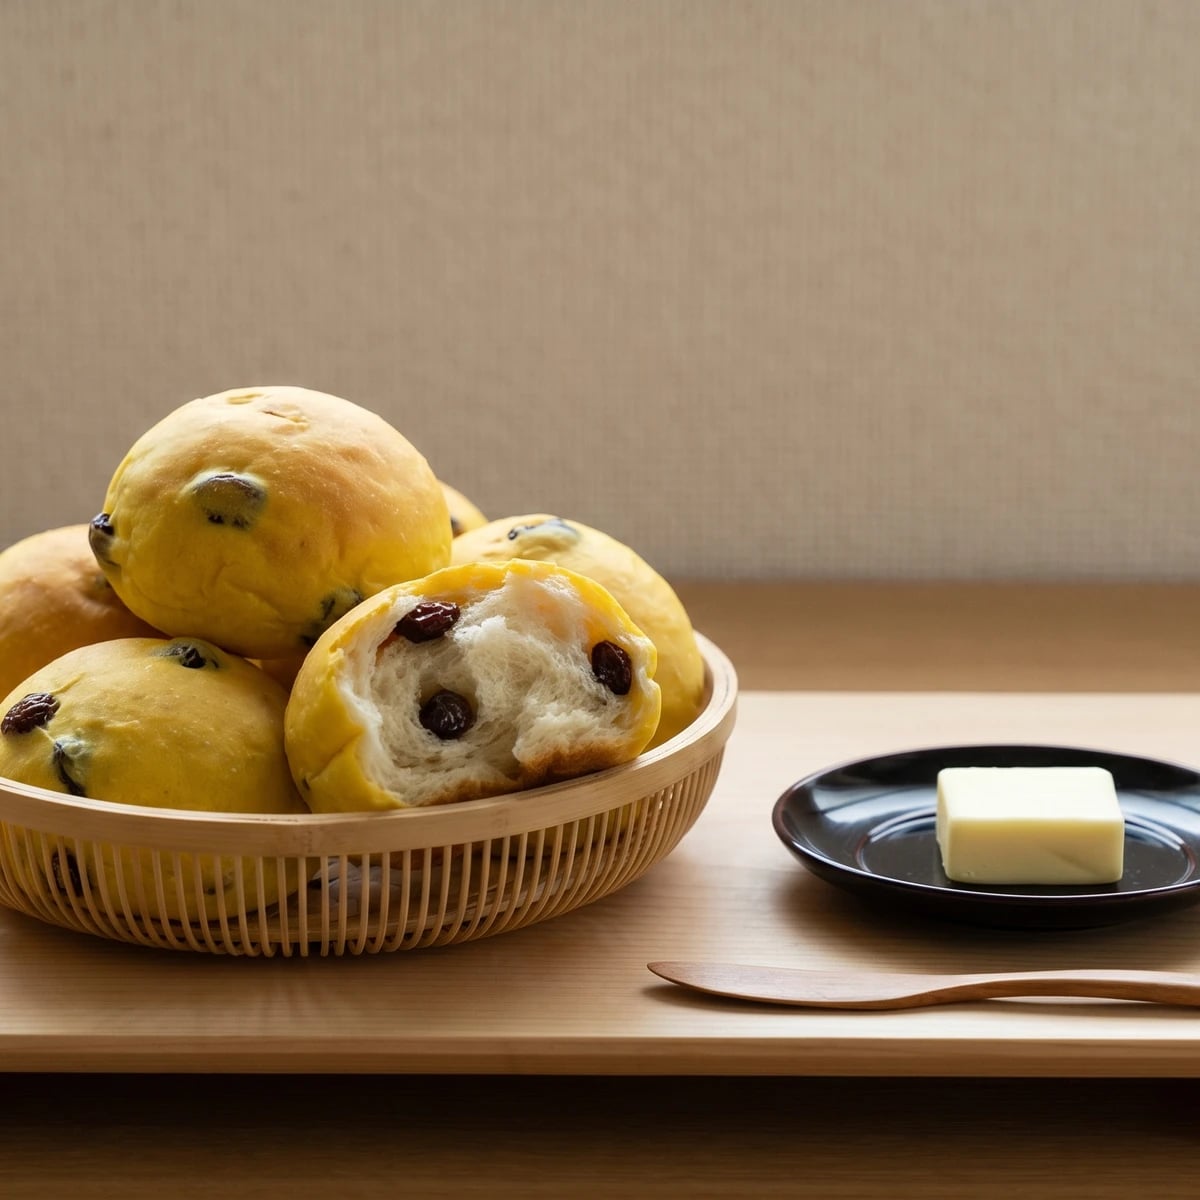
At the panya counter these are the quiet rolls in the corner: buttery, lightly sweet, raisin-studded, and soft because the fruit is soaked before it can steal water from the crumb.

Breads
Japanese
Weeknight
Picnic
1 hr 45 min
Active Time
15 min cook2 hr total
Yield10 rolls

Raisins are small thieves in bread. Put them into dough dry and they drink from the crumb just when the crumb is trying to open. So we soak them first, then dry the outside, and the roll stays soft instead of tightening around the fruit.

At a Japanese panya, レーズンバターロール sit beside the plain butter rolls, the same tender crescent shape with dark fruit folded through. They look like small bakery work. They are not difficult, only a little particular: mix a ストレート (straight) dough, add the butter after the flour has taken the liquid, and let the dough rise until puffy rather than huge.

The one detail is tension. Roll each piece from a tapered sheet with the raisins tucked inside and the tip pinned underneath. That little pull across the surface gives the roll its lift and its egg-gold shine; without it, you have sweet bread, perfectly pleasant, but not the panya counter version we came for. Serve three or five, leave them room, and let the torn crumb tell you whether you treated the dough kindly.

The word pan entered Japanese from Portuguese pão in the sixteenth century, but batā rōru belongs to the modern panya, not the older rice-centered table. Soft enriched breads spread widely in the twentieth century, and postwar kyūshoku (school lunches) made bread and milk part of ordinary Japanese eating rather than occasional imported fare. Bakery method now distinguishes ストレート (straight), the same-day dough used here, from 湯種 (yudane), the scalded-flour starter studied by Japan's National Agriculture and Food Research Organization because pre-gelatinized starch helps shokupan hold moisture for days.

The technique, the tradition, and the story behind every dish.

Discover Culinary Explorer

Ingredients

raisins

Quantity

90g

warm water

Quantity

120g

for soaking the raisins

bread flour

Quantity

300g

plus a little for shaping

sugar

Quantity

30g

skim milk powder

Quantity

10g

instant yeast

Quantity

6g

fine sea salt

Quantity

5g

whole milk

Quantity

150g

warmed to 30 to 35 C

large egg

Quantity

1, about 50g

lightly beaten

unsalted butter

Quantity

45g

softened, for the dough

egg yolk

Quantity

1

mixed with 1 teaspoon whole milk for egg wash

unsalted butter

Quantity

10g

melted, for finishing

Equipment Needed

  • Kitchen scale
  • Bench scraper
  • Menbō (rolling pin), or any small rolling pin
  • Baking sheet lined with parchment
  • Pastry brush

Instructions

  1. 1

    Soak the raisins

    Put the raisins in a small bowl and cover them with the warm water for 10 minutes. Drain them well, then pat them dry on a towel until their skins feel plump but not wet. Dry raisins steal water from the dough as it bakes; soaked raisins give it back. The drying matters too, because wet fruit slides through dough instead of settling into it.

    Soaking is not kindness to the raisins. It is kindness to the crumb.
  2. 2

    Mix the dough

    In a large bowl, whisk together the bread flour, sugar, milk powder, instant yeast, and salt. Add the warm milk and beaten egg, then mix until no dry flour remains and the dough looks shaggy. This is ストレート (straight), the same-day method: one dough, no starter, no long rest. The milk should feel barely warm, not hot, because yeast is lively but not heroic.

  3. 3

    Knead in butter

    Knead the dough for 5 minutes by hand, or 3 minutes on low speed in a mixer, until it begins to smooth out. Add the softened butter in three or four pieces and keep kneading until the dough turns glossy, elastic, and just a little tacky, about 7 minutes by hand or 4 minutes in a mixer. Butter goes in after the flour has taken the liquid because butter coats flour; add it too early and the dough struggles to build strength.

    The dough may smear when the butter first goes in. Keep going. It comes back together when the gluten catches it.
  4. 4

    Fold in raisins

    Scatter the drained raisins over the dough and fold them in by hand for the last minute of kneading. Work gently until the fruit is evenly dotted through, with most raisins tucked under the surface. If you add them early, they tear the gluten before the dough has strength; if you beat them hard, they break and stain the crumb.

  5. 5

    Let it rise

    Shape the dough into a round, set it in a lightly buttered bowl, cover it, and let it rise in a warm place for 35 to 45 minutes. It should look puffy and about one and a half times its size, not necessarily doubled. Enriched dough moves more slowly than plain dough. Wait for puffiness, not a number on the clock.

  6. 6

    Divide and rest

    Turn the dough onto a lightly floured surface and divide it into 10 equal pieces, about 78g each. Round each piece into a small ball, cover them, and rest for 10 minutes. This rest relaxes the gluten, so the dough rolls long instead of snapping back like a sulky rubber band.

  7. 7

    Shape the rolls

    Roll each ball into a short cone, then flatten and roll it into a tapered sheet about 18cm long, wider at one end and narrow at the other. Roll from the wide end toward the point, then tuck the point underneath on the baking sheet. That surface tension is the panya shape: it gives the roll lift, keeps the spiral neat, and holds the raisins inside where they won't scorch.

    If the dough fights you, cover it and wait 5 minutes. Rest does what force cannot.
  8. 8

    Proof and glaze

    Set the rolls point-side down on a parchment-lined baking sheet, leaving about 5cm between them. Cover and proof for 25 to 35 minutes, until they look pillowy and a fingertip leaves a dent that slowly rises back. Heat the oven to 190 C / 375 F during the last 20 minutes. Brush lightly with the egg wash; the touch should be gentle, because heavy brushing presses out the air you just waited for.

  9. 9

    Bake and finish

    Bake for 13 to 15 minutes, rotating the pan if one side browns faster, until the rolls are egg-gold on top and lightly browned underneath. If you want a number, the center should read about 90 C / 195 F. Brush the hot rolls with the melted butter, then cool them for at least 10 minutes before tearing one open. The crumb finishes setting as it cools, and patience gives you softness instead of a crushed center.

Chef Tips

  • Use bread flour. Cake flour gives tenderness but not the strength these rolls need, and the shape slumps before it ever reaches the oven.
  • Do not keep adding flour until the dough feels dry and obedient. A slightly tacky enriched dough bakes tender; a stiff one bakes polite little stones, and politeness is not enough here.
  • Yudane is honmono Japanese baking science, especially for shokupan, where scalded flour keeps the loaf moist for days. These rolls use the straight method instead. The soaked raisins and butter give enough tenderness for a same-evening bake.
  • Push exposed raisins back under the dough before proofing. Raisins on the surface darken quickly in the oven, while tucked raisins stay plump and sweet.

Advance Preparation

  • The raisins can be soaked and drained up to 1 day ahead. Keep them covered in the refrigerator and pat them dry before adding them to the dough.
  • The dough can be chilled after the first rise for up to 12 hours. Shape it while still cool, then proof until puffy, usually 45 to 60 minutes.
  • Baked rolls keep 2 days at room temperature, wrapped once fully cool. Freeze for up to 1 month and rewarm gently at 160 C / 325 F for 5 to 6 minutes.

Frequently Asked Questions

Nutrition Information

1 serving (about 70g)

Calories
245 calories
Total Fat
7 g
Saturated Fat
4 g
Trans Fat
0 g
Unsaturated Fat
2 g
Cholesterol
55 mg
Sodium
235 mg
Total Carbohydrates
39 g
Dietary Fiber
1 g
Sugars
9 g
Protein
6 g

Note: Chef personas and recipes are created with AI assistance. Cook with care: follow safe food-handling practices, check doneness with a thermometer when needed, and adapt for allergies and your kitchen.

Where cooking meets culture.

Culinary guides, cultural storytelling, and the editorial depth that makes cooking meaningful.

Discover Culinary Explorer

More from Shokupan & Milk Breads

Browse the full collection