Culinary Explorer

A cooking platform built around craft, culture, and the stories behind what we eat.
Discover Culinary Explorer
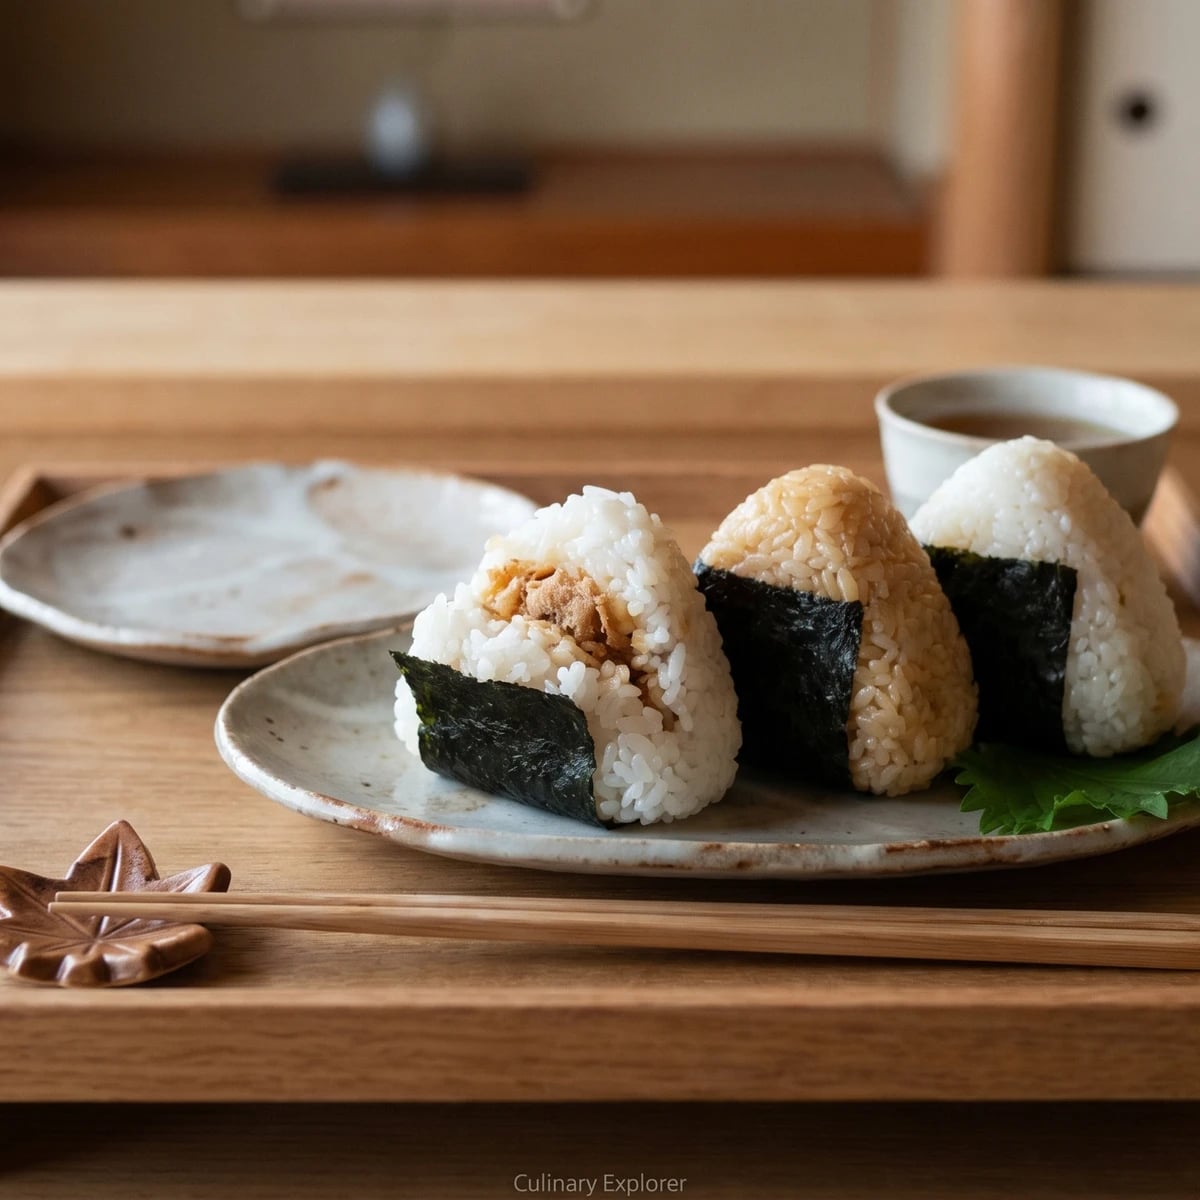
Okaka Onigiri (おかかおにぎり, bonito-soy rice ball)

Okaka Onigiri (おかかおにぎり, bonito-soy rice ball)

Created by

Warm rice, salted hands, and bonito flakes just dampened with soy sauce. Okaka onigiri proves how little a rice ball needs when the filling is honest.

Appetizers & Snacks
Japanese
Quick Meal
Budget Friendly
Picnic
25 min
Active Time
25 min cook1 hr total
Yield4 onigiri

Okaka looks like almost nothing: bonito flakes darkened with soy, tucked at the heart of warm rice. That smallness is the lesson. The flakes that usually give dashi its backbone carry enough flavor for a whole rice ball, if you don't drown them first.

The detail that decides it is moisture. Katsuobushi should be damp and fragrant, not wet. Too much soy seeps through the rice and turns the center sharp; too little leaves the flakes dry and papery. Mix until the flakes cling together in soft tufts, and stop there. This is the whole filling. Very serious people have built ceremonies out of less.

Shape while the rice is warm. Cold rice is stubborn, but warm short-grain rice gathers under the hand and holds with only a little pressure. Wet, salted palms do two jobs at once: they keep the rice from sticking to you and season the outside where the first bite lands. Press gently. The grains should still look like grains.

Okaka onigiri belongs to lunch boxes, train rides, picnics, and the plain hour when rice is ready and you need food now. It is the method, not the menu: rice, salt, soy, bonito, and restraint. Leave it room on the plate, and in your hands.

Onigiri's ancestor is often traced to tonjiki (屯食), oval rice balls served at Heian-period court banquets and also given to attendants as portable food. By the Edo period, rice balls wrapped in sheet nori had become common travel and theater-bento food, helped by the spread of paper-like nori sheets from Edo's Asakusa waters. Okaka filling depends on katsuobushi and soy sauce, two preserved seasonings whose Edo-period refinement made a small center of bonito carry deep flavor into plain rice.

The technique, the tradition, and the story behind every dish.

Discover Culinary Explorer

Ingredients

Japanese short-grain rice

Quantity

2 rice-cooker cups (300g)

water

Quantity

400ml, or to the 2-cup rice-cooker mark

katsuobushi (bonito flakes)

Quantity

10g

Japanese soy sauce (shōyu)

Quantity

2 teaspoons

sea salt

Quantity

about 1 teaspoon

for shaping

yaki-nori (toasted nori) (optional)

Quantity

2 sheets

cut into 4 wide strips

Equipment Needed

  • Rice cooker, or a heavy pot with a tight lid
  • Rice paddle (shamoji), or a broad wooden spoon
  • Small bowl for okaka
  • Bowl of water and small dish of salt for shaping

Instructions

  1. 1

    Wash the rice

    Put the rice in a bowl, cover it with cool water, stir quickly with your hand, and pour the cloudy water away at once. Repeat until the water runs almost clear, then drain the rice for ten minutes. You're washing off loose surface starch, not scrubbing the grain bare. Too much starch on the outside makes the rice gummy instead of glossy.

    Wash it twice, wash it thrice if the water still clouds. Stop when it is nearly clear, not perfectly clear.
  2. 2

    Cook the rice

    Add the drained rice and water to a rice cooker and cook on the plain white-rice setting. For a pot, combine rice and water, soak twenty minutes, cover, bring to a boil, lower the heat, cook fifteen minutes, then rest off the heat ten minutes without lifting the lid. The rest matters because the moisture finishes moving through the grains, giving you rice that holds together without turning heavy.

  3. 3

    Mix the okaka

    Put the katsuobushi in a small bowl and sprinkle the soy sauce over it. Mix with chopsticks until the flakes darken and cling together in soft tufts. They should be damp, not wet. Too much soy leaks into the rice and makes the center harsh; too little leaves dry flakes that taste flat.

    The first secret is restraint. Okaka is bonito carried by soy, not bonito drowned in soy.
  4. 4

    Loosen and cool

    Open the rice cooker or pot and fold the rice gently with a rice paddle, lifting from the bottom and turning it over without mashing. Let it stand uncovered for two or three minutes, just until you can handle it. Warm rice is supple and sticky in the right way; cold rice resists shaping and cracks at the edges.

  5. 5

    Salt your hands

    Set out a bowl of water and a small dish of salt. Wet your palms lightly, shake off the excess, and rub a small pinch of salt across both hands. The water keeps the rice from clinging to you, and the salt seasons the outside of the onigiri, where your tongue meets it first.

    Don't soak your hands between every rice ball. Damp hands help; wet hands make the surface loose.
  6. 6

    Fill and shape

    Scoop about one-quarter of the warm rice into one palm, make a shallow hollow in the center, and tuck in one-quarter of the okaka. Cover the filling with the surrounding rice. Shape it into a triangle by cupping one hand into a roof and pressing with the other, turning the rice ball three times. Press just firmly enough for it to hold. An onigiri is gathered, not clenched.

    If triangles feel fussy, make rounds. The honmono is in the warm rice, salted hands, and centered filling, not in winning a geometry contest.
  7. 7

    Wrap and serve

    Wrap each onigiri with a strip of yaki-nori if using, or serve the nori alongside so it stays crisp. Eat them warm or at room temperature. For a picnic, let the surface cool before wrapping, pack them with a cold pack if they will sit more than a short while, and eat them the same day.

Chef Tips

  • Use Japanese short-grain rice. Long-grain rice may be lovely in its own house, but it won't gather properly here, and you'll fight the dish from the first handful.
  • Open the katsuobushi packet only when you're ready to mix the filling. The aroma is the point, and it fades quickly once the flakes meet the air.
  • Start with less soy than you think. You can add a few more drops, but you can't take them back once the okaka turns wet.
  • For bento or picnic packing, keep the nori separate until eating if you want it crisp. Wrapped early, it softens into the rice, which is also good, just a different pleasure.

Advance Preparation

  • The rice is best cooked just before shaping. If you already have freshly cooked warm rice, the onigiri takes about ten minutes.
  • You can measure the katsuobushi ahead, but mix it with soy sauce just before filling so the flakes stay fragrant.
  • Onigiri is best the day it is made. For a picnic, wrap each rice ball once the surface has cooled, pack with a cold pack for longer holding, and eat within the day.
  • To freeze, wrap plain filled onigiri without nori. Reheat from frozen until warm through, then add nori just before eating.

Frequently Asked Questions

Nutrition Information

1 serving (about 175g)

Calories
280 calories
Total Fat
1 g
Saturated Fat
0 g
Trans Fat
0 g
Unsaturated Fat
1 g
Cholesterol
5 mg
Sodium
740 mg
Total Carbohydrates
59 g
Dietary Fiber
1 g
Sugars
0 g
Protein
7 g

Note: Chef personas and recipes are created with AI assistance. Cook with care: follow safe food-handling practices, check doneness with a thermometer when needed, and adapt for allergies and your kitchen.

Where cooking meets culture.

Culinary guides, cultural storytelling, and the editorial depth that makes cooking meaningful.

Discover Culinary Explorer

More from Onigiri & Rice Snacks

Browse the full collection