
Chef Takumi
Agedashi Tofu (揚げ出し豆腐)
Agedashi tofu looks like a fryer test. It is only drained tofu, potato starch, clean oil, and a hot dashi broth waiting nearby.
A cooking platform built around craft, culture, and the stories behind what we eat.
Created by
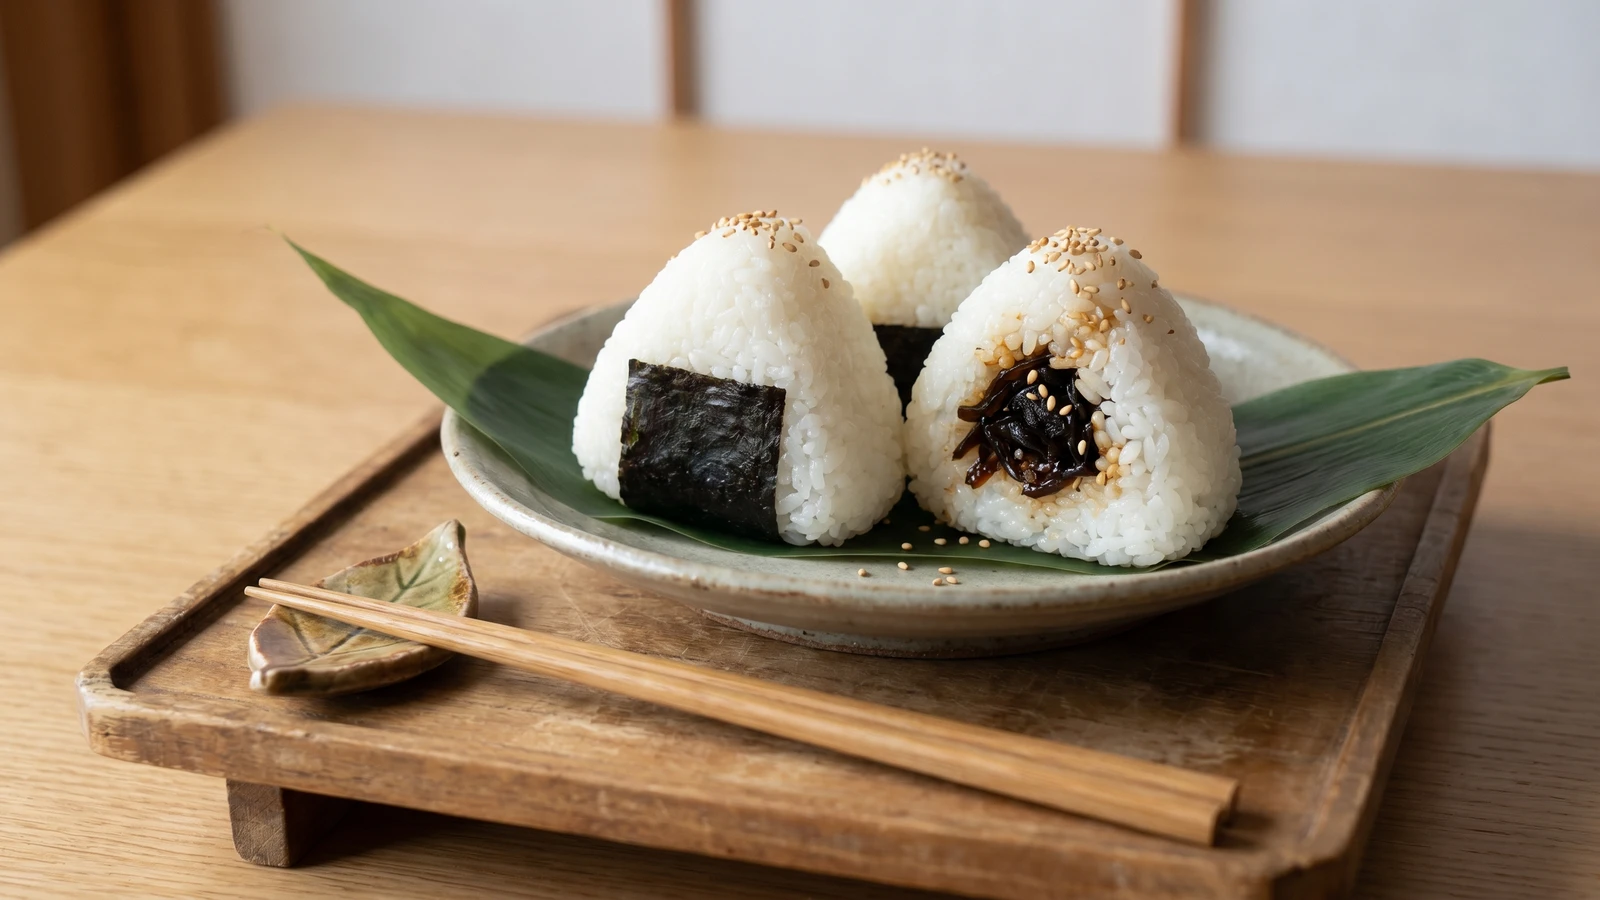
Kombu onigiri is a small lesson in restraint: glossy soy-simmered kelp, warm salted rice, and hands damp enough that the grains gather without being crushed.
Kombu is modest until you cook it twice. First it gives its body to dashi, then it comes back as tsukudani, dark, glossy, and patient enough for a picnic. That is very Japanese, this refusal to waste a good thing.
The one detail that decides kombu onigiri is dryness, though I know dryness sounds like a poor advertisement. The filling must be yielding, not wet. Reduce the soy, mirin, and sugar until the kelp shines and no loose liquid runs into the rice; wet filling makes the grains slump, while a glossy one seasons from the inside and lets the rice stay rice.
Onigiri itself is not difficult, only a little unfamiliar to the hands. Use warm short-grain rice, damp salted palms, and light pressure. You're persuading the grains to hold together, not punishing them into a brick. Tuck the tsukudani in the center, wrap the nori when you eat, and you have a stuffed bite that belongs in a lunch cloth or beside tea: plain, useful, 本物 (honmono, the real thing).
Tsukudani takes its name from Tsukuda-jima, a fishing settlement in Edo where, in the early Tokugawa period, small fish and seaweed were simmered hard with soy so they would keep. Rice balls as portable food are older still; Heian-period records mention tonjiki, balls of rice carried or given out as practical provisions. Filling onigiri with kombu tsukudani joins two habits of the city table: preserving sea vegetables and carrying rice without ceremony.
Quantity
2 rice-cooker cups (about 300g)
rinsed and soaked
Quantity
400ml, or to the 2-cup line of a rice cooker
Quantity
20g
wiped, then softened in dashi
Quantity
3 cups
Quantity
8g
for standard dashi
Quantity
1
use instead of katsuobushi for a meatless dashi
Quantity
3 tablespoons
Quantity
2 tablespoons
Quantity
1 tablespoon
Quantity
1 tablespoon
Quantity
1 teaspoon
Quantity
2 teaspoons
Quantity
1 1/2 teaspoons
for salting your hands
Quantity
2
cut into 6 wide strips
| Ingredient | Quantity |
|---|---|
| Japanese short-grain ricerinsed and soaked | 2 rice-cooker cups (about 300g) |
| cold water for rice | 400ml, or to the 2-cup line of a rice cooker |
| kombu (dried kelp)wiped, then softened in dashi | 20g |
| cold water for dashi | 3 cups |
| katsuobushi (bonito flakes)for standard dashi | 8g |
| dried shiitake (optional)use instead of katsuobushi for a meatless dashi | 1 |
| koikuchi shōyu (standard Japanese soy sauce) | 3 tablespoons |
| mirin | 2 tablespoons |
| sake | 1 tablespoon |
| sugar | 1 tablespoon |
| rice vinegar | 1 teaspoon |
| toasted white sesame seeds (optional) | 2 teaspoons |
| fine sea saltfor salting your hands | 1 1/2 teaspoons |
| nori sheets (optional)cut into 6 wide strips | 2 |
Put the rice in a bowl, cover with cold water, stir with your fingers, and pour the cloudy water away. Repeat until the water is almost clear, then soak the rice for 20 minutes and drain it for 10. Washing removes loose surface starch so the grains cling cleanly instead of turning pasty, and soaking lets the center cook through without making the outside too soft.
Wipe the kombu with a damp cloth, but don't wash it. Put it in 3 cups cold water and bring it up slowly over low heat. Pull the kombu just before the water boils, when small bubbles climb the sides and the surface begins to tremble. Boil it and the liquid turns a little slick and bitter, and the kelp loses the clean flavor you want in the filling.
Bring the water to a gentle boil, add the katsuobushi all at once, take the pot off the heat, and leave it alone for 2 to 3 minutes. The flakes will sink as they give up their flavor. Strain through a cloth and let it drip without pressing. Reserve the softened kombu and 1/2 cup of the dashi for the tsukudani; save the rest for soup.
Let the kombu cool enough to handle, pat it dry, stack it neatly, and slice it into thin strips about 3cm long. This cut is not ornament. Thin strips let the seasoning reach the kelp and make the filling tender between the teeth instead of rubbery.
Put the sliced kombu, reserved 1/2 cup dashi, shōyu, mirin, sake, sugar, and rice vinegar in a small wide pan. Bring to a quiet simmer, cover with a wooden drop-lid (otoshibuta) or a circle of parchment, and cook for 20 to 25 minutes. Remove the lid and reduce until the liquid is gone except for a glossy coat on the kelp. Stir in the sesame seeds if using, then cool completely.
Cook the soaked, drained rice with 400ml cold water in a heavy lidded pot, or use the 2-cup line of a rice cooker. For a pot, bring it to a boil, cover tightly, lower the heat, cook 12 minutes, then rest off the heat for 10 minutes before opening. Resting lets the moisture settle evenly, which gives you rice that shapes without smearing.
Turn the rice gently with a rice paddle and let it cool only until your hands can bear it. Set out a bowl of water and the salt. Wet your palms, rub on a pinch of salt, and keep the remaining rice covered. Warm rice is pliable; cold rice cracks and resists you. The salt seasons the outside and helps the onigiri keep for the lunch cloth.
Scoop about 1/2 cup warm rice into one damp salted palm. Make a shallow hollow, add 1 heaping teaspoon of kombu tsukudani, cover with a little more rice, and press lightly into a triangle or round ball. Use enough pressure that it holds, then stop. Too much turns a rice ball into a rice brick, and we have enough bricks in the world.
Wrap each onigiri with a strip of nori just before eating, or pack the nori separately for a picnic. If making ahead, let the onigiri cool on a plate until the surface no longer feels damp, then wrap each one individually and keep cool. Eat them the same day. The filling is sturdy, but cooked rice still asks for respect.
1 serving (about 150g)
Culinary guides, cultural storytelling, and the editorial depth that makes cooking meaningful.
Discover Culinary ExplorerChef Takumi
Agedashi tofu looks like a fryer test. It is only drained tofu, potato starch, clean oil, and a hot dashi broth waiting nearby.

Chef Takumi
Aspara-bacon is late-spring asparagus treated with common sense: thin bacon, hot grill, and a last brush of shōyu and mirin so the spear stays sweet while the wrap crisps.

Chef Takumi
This is Osaka street food at its plainest and best: good beef cut small, a thin batter, fine panko, hot beef tallow, and one clean dip in sauce.

Chef Takumi
Buta-bara is not a trick of the grill. Good pork belly, even cutting, steady heat, and the patience to let the fat turn glossy do most of the work.