
Chef Margarida
Areias de Cascais
The sand cookies of Cascais, where three simple ingredients become something that melts on your tongue and sparkles like the beach at sunset. Butter, flour, sugar. That's all. That's enough.
A cooking platform built around craft, culture, and the stories behind what we eat.
Created by
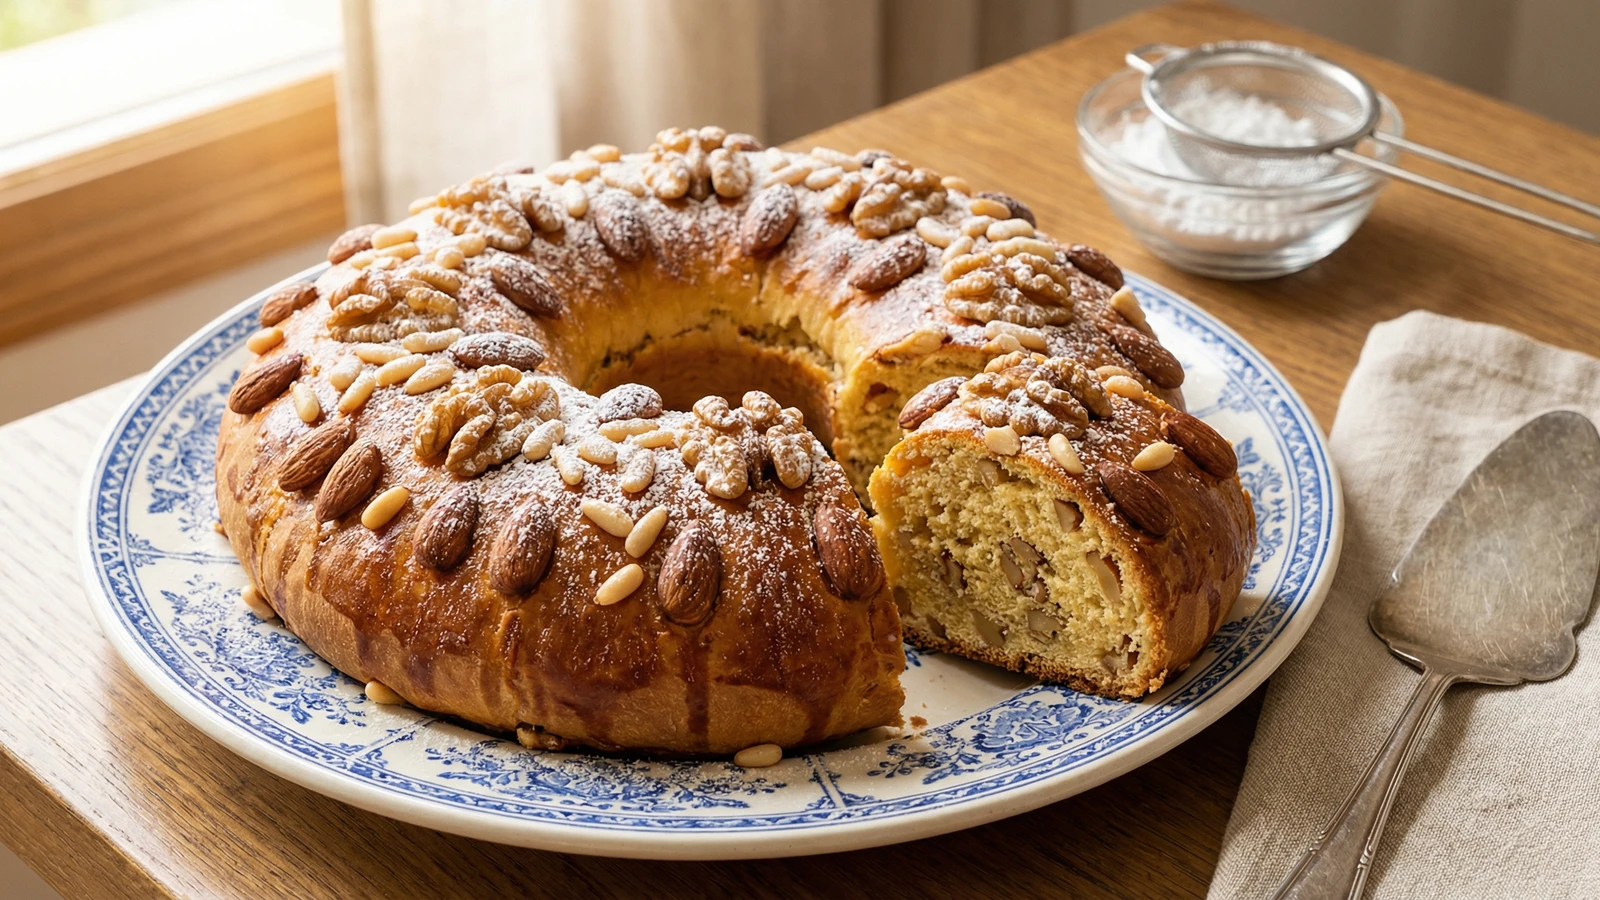
The queen to Bolo Rei's king, born for those who wanted their Christmas crown filled with toasted nuts instead of jewel-colored fruit. Same festive tradition, different treasure within.
Every Portuguese Christmas table has room for both royalty. Bolo Rei sits in his candied fruit glory, but beside him sits the queen, Bolo Rainha, crowned with toasted nuts for those of us who always picked around the crystallized fruit anyway.
Avó Leonor made both every December. The Rei for my grandfather, who loved those sticky bits of citron and cherry. The Rainha for me. I'd sit at her kitchen table, watching her knead the golden dough enriched with butter and eggs, perfumed with port wine and orange zest. The smell of Christmas isn't pine trees to me. It's this dough rising under a cloth, filling the kitchen with warmth.
The technique is the same for both cakes: a rich, brioche-like dough that needs time and patience. You build it slowly, adding butter bit by bit until it becomes silky. Then you fold in the treasure. For Bolo Rei, it's candied fruits. For Bolo Rainha, it's a generous handful of toasted almonds, walnuts, and pine nuts. Same crown shape, dusted with powdered sugar like snow, cut at the table while everyone argues about who gets the biggest slice.
This isn't a quick bake. Plan for it. The dough needs time to rise, the nuts need proper toasting. But Christmas isn't meant to be rushed. As avós sabem. Start this the day before, let the dough rest overnight in the cold, and bake it Christmas morning when the house is still quiet. That's how Avó Leonor did it. That's how I still do it.
Bolo Rainha emerged in the mid-20th century as an alternative to the traditional Bolo Rei for Portuguese who preferred nuts over candied fruit. Both descend from the French galette des rois, which arrived in Portugal during the medieval period through royal connections. The ring shape symbolizes the crown of the Magi, and traditionally both cakes are eaten from Christmas through Dia de Reis (Epiphany) on January 6th.
Quantity
500g
plus more for dusting
Quantity
100g
Quantity
7g
Quantity
1 teaspoon
Quantity
1 teaspoon
Quantity
from 1 orange
Quantity
from 1 lemon
Quantity
4 large
room temperature
Quantity
1 large
room temperature
Quantity
60ml
lukewarm
Quantity
60ml
Quantity
150g
softened, cut into pieces
Quantity
100g
toasted and roughly chopped
Quantity
75g
toasted and roughly chopped
Quantity
50g
lightly toasted
Quantity
1
mixed with 1 tablespoon milk for egg wash
Quantity
for topping
Quantity
for topping
Quantity
for topping
Quantity
for dusting
| Ingredient | Quantity |
|---|---|
| all-purpose flourplus more for dusting | 500g |
| granulated sugar | 100g |
| instant yeast | 7g |
| fine sea salt | 1 teaspoon |
| ground cinnamon | 1 teaspoon |
| orange zest | from 1 orange |
| lemon zest | from 1 lemon |
| egg yolksroom temperature | 4 large |
| whole eggroom temperature | 1 large |
| whole milklukewarm | 60ml |
| port wine | 60ml |
| unsalted buttersoftened, cut into pieces | 150g |
| almondstoasted and roughly chopped | 100g |
| walnut halvestoasted and roughly chopped | 75g |
| pine nutslightly toasted | 50g |
| egg yolkmixed with 1 tablespoon milk for egg wash | 1 |
| whole almonds | for topping |
| walnut halves | for topping |
| pine nuts | for topping |
| powdered sugar | for dusting |
Spread the almonds and walnuts on a baking sheet and toast at 160°C (320°F) for 10 to 12 minutes, stirring halfway, until fragrant and golden. Toast the pine nuts separately as they burn quickly, just 3 to 4 minutes. Let cool completely, then roughly chop the almonds and walnuts, leaving some pieces chunky. Set aside a handful of whole nuts for decorating the top.
In a large bowl or the bowl of a stand mixer, whisk together the flour, sugar, yeast, salt, cinnamon, and both citrus zests. In a separate bowl, combine the egg yolks, whole egg, lukewarm milk, and port wine. Pour the wet ingredients into the dry and mix until a shaggy dough forms. If using a stand mixer, attach the dough hook.
Knead the dough on medium speed (or by hand on a lightly floured surface) for about 5 minutes until it comes together. Now begin adding the softened butter, one or two pieces at a time, kneading after each addition until incorporated before adding more. This takes patience, about 10 to 15 minutes total. The dough will look like a mess at first, then suddenly come together into something silky and elastic. Keep going until it pulls away from the bowl cleanly and feels smooth.
Turn the dough onto a clean surface. Scatter the toasted, chopped nuts over it and fold and knead gently until they're evenly distributed throughout. The dough should be soft, slightly sticky, and studded with nuts. Shape it into a ball.
Place the dough in a lightly oiled bowl, cover tightly with plastic wrap, and let rise in a warm spot until doubled in size, about 2 hours. Alternatively, for better flavor development, refrigerate overnight and let it come to room temperature for 1 hour before shaping.
Line a large baking sheet with parchment paper. Turn the risen dough onto a lightly floured surface and press it gently to deflate. Shape it into a ball, then poke a hole in the center with your fingers. Gradually stretch and widen the hole, rotating the dough, until you have a ring about 25cm in diameter with a hole of about 10cm in the center. The hole will shrink as it rises, so make it bigger than you think you need. Transfer to the prepared baking sheet.
Cover the shaped ring loosely with oiled plastic wrap and let rise until puffy and nearly doubled, about 1 to 1.5 hours. It should look soft and pillowy, not dense. Meanwhile, preheat your oven to 180°C (350°F). When ready to bake, brush the top gently with the egg wash. Press the reserved whole almonds, walnut halves, and pine nuts decoratively into the top of the ring, creating the jeweled crown effect.
Bake for 30 to 35 minutes, until deep golden brown and the internal temperature reaches 88°C (190°F). If the top browns too quickly, tent loosely with foil. The kitchen will smell like Christmas. Let cool on the baking sheet for 10 minutes, then transfer to a wire rack to cool completely.
Once completely cool, dust generously with powdered sugar, letting it fall like snow over the crown and into the crevices around the nuts. Cut at the table, passing slices to everyone. Bolo Rainha keeps well wrapped at room temperature for 3 to 4 days, and toasts beautifully on the second day.
1 serving (about 85g)
Culinary guides, cultural storytelling, and the editorial depth that makes cooking meaningful.
Discover Culinary ExplorerChef Margarida
The sand cookies of Cascais, where three simple ingredients become something that melts on your tongue and sparkles like the beach at sunset. Butter, flour, sugar. That's all. That's enough.

Chef Margarida
The Christmas turnovers of Alentejo, where humble chickpeas become something miraculous inside a crispy shell. Proof that Portuguese grandmothers could turn anything into celebration.

Chef Margarida
The butter cookies of the Azores, shaped into golden rings by island grandmothers who knew that the best things in life are simple: good butter, fresh eggs, and a cup of strong coffee.

Chef Margarida
The almond cookies of the Algarve, where Moorish orchards still bloom white against blue January skies. Three ingredients, centuries of tradition, the taste of southern Portugal in every tender bite.