
Chef Lupita
Acambaritas de Acámbaro
Guanajuato's daily bread from Acámbaro, a small glazed roll built on pata, enriched with manteca de cerdo, and baked until the top shines lightly for merienda.
A cooking platform built around craft, culture, and the stories behind what we eat.
Created by
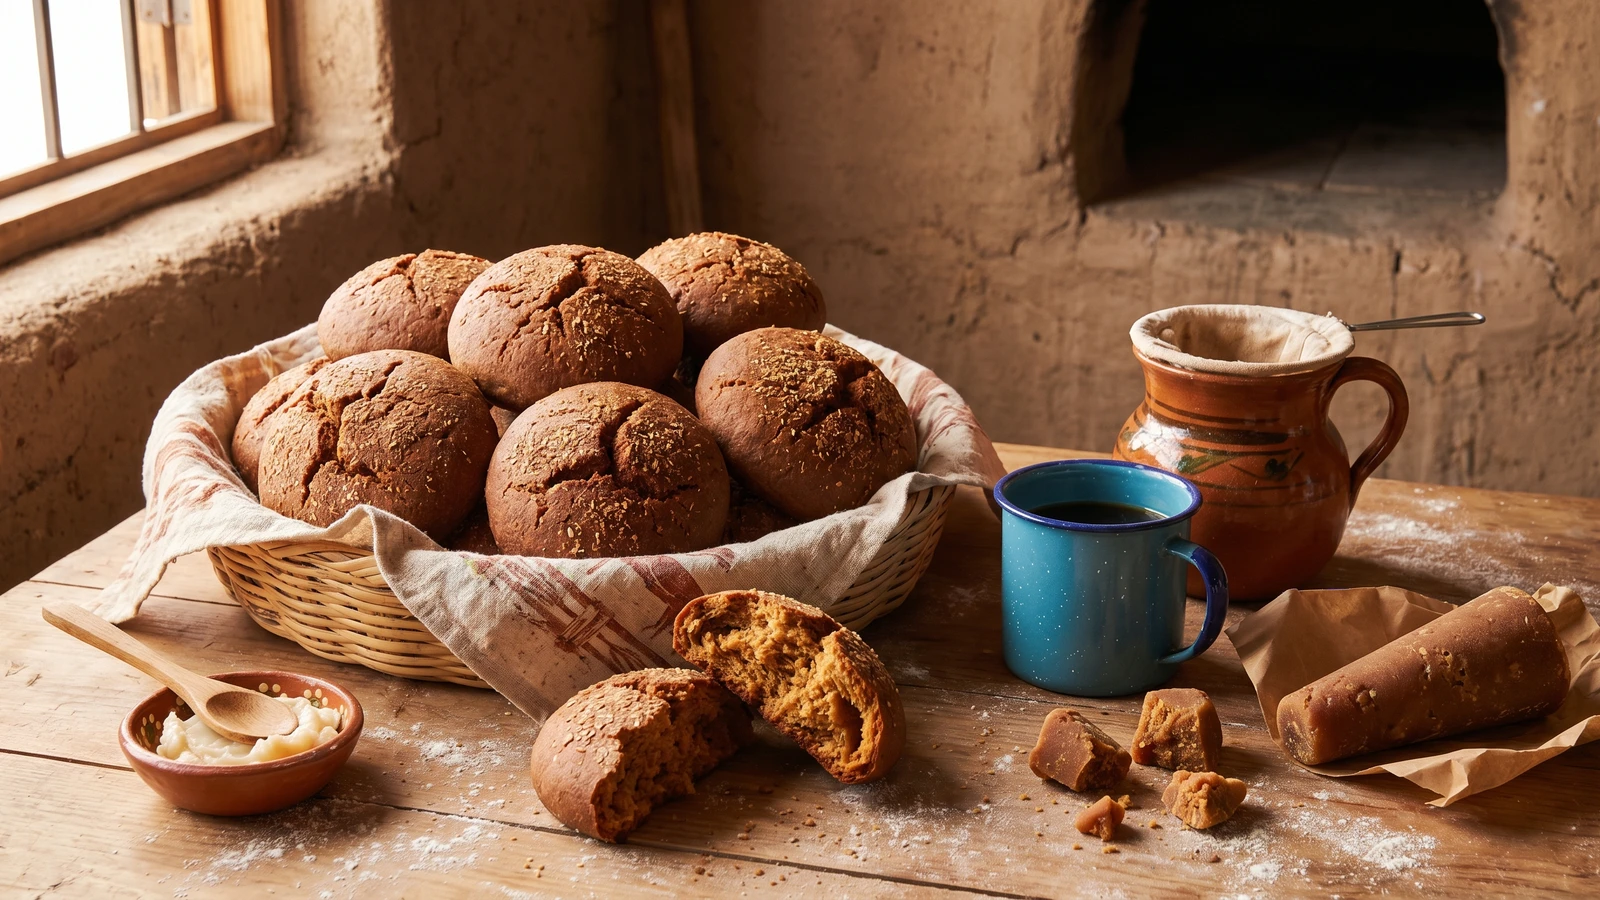
Sonora's bran-flecked whole wheat round, sweetened with dark piloncillo and enriched with manteca de cerdo. The rancher's bread, denser than central pan dulce, made for long mornings and longer roads.
This is bread from Sonora. Not Mexico City. Not Puebla. Sonora. The semita is not a churro and it is not a concha and it has nothing to do with the soft, sugar-topped pan dulce that tourists buy in the capital and call Mexican bread. This is wheat country. The semita is what the wheat country bakes.
The north of Mexico grows wheat the way the south grows corn, and the bread tradition that came with the Jesuits and the rancheros took root in the dry valleys of Sonora and never left. The semita is a round, dense, bran-flecked loaf sweetened with piloncillo and enriched with manteca de cerdo. The bran stays in the dough because the women who baked these were not interested in refined flour. They were interested in bread that traveled, bread that fed a vaquero on horseback, bread that held its shape in a saddlebag and tasted as good at noon as it did at dawn. You see them stacked at roadside puestos along the highways out of Hermosillo and Ciudad Obregon, sold in paper bags with cafe de talega, the cloth-strained coffee of the ranchos.
Piloncillo is the sweetener. Not white sugar. The dark, mineral, almost smoky cone of unrefined cane sugar that Mexico has been making since the colonial mills. It gives the semita its color and its character. La manteca es el sabor. The lard gives the crumb its richness and the keeping quality that lets a semita sit on a kitchen counter for three days and still be good. Do not substitute butter. Do not substitute vegetable shortening. This is a ranch bread and ranch bread is made with manteca. Cada estado, su propia cocina, and this one belongs to the noroeste.
My mother did not make semitas. She was from Jalisco and her bread tradition was different. I learned these from a senora named Dona Carmen in a small panaderia outside Magdalena de Kino, in the summer of my second year traveling the 32 states. She had been baking the same recipe for forty-one years in the same wood-fired horno her father built. She told me: the bran is not optional, the piloncillo is not optional, the manteca is not optional. Everything else you can argue about. The rest is the recipe. Saber cocinar es saber vivir.
Wheat arrived in northwestern Mexico with the Spanish Jesuit missions of the 17th and 18th centuries, which established irrigated wheat agriculture in the river valleys of what is now Sonora and Sinaloa, fundamentally distinguishing the region's food culture from the corn-based south. The semita, whose name likely derives from the Spanish 'acemita' (a bran-enriched bread of Andalusian origin), evolved as the everyday bread of the ranch and mining economies of colonial Sonora, where its density, keeping quality, and reliance on locally rendered manteca made it the practical choice for working people. Piloncillo as the sweetener reflects the long-standing trade between Sonora's wheat country and the cane-growing regions further south, predating the industrial sugar refineries by centuries.
Quantity
3 cups
harina integral
Quantity
2 cups, plus more for dusting
Quantity
1/2 cup, plus 2 tablespoons for tops
Quantity
8 ounces (about 1 generous cup)
grated or chopped fine
Quantity
1/2 cup
for dissolving piloncillo
Quantity
1 cup
warmed to body temperature
Quantity
2 1/4 teaspoons (one packet)
Quantity
1/2 cup
softened, not melted
Quantity
2
at room temperature
Quantity
1 1/2 teaspoons
Quantity
1 teaspoon
Quantity
1 tablespoon
for brushing
| Ingredient | Quantity |
|---|---|
| whole wheat flour, preferably stone-groundharina integral | 3 cups |
| all-purpose flour | 2 cups, plus more for dusting |
| wheat bran | 1/2 cup, plus 2 tablespoons for tops |
| piloncillograted or chopped fine | 8 ounces (about 1 generous cup) |
| hot waterfor dissolving piloncillo | 1/2 cup |
| whole milkwarmed to body temperature | 1 cup |
| active dry yeast | 2 1/4 teaspoons (one packet) |
| manteca de cerdo (pork lard)softened, not melted | 1/2 cup |
| large eggsat room temperature | 2 |
| fine sea salt | 1 1/2 teaspoons |
| canela molida (Mexican cinnamon, ground) | 1 teaspoon |
| manteca de cerdo, meltedfor brushing | 1 tablespoon |
Place the grated piloncillo in a small bowl and pour the hot water over it. Stir until it dissolves completely into a dark, molasses-like syrup. Let it cool to warm, not hot. This is your sweetener. Refined sugar will not give you the same flavor. Piloncillo carries minerals and a smoky depth that white sugar lost long ago when the industrial mills took over. La panaderia ranchera lives on piloncillo.
Pour the warm milk into a large mixing bowl. Sprinkle the yeast over the surface and add one tablespoon of the dissolved piloncillo syrup. Stir once and leave it alone for ten minutes. You should see a foamy raft form on top. If nothing happens, the yeast is dead. Start over with fresh yeast. No me vengas con atajos.
Add the remaining piloncillo syrup, the eggs, the softened lard, the salt, and the canela to the yeast mixture. Whisk to combine. In a separate bowl, stir together the whole wheat flour, all-purpose flour, and the half cup of wheat bran. Add the dry ingredients to the wet in three additions, stirring with a wooden spoon between each. The dough will be shaggy and stiffer than a white bread dough. That is correct. Whole wheat absorbs more water and the bran adds texture you want to feel.
Turn the dough out onto a lightly floured wooden surface. Knead for ten to twelve minutes by hand. The dough will feel rough at first because of the bran. Keep going. It will smooth out into a firm, elastic ball that springs back when you press it. Do not add too much flour. The dough should be tacky but not sticky. The women in the Sonora ranch kitchens kneaded this on the same wooden table their mothers used, and that wood remembered every loaf.
Place the dough in a bowl greased with a little lard. Turn the dough once to coat. Cover with a clean cotton towel, not plastic. The towel lets the dough breathe the way it does in a panaderia. Let it rise in a warm spot for one and a half to two hours, until doubled. Whole wheat dough rises slower than white flour dough. Be patient. La cocina no es decoracion, es trabajo.
Punch the dough down gently and turn it out onto a floured surface. Divide it into twelve equal pieces, about three and a half ounces each. Weigh them if you want them uniform. Roll each piece into a tight ball by cupping your hand over the dough and moving in a small circle against the table. The seam should pull underneath. Flatten each ball slightly with the heel of your hand into a thick disc about three inches across. The semita is a round, not a cone like a piloncillo and not a knot like a torcido. It sits flat on the comal of your palm.
Arrange the discs on two parchment-lined baking sheets, leaving two inches between each. Brush the tops with melted lard and scatter the reserved wheat bran across the surface, pressing it lightly so it sticks. With a sharp paring knife or a razor, score a shallow cross or a single line across each top. The cross is the old mark of the rancho bakers. Cover loosely with a towel and let rise for forty-five minutes to one hour, until puffed but not doubled.
Preheat the oven to 375F at least thirty minutes before baking. Place a heatproof pan of water on the bottom rack to create humidity. Bake the semitas on the middle rack for thirty to thirty-five minutes, rotating the sheets halfway through. They should turn a deep, even brown. The bran on top will toast and crackle. When you tap the bottom of one, it should sound hollow. A pale semita is an underbaked semita. Sonora bakes them dark because that is what holds up to a long day in a saddlebag.
Transfer the semitas to a wire rack and let them cool for at least twenty minutes before tearing one open. The interior should be dense but tender, flecked with bran, fragrant with canela and piloncillo. Serve with cafe de talega, the cloth-strained ranch coffee of Sonora, or with cafe de olla brewed with piloncillo and canela. A semita with hot coffee at dawn before the work of the day. Asi se hace y punto.
1 serving (about 108g)
Culinary guides, cultural storytelling, and the editorial depth that makes cooking meaningful.
Discover Culinary ExplorerChef Lupita
Guanajuato's daily bread from Acámbaro, a small glazed roll built on pata, enriched with manteca de cerdo, and baked until the top shines lightly for merienda.

Chef Lupita
Michoacan's Tinguindin aguacatas are flat, leaf-scored sweet breads made with harina de trigo, piloncillo, anise, and manteca de cerdo, shaped by hand for the wood oven.

Chef Lupita
From Ajijic on Lake Chapala, Pan Tachihual is a lightly sweet wedding loaf built with harina de trigo, harina de maiz, piloncillo, manteca, anise, and the old Guadalajara pata.

Chef Lupita
Comitán's pan de yema shaped into little pigs, birds, and rabbits, a Chiapas bakery bread rich with egg yolks, manteca de cerdo, and anís, baked golden on hoja de plátano.