
Chef Takumi
Autumn Mushroom Rice (きのこの炊き込みご飯, Kinoko Takikomi Gohan)
Autumn mushrooms do most of the work here. Rinse the rice well, season the liquid before cooking, and let the pot rest so every grain comes out separate and fragrant.
A cooking platform built around craft, culture, and the stories behind what we eat.
Created by
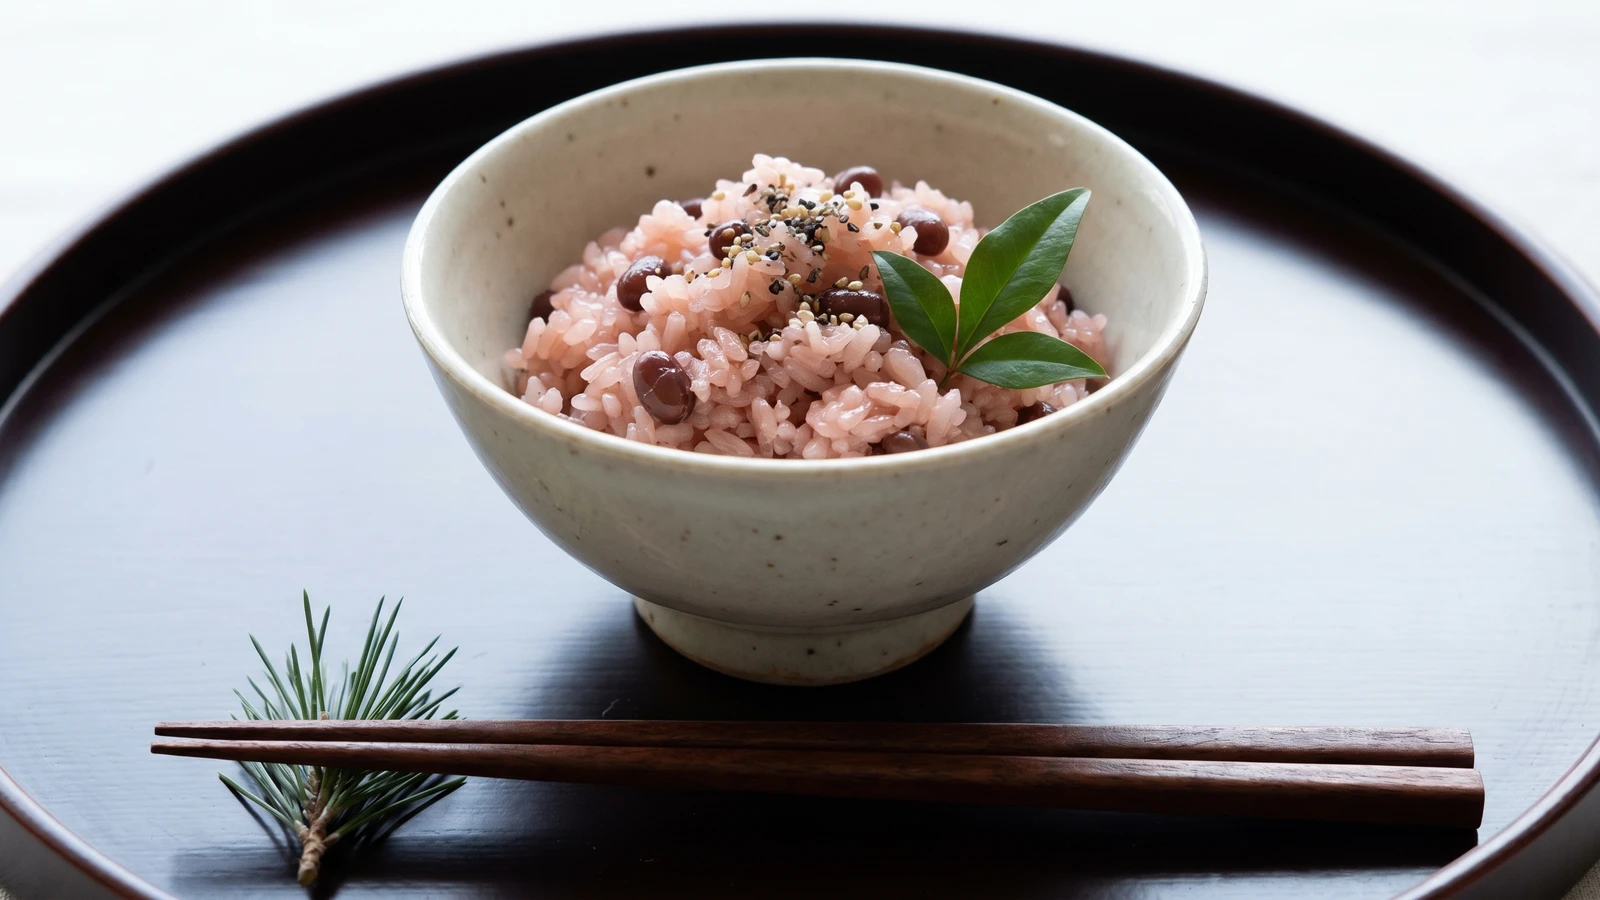
Sekihan looks ceremonial, but the work is plain: soak the sticky rice well, save the bean liquor, and steam until each grain turns rosy, tender, and quietly chewy.
Red rice announces itself before the meal begins. A small mound of sekihan on a tray says birth, first school day, birthday, wedding, some good turn in the house. It isn't sweet, and it isn't decorated. Mochigome (glutinous rice) carries the celebration by taking on the pink liquor from azuki, or sasage in Kantō, then meeting a pinch of gomashio at the table.
The dish looks ceremonial enough to make a home cook stiffen. Don't. The work is washing, soaking, simmering the beans gently, and steaming the rice until the grains are tender but still spring back under the teeth. The one detail that decides it is the bean liquor. Cook the beans only until their skins hold, save the red cooking water, and let the rice absorb it before and during steaming. That color is not dye. It is the ingredient speaking, which is why we don't rush it.
Use mochigome for the real chew; ordinary short-grain rice alone won't give the same body. If you must lighten it, replace only a small part with uruchimai (regular Japanese short-grain rice), and say plainly what you changed. Sekihan belongs beside a meal rather than under sauce, so keep it restrained: a neat mound, a little black sesame salt, and space around it. Honmono, in this case, is quiet enough to fit in your hand.
Sekihan grew from older Japanese customs of offering red rice to kami, the Shintō deities, with the color treated as protective and auspicious. As white polished rice and glutinous rice became standard, azuki or sasage cooking liquor supplied the red color without using naturally red rice varieties. The Kantō preference for sasage is often explained by Edo's warrior culture: sasage holds its shape better than azuki, whose split skins were considered an unlucky sign.
Quantity
2 1/2 rice-cooker cups (about 375g)
Quantity
1/3 cup (about 60g)
Quantity
4 cups, plus more for soaking
Quantity
1/2 teaspoon
Quantity
1 tablespoon
Quantity
1/2 teaspoon
for gomashio
| Ingredient | Quantity |
|---|---|
| mochigome (glutinous rice) | 2 1/2 rice-cooker cups (about 375g) |
| dried azuki beans, or sasage cowpeas for Kantō style | 1/3 cup (about 60g) |
| water | 4 cups, plus more for soaking |
| fine sea salt | 1/2 teaspoon |
| black sesame seeds | 1 tablespoon |
| flaky sea saltfor gomashio | 1/2 teaspoon |
Rinse the mochigome in a bowl, changing the water several times, until the water is almost clear rather than milky. Cover with fresh water and soak at least 6 hours, or overnight. Mochigome has a firm, opaque center, and the long soak gives water time to reach it; without that, the outside softens before the middle is cooked. Drain in a colander for 30 minutes before steaming so the grains carry moisture inside, not water clinging outside.
Rinse the azuki or sasage, put them in a small pot, and cover with plenty of water. Bring to a boil for 2 minutes, then drain and discard that first water. This quick blanch carries away harshness and gray foam, so the later bean liquor tastes clean and colors the rice clearly.
Return the beans to the pot with 4 cups fresh water. Simmer gently, uncovered, until the beans are still firm but no longer chalky inside, about 15 to 20 minutes for azuki and a little longer for sasage. Bite one. It should resist slightly, because it will cook again with the rice. Drain through a sieve set over a bowl, keeping the red cooking liquor and the beans separate.
Pour the hot bean liquor from one bowl to another four or five times, lifting it a little as you pour. This cools it quickly and helps the red color show more clearly. A little ceremony, yes, but a useful one. Measure 2 cups of the liquor; if you are short, add water to make up the amount.
Put the drained mochigome in a bowl and cover it with 1 1/2 cups of the cooled bean liquor. Let it stand 30 to 45 minutes, then drain again, saving that liquor. This short second soak gives the rice its rosy color before it reaches the steamer. If the liquor is hot, it starts cooking the surface unevenly, so let it cool first.
Line a seiro (bamboo steamer) or metal steamer with a damp sarashi cloth or thin cotton towel. Mix the tinted rice gently with the cooked beans and spread it in the cloth in a shallow layer, with the center slightly lower than the edges. The shallow layer lets heat reach the rice evenly; a thick heap gives you soft grains outside and hard ones inside.
Bring the water under the steamer to a strong, steady simmer and steam the rice, covered, for 20 minutes. Mix the remaining bean liquor with the fine sea salt. Open the steamer, sprinkle about 1/2 cup of this salted liquor over the rice, and turn the rice gently with a rice paddle. Cover and steam 10 minutes more, then repeat with another small sprinkle if the grains still feel firm. The sprinkling liquid, called uchimizu, seasons the rice and finishes the cooking without flooding it.
After 40 to 45 minutes total steaming, taste a few grains from the center and the edge. They should be tender, glossy, and chewy, with no hard core. If the rice is still tight in the middle, sprinkle a little more bean liquor or hot water over it and steam 5 to 10 minutes longer. Mochigome forgives patience better than haste.
Toast the black sesame seeds in a dry pan just until fragrant, then mix with the flaky sea salt. Crush a few seeds between your fingers or in a suribachi (ridged mortar), but leave most whole. Breaking a few releases aroma; leaving most whole keeps the clean black specks that make sekihan look like itself.
Lift the steamer off the heat and let the rice rest, still covered, for 10 minutes. The rest lets the moisture settle so the grains cling without turning heavy. Mound the sekihan lightly in small bowls or on a tray, sprinkle with gomashio, and serve warm or at room temperature.
1 serving (about 190g)
Culinary guides, cultural storytelling, and the editorial depth that makes cooking meaningful.
Discover Culinary ExplorerChef Takumi
Autumn mushrooms do most of the work here. Rinse the rice well, season the liquid before cooking, and let the pot rest so every grain comes out separate and fragrant.

Chef Takumi
A whole salmon fillet laid on seasoned rice does nearly all the work. Cook it gently, flake it back through, and autumn has found its bowl.

Chef Takumi
Daigakuimo is simple student comfort: sweet potato cut stout, fried until the corners take color, then turned in a soy-sugar syrup that sets shiny instead of sticky.

Chef Takumi
Chawanmushi looks delicate, but the secret is plain: good dashi, strained egg, and quiet heat. Keep the steam soft and the custard sets smooth, tender, and calm.