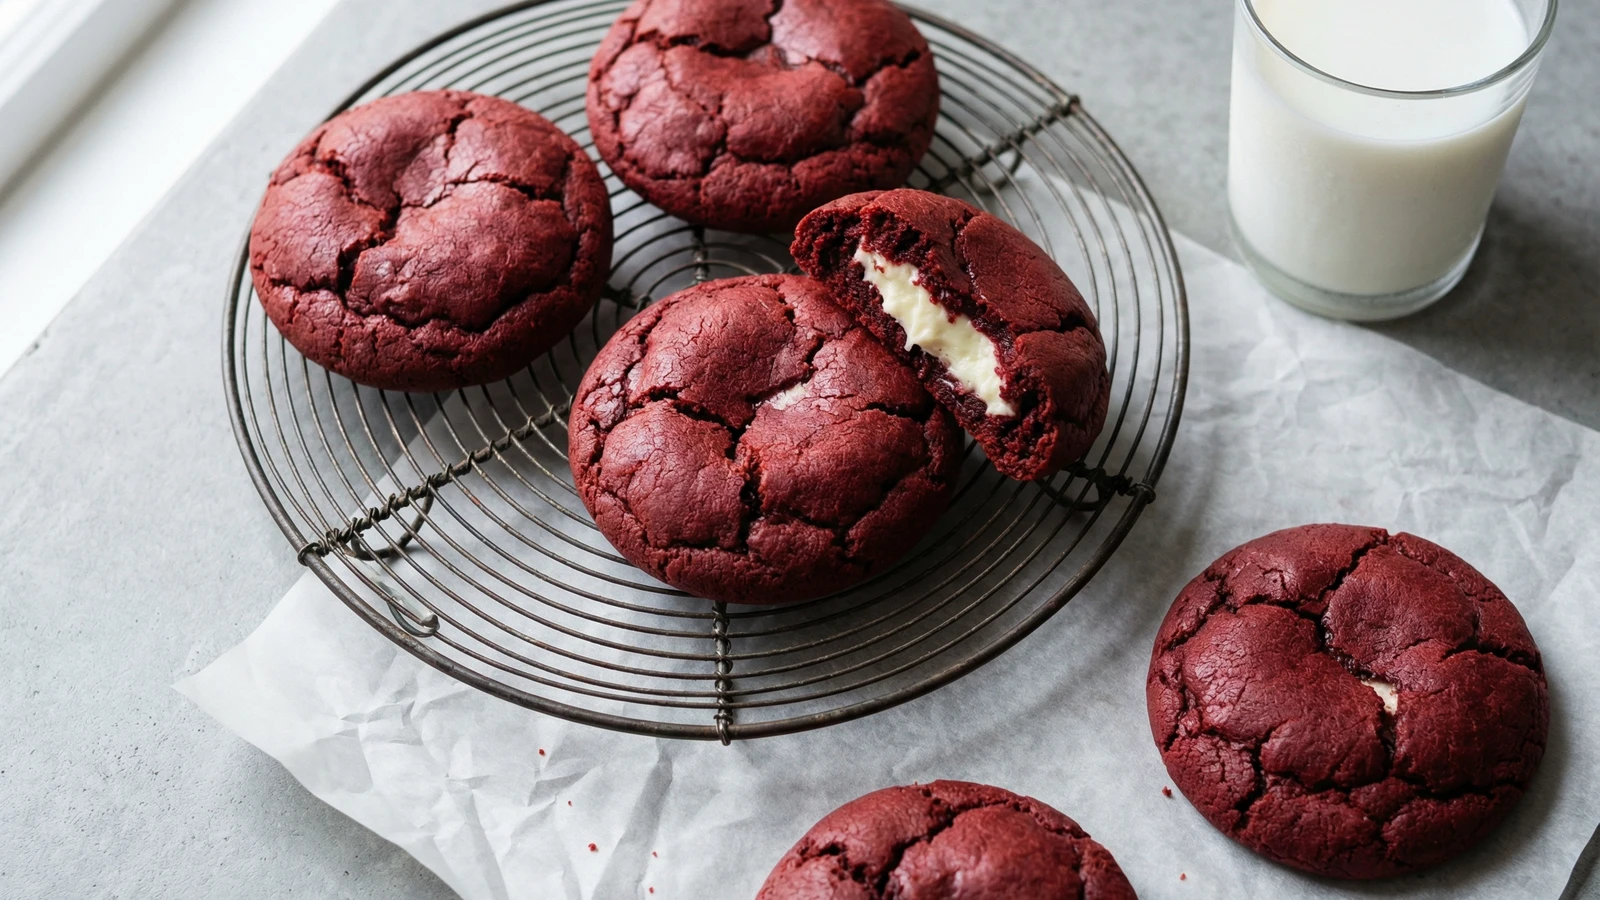
Pillowy crimson cookies hiding molten cream cheese hearts, delivering the beloved cake's signature tang in every tender, dramatic bite. These freeze beautifully and bake even better from frozen.
Pastries & Cookies
American
Make Ahead
Holiday
30 min
Active Time
12 min cook•2 hr 30 min total
Yield24 cookies
Red velvet has one of American baking's stranger origin stories. The Waldorf-Astoria Hotel in New York claims credit, though food historians argue the true roots lie in Southern kitchens during the Depression, when cooks used beet juice to deepen chocolate color and stretch expensive cocoa. The red intensified over decades as food coloring became affordable and home bakers chased that distinctive crimson.
What makes red velvet work isn't the color. It's the chemistry. A small amount of cocoa meets buttermilk's acidity, creating a flavor that reads as neither chocolate nor vanilla but something uniquely American. The cream cheese frosting traditionally paired with the cake provides the essential counterpoint: tangy richness against tender crumb.
These cookies capture that balance by hiding frozen cream cheese filling inside each dough ball. As the cookies bake, the centers soften into creamy pockets that stay slightly cool against the warm, chewy exterior. It's a trick worth mastering. Once you understand the technique, you'll apply it to everything from peanut butter cookies with chocolate ganache centers to snickerdoodles with apple butter hearts.
The technique, the tradition, and the story behind every dish.
•Large cookie scoop or 2-tablespoon measure (for dough)
•Parchment paper
•Wire cooling rack
Instructions
1
Make the cream cheese filling
Beat cream cheese with powdered sugar and vanilla until completely smooth, scraping the bowl twice to eliminate lumps. Line a small baking sheet with parchment. Drop 24 rounded teaspoons of filling onto the parchment, spacing them apart. They'll look messy. That's fine. Freeze until solid, at least one hour. These can be made days ahead and stored frozen in a sealed container.
A small cookie scoop makes quick work of portioning and produces uniform centers.
2
Prepare dry ingredients
Whisk together flour, cocoa powder, baking soda, and salt in a medium bowl. Dutch-process cocoa gives the deepest chocolate flavor here, though natural cocoa works if that's what you have. The difference is subtle when red food coloring dominates the visual.
3
Cream butter and sugars
Beat softened butter with both sugars in a stand mixer fitted with the paddle attachment. Start on low to prevent a sugar cloud, then increase to medium-high. Beat for three full minutes until the mixture looks fluffy and pale, scraping the bowl halfway through. This aeration is what makes your cookies tender rather than dense.
4
Add wet ingredients
Add the egg and beat until incorporated, about 30 seconds. Scrape the bowl. Add vanilla and red food coloring, beating until the color distributes evenly. The batter will look alarmingly crimson. That's exactly right. In a small measuring cup, stir together buttermilk and vinegar. This combination reacts with the baking soda for lift.
5
Build the dough
Add half the flour mixture to the butter mixture, beating on low just until streaks remain. Pour in the buttermilk mixture and beat briefly. Add remaining flour and mix until a soft, sticky dough forms. Do not overmix. The dough should be uniformly red with no flour pockets visible. It will be softer than typical cookie dough.
If your dough seems too soft to handle, refrigerate for 30 minutes before portioning.
6
Stuff the cookies
Scoop roughly two tablespoons of dough and flatten it in your palm. Place one frozen cream cheese ball in the center. Wrap the dough around the filling, pinching seams closed and rolling gently between your palms to form a smooth ball. The filling should be completely encased. Place seam-side down on a parchment-lined baking sheet. Repeat with remaining dough and filling.
7
Chill the dough balls
Refrigerate assembled cookies for at least 30 minutes, or freeze for 15 minutes. This firms the butter and helps cookies hold their shape during baking. Cold dough spreads less, keeping those cream cheese centers properly centered. The cookies can be frozen at this point for up to two months.
8
Bake to perfection
Heat your oven to 350°F. Arrange chilled dough balls on parchment-lined baking sheets, leaving three inches between each. They spread. Bake 11 to 13 minutes, rotating the pan halfway through. The edges should look set and slightly crackled while centers appear soft and almost underdone. They firm as they cool. Trust the process.
If baking from frozen, add 2-3 minutes to the baking time. No need to thaw first.
9
Cool properly
Let cookies rest on the baking sheet for five minutes. The cream cheese centers need this time to set slightly. Transfer to a wire rack to cool completely, or serve warm when the centers are still molten. Both approaches have their merits. I prefer them slightly warm, when the cream cheese has the texture of very soft frosting.
Chef Tips
•Gel food coloring produces deeper crimson than liquid. Use about half the amount if substituting gel for the liquid called for here.
•Room temperature ingredients matter tremendously in cookie baking. Cold buttermilk or eggs can cause the batter to break, resulting in greasy, flat cookies.
•For the crinkliest tops, don't flatten the dough balls before baking. The natural cracks that form as rounded dough spreads are part of red velvet's visual appeal.
•These pair beautifully with cold milk or strong coffee. The dairy cuts through the sweetness and amplifies the tangy cream cheese.
Advance Preparation
•Cream cheese filling can be frozen up to 2 weeks ahead. Keep frozen until ready to use.
•Assembled unbaked cookies freeze beautifully for up to 2 months. Freeze on a sheet until solid, then transfer to freezer bags. Bake directly from frozen, adding 2-3 minutes to the time.
•Baked cookies keep at room temperature in an airtight container for 4 days. Refrigerate for up to 1 week. Bring to room temperature or warm briefly in a low oven before serving.
Frequently Asked Questions
Nutrition Information
1 serving (about 40g)
Calories
170 calories
Total Fat
8 g
Saturated Fat
5 g
Trans Fat
0 g
Unsaturated Fat
2 g
Cholesterol
20 mg
Sodium
50 mg
Total Carbohydrates
24 g
Dietary Fiber
0 g
Sugars
19 g
Protein
3 g
Where cooking meets culture.
Culinary guides, cultural storytelling, and the editorial depth that makes cooking meaningful.