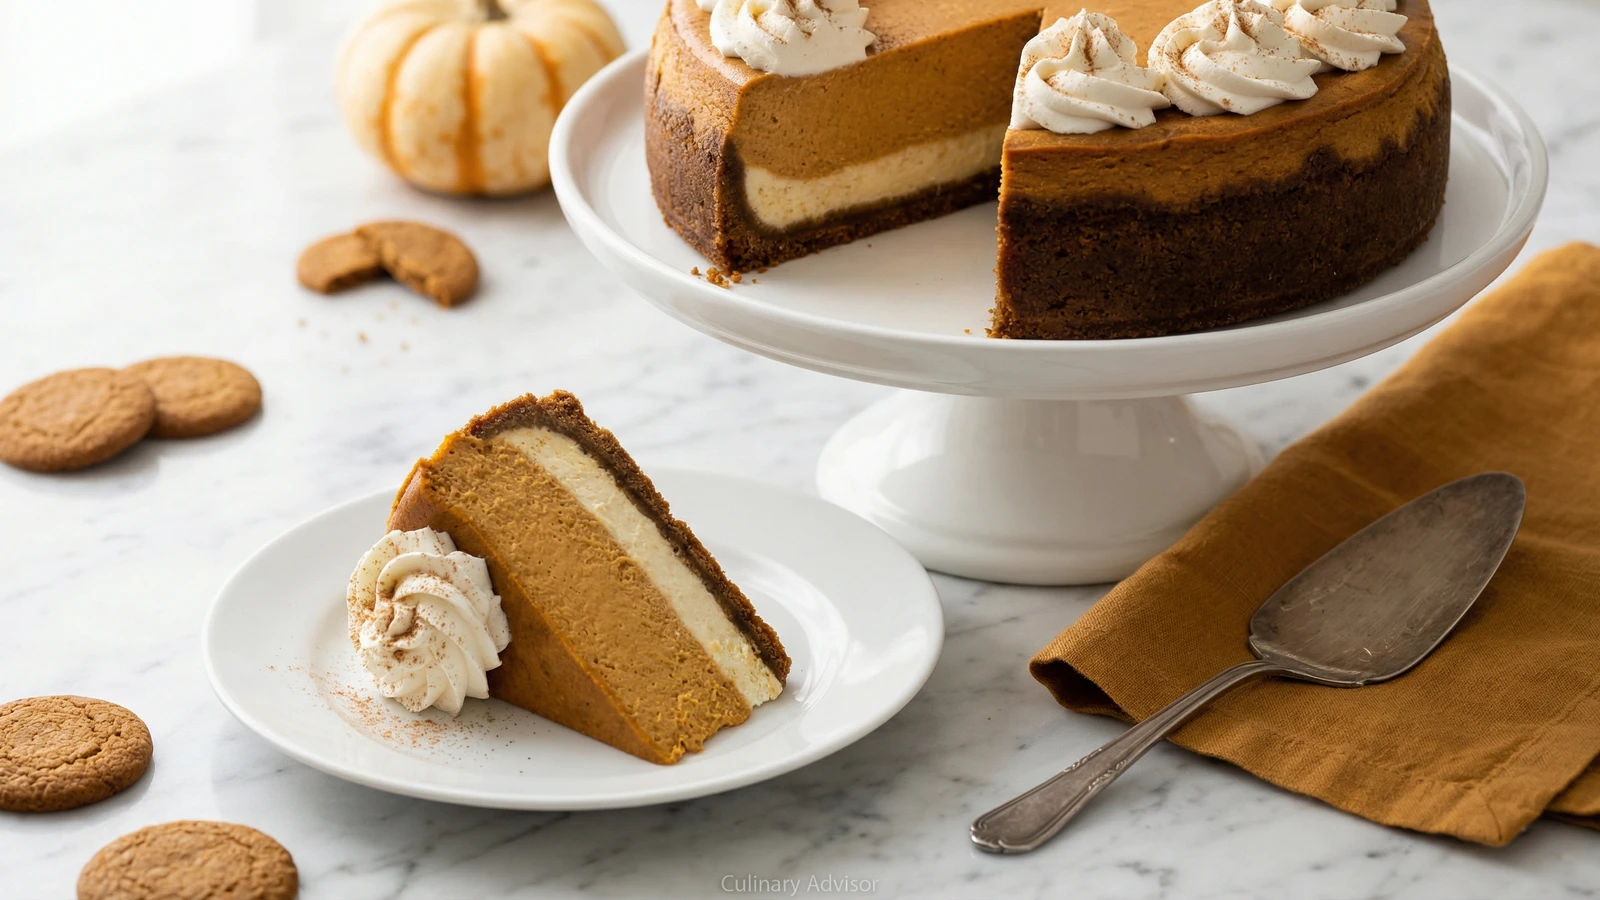
The marriage of two American dessert traditions: silky pumpkin filling perfumed with warm spices meets the tang of New York cheesecake, all resting on a buttery gingersnap crust that shatters with each forkful.
Desserts
American
Thanksgiving
Holiday
Make Ahead
45 min
Active Time
1 hr 15 min cook•6 hr total
Yield12 servings
Every November, America faces an impossible choice between pumpkin pie and cheesecake. This recipe refuses to choose. It combines the custardy spice of a proper pumpkin pie with the dense, tangy luxury of cheesecake, creating something more satisfying than either alone.
The gingersnap crust is the secret weapon here. Those spicy cookies, pulverized and bound with butter, create a foundation that echoes the filling's warm spices while providing textural contrast. The snap of that crust against the velvet filling is honest pleasure.
I've taught this recipe to nervous Thanksgiving hosts for decades. They arrive convinced cheesecake is difficult. It isn't. What it demands is patience and attention to temperature. Room temperature ingredients, a water bath, a slow cool-down. Follow these rules and cracks become impossible. Ignore them and you'll be covering mistakes with whipped cream.
The beauty of pumpkin cheesecake is its make-ahead nature. It improves after a night in the refrigerator. Make it Tuesday for Thursday's table. You'll wake up Thanksgiving morning with one less worry and one guaranteed triumph waiting in the wings.
The technique, the tradition, and the story behind every dish.
•Stand mixer with paddle attachment (or hand mixer)
•Large roasting pan for water bath
•Heavy-duty aluminum foil
•Offset spatula
•Instant-read thermometer (optional)
Instructions
1
Prepare the pan
Position a rack in the center of your oven and preheat to 325°F. Wrap the outside of a 9-inch springform pan tightly with two layers of heavy-duty aluminum foil, bringing it up the sides. This creates a waterproof barrier for the water bath. The foil must be snug. Any gap invites water into your crust, and a soggy crust is a heartbreak.
2
Make the gingersnap crust
Pulse gingersnap cookies in a food processor until you have fine, uniform crumbs. Measure two cups. In a medium bowl, combine the crumbs with three tablespoons sugar and the salt, then pour in the melted butter. Stir until every crumb is coated and the mixture resembles wet sand. It should clump when squeezed in your fist.
No food processor? Place cookies in a heavy-duty zip-lock bag and crush with a rolling pin. It takes longer but works beautifully.
3
Press and bake the crust
Transfer the crumb mixture to your prepared springform pan. Using the bottom of a measuring cup or flat-bottomed glass, press the crumbs firmly into an even layer across the bottom. Press about one inch up the sides. Bake for ten minutes until fragrant and slightly set. The crust will firm as it cools. Set aside while you make the filling.
4
Beat the cream cheese
In the bowl of a stand mixer fitted with the paddle attachment, beat the cream cheese on medium speed until completely smooth, about three minutes. Stop the mixer and scrape down the sides and bottom of the bowl thoroughly. Lumps in cream cheese never disappear on their own. This step determines your texture.
Cold cream cheese is the enemy of smooth cheesecake. Leave it on the counter for at least two hours before starting. It should yield easily when pressed.
5
Add sugar and pumpkin
With the mixer on medium-low, gradually add the sugar, beating until incorporated. Add the pumpkin puree and the quarter cup of sour cream, mixing until uniform. The batter will take on that gorgeous burnt-orange hue. Scrape the bowl again. Neglecting corners leads to streaks in your finished cake.
6
Incorporate the spices
Add the cinnamon, ginger, nutmeg, cloves, salt, and vanilla. Beat on low just until combined. Taste the batter. Yes, taste it. You're checking the spice balance. It should smell like autumn distilled. If it seems flat, a pinch more cinnamon won't hurt.
7
Add eggs gently
Add the eggs one at a time, beating on low speed just until each disappears into the batter, about thirty seconds per egg. Do not overbeat. Excess air causes the cheesecake to rise dramatically in the oven and then crack as it falls. Slow and gentle wins this race.
Room temperature eggs emulsify into the batter smoothly. Cold eggs can cause the cream cheese to seize and create lumps.
8
Pour and prepare the water bath
Pour the filling over the cooled crust, smoothing the top with an offset spatula. Set the springform pan in a large roasting pan. Place the roasting pan in the oven, then carefully pour hot water into the roasting pan until it reaches halfway up the sides of the springform. The steam creates a humid environment that prevents cracking.
9
Bake low and slow
Bake for one hour to one hour and fifteen minutes. The cheesecake is done when the edges are set and puffed slightly, but the center three inches still wobble like gelatin when you gently shake the pan. It will seem underdone. Trust the process. Carry-over cooking will finish the job.
10
Cool gradually
Turn off the oven. Crack the door open about two inches using a wooden spoon as a prop. Let the cheesecake cool in the oven for one full hour. This gradual temperature drop prevents the dramatic temperature shock that causes cracks. Patience here is non-negotiable.
11
Make the sour cream topping
While the cheesecake cools, whisk together the two cups sour cream, three tablespoons sugar, and one teaspoon vanilla until smooth. After the cheesecake has cooled in the oven, remove it from the water bath. Gently spread the sour cream mixture over the top in an even layer. Return to the oven at 325°F for ten minutes, just until set.
12
Chill thoroughly
Remove from oven and cool to room temperature on a wire rack, about one hour. Cover loosely with plastic wrap and refrigerate for at least four hours, preferably overnight. Cheesecake slices cleanly only when completely cold. Running a thin knife under hot water between cuts helps too.
The flavors develop overnight. A cheesecake made Tuesday tastes better than one made Wednesday for your Thursday Thanksgiving.
13
Unmold and serve
Run a thin knife around the edges before releasing the springform ring. Transfer to your serving plate. Slice with a thin, sharp knife dipped in hot water and wiped clean between cuts. Serve each slice with a generous dollop of lightly sweetened whipped cream.
Chef Tips
•Use pure pumpkin puree, not pumpkin pie filling. Pie filling contains sugar and spices already, which will throw off your proportions and make the cheesecake too sweet.
•Freshly grated nutmeg makes a difference you can taste. Whole nutmeg keeps for years, and a microplane does the work in seconds. Pre-ground nutmeg tastes like sawdust by comparison.
•If your cream cheese isn't soft enough, cut it into cubes and microwave in ten-second bursts, checking after each. Better than waiting three hours.
•A crack isn't failure. Cover it with sour cream topping and no one will ever know. The topping exists partly for this reason.
•Leftover pumpkin puree freezes beautifully in ice cube trays. Pop the cubes into smoothies or oatmeal all winter long.
Advance Preparation
•The completed cheesecake must chill at least four hours but tastes best after 24 hours. Make it up to three days before serving and store covered in the refrigerator.
•The gingersnap crust can be pressed and baked up to two days ahead. Wrap tightly in plastic wrap and store at room temperature.
•Gingersnap crumbs can be prepared up to one week ahead and stored in an airtight container.
•The cheesecake freezes well for up to two months. Wrap tightly in plastic, then foil. Thaw overnight in the refrigerator before serving.
Frequently Asked Questions
Nutrition Information
1 serving (about 240g)
Calories
620 calories
Total Fat
45 g
Saturated Fat
27 g
Trans Fat
0 g
Unsaturated Fat
16 g
Cholesterol
54 mg
Sodium
84 mg
Total Carbohydrates
43 g
Dietary Fiber
0.3 g
Sugars
27 g
Protein
9 g
Where cooking meets culture.
Culinary guides, cultural storytelling, and the editorial depth that makes cooking meaningful.