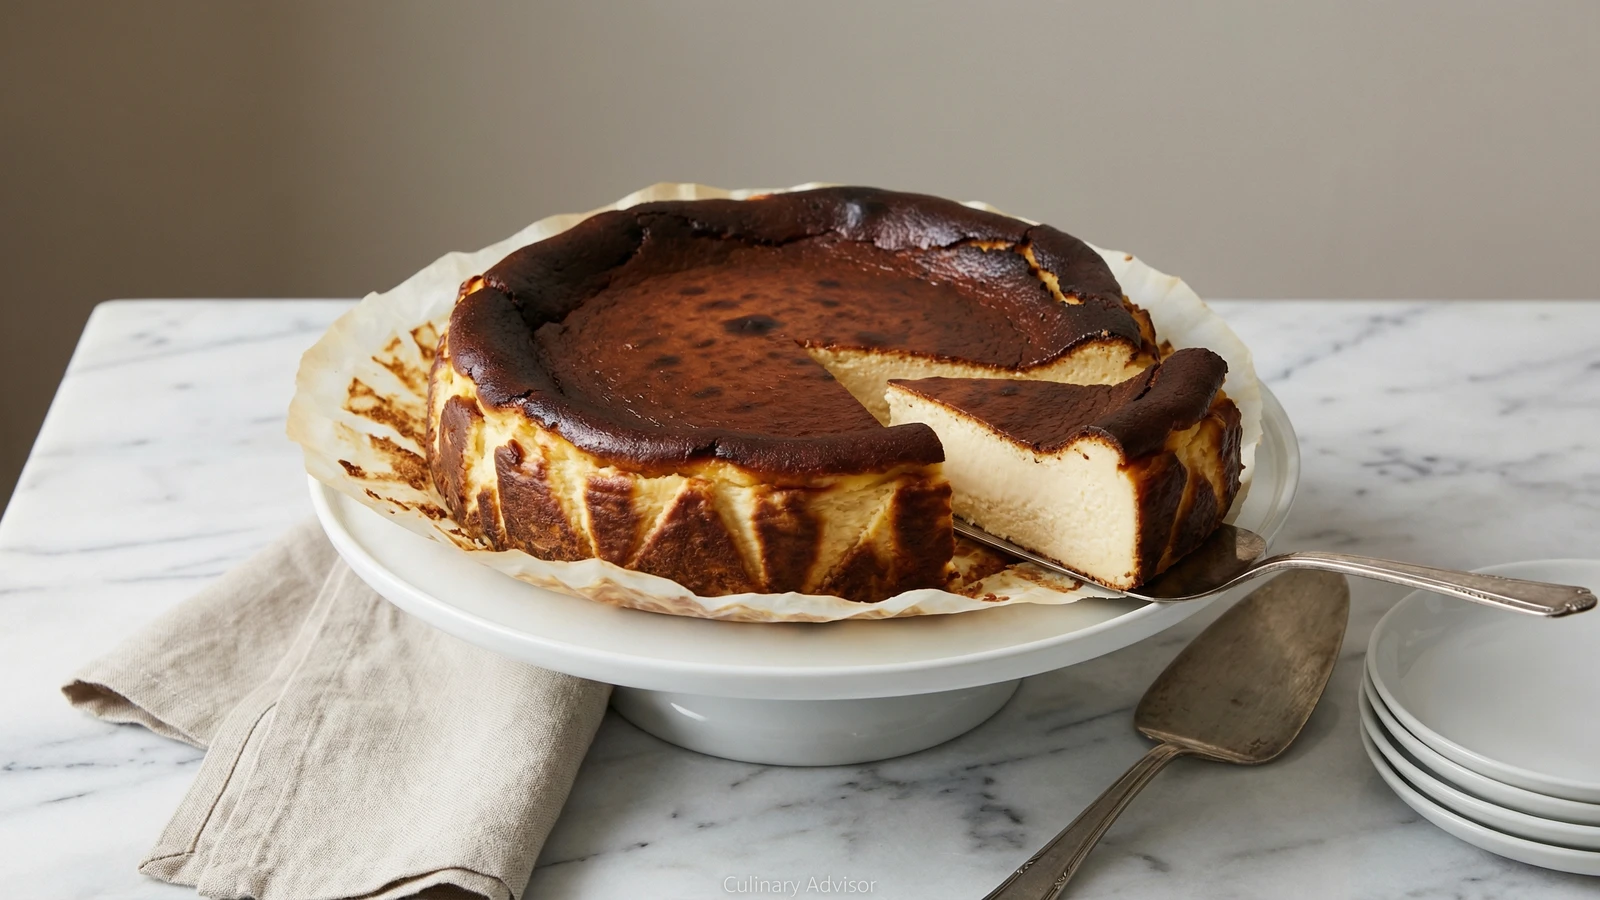
A crustless wonder from San Sebastián with a dramatic caramelized top that cracks like crème brûlée, giving way to a center so impossibly creamy it trembles when you slice it.
Desserts
Spanish
Dinner Party
Special Occasion
20 min
Active Time
65 min cook•85 min total
Yield12 servings
This cheesecake breaks every rule American bakers hold sacred. No water bath. No slow cooling. No crust. You blast it with ferocious heat until the top looks almost burnt, then pull it from the oven while the center still wobbles like a bowl of custard. It sounds wrong. It works brilliantly.
The recipe comes from La Viña, a pintxos bar in San Sebastián where they've been serving this exact cheesecake since 1990. Word spread through food pilgrims and social media until it became the most searched cheesecake in the world. The secret isn't technique. It's trust. You must believe that what looks like disaster in the oven will become glory on the plate.
I've taught this to students who were terrified of cheesecake. They'd heard horror stories about cracks and sunken centers and weeping disasters. This recipe laughs at all that. The cracks are the point. The caramelization is the beauty. You want it dark. You want it dramatic. The contrast between that bitter-sweet burnished exterior and the cool, yielding cream within is what makes this cheesecake unforgettable.
Make it the day before you need it. Let it rest overnight in the refrigerator. Bring it to room temperature an hour before serving. Then watch your guests fall silent as they take their first bite.
The technique, the tradition, and the story behind every dish.
•Stand mixer with paddle attachment (or hand mixer)
•Fine-mesh strainer
•Parchment paper
•Wire cooling rack
Instructions
1
Prepare your pan
Position a rack in the center of your oven and preheat to 400°F. Line a 10-inch springform pan with two overlapping sheets of parchment paper, pressing them into the corners and up the sides. The paper should extend at least 2 inches above the rim. Don't worry about wrinkles or creases. Those imperfections become part of the rustic charm, creating beautiful rippled edges on the finished cake.
Crumple the parchment into a ball first, then smooth it out. This makes it pliable enough to conform to the pan without fighting you.
2
Beat the cream cheese
Place the room-temperature cream cheese in the bowl of a stand mixer fitted with the paddle attachment. Beat on medium speed until completely smooth and free of lumps, about 2 minutes. Scrape down the sides and bottom of the bowl thoroughly. Any lumps now will haunt you later.
Room temperature ingredients are non-negotiable here. Cold cream cheese will never blend smooth, and cold eggs can cause the batter to break and curdle.
3
Add sugar and salt
Add the sugar and salt to the cream cheese. Beat on medium speed until fully incorporated and the mixture looks lighter in texture, about 2 minutes. The sugar should be completely dissolved. Rub a small amount between your fingers. If you feel grains, keep mixing.
4
Incorporate the eggs
Add the eggs one at a time, beating on low speed after each addition just until incorporated. After the last egg, scrape down the bowl and beat for 30 seconds more. The mixture will be loose and golden. Resist any urge to whip air into it. We want density, not fluff.
5
Add cream and vanilla
With the mixer on low speed, slowly pour in the heavy cream in a steady stream. Add the vanilla. Mix just until combined. The batter should be pourable, like thick cream, completely homogeneous with no streaks.
6
Finish with flour
Sift the flour directly over the batter. Mix on the lowest speed until no dry spots remain, about 15 seconds. Stop the moment the flour disappears. Overmixing now develops gluten and creates a gummy texture. The batter will be thin and silky, nothing like traditional cheesecake batter.
Some recipes skip the flour entirely. It works. But the small amount here helps the center set just enough to slice cleanly while remaining impossibly creamy.
7
Strain and pour
Pour the batter through a fine-mesh strainer into the prepared pan, pressing any stubborn bits through with a spatula. This step catches any remaining lumps of cream cheese and removes chalazae from the eggs. Your finished cake will be flawlessly smooth.
8
Bake until dramatically burnished
Bake for 60 to 65 minutes. The top will puff dramatically, crack, and turn deep mahogany with blackened spots. The center will jiggle like a water balloon when you gently shake the pan. This is correct. The cake continues cooking as it cools. If you bake until the center is set, you've gone too far.
Every oven runs differently. Start checking at 55 minutes. The top should be deeply caramelized, almost alarmingly dark. Trust the process.
9
Cool completely
Transfer the pan to a wire rack and let the cake cool completely at room temperature, at least 3 hours. The dramatic puff will collapse as it cools. This is expected. The surface will wrinkle and the center will sink slightly, creating that signature sunken appearance.
10
Chill and serve
Refrigerate the cake, still in its pan, for at least 4 hours or overnight. When ready to serve, remove the springform ring and gently peel away the parchment. Transfer to your serving plate. Let it stand at room temperature for 30 to 60 minutes before slicing. The texture at cool room temperature is transcendent: creamy, dense, and yielding.
Chef Tips
•Full-fat cream cheese is essential. Reduced-fat versions contain stabilizers and gums that will ruin the texture. Buy the blocks, not the spreadable tubs.
•If your oven runs hot or you're nervous about the dark color, start at 425°F for 15 minutes to set the top, then reduce to 375°F for the remaining time. The result is slightly less dramatic but still delicious.
•For a subtle flavor variation worthy of the original, replace the vanilla extract with the seeds of one vanilla bean, or add a tablespoon of aged rum.
•This cheesecake pairs beautifully with macerated berries, but it needs nothing at all. Serve it naked and let the burnished top speak for itself.
•A hot, thin knife makes clean slices. Dip the blade in hot water, wipe it dry, and cut with a single confident stroke. Clean the blade between each cut.
Advance Preparation
•This cake must be made at least 4 hours ahead and benefits from overnight refrigeration. The texture improves as it sets.
•The finished cheesecake keeps refrigerated for up to 5 days, covered loosely with plastic wrap. The top softens slightly but remains delicious.
•Bring to room temperature 30 to 60 minutes before serving for the best texture. Cold from the refrigerator, it's too firm. At room temperature, it's transcendent.
•This cake does not freeze well. The high cream content causes textural changes upon thawing. Make it fresh.
Frequently Asked Questions
Nutrition Information
1 serving (about 153g)
Calories
464 calories
Total Fat
43 g
Saturated Fat
26 g
Trans Fat
0 g
Unsaturated Fat
15 g
Cholesterol
102 mg
Sodium
457 mg
Total Carbohydrates
32 g
Dietary Fiber
0 g
Sugars
25 g
Protein
9 g
Where cooking meets culture.
Culinary guides, cultural storytelling, and the editorial depth that makes cooking meaningful.