Chef Fai
Crispy Rice with Coconut Dip (Khao Tang Na Tang)
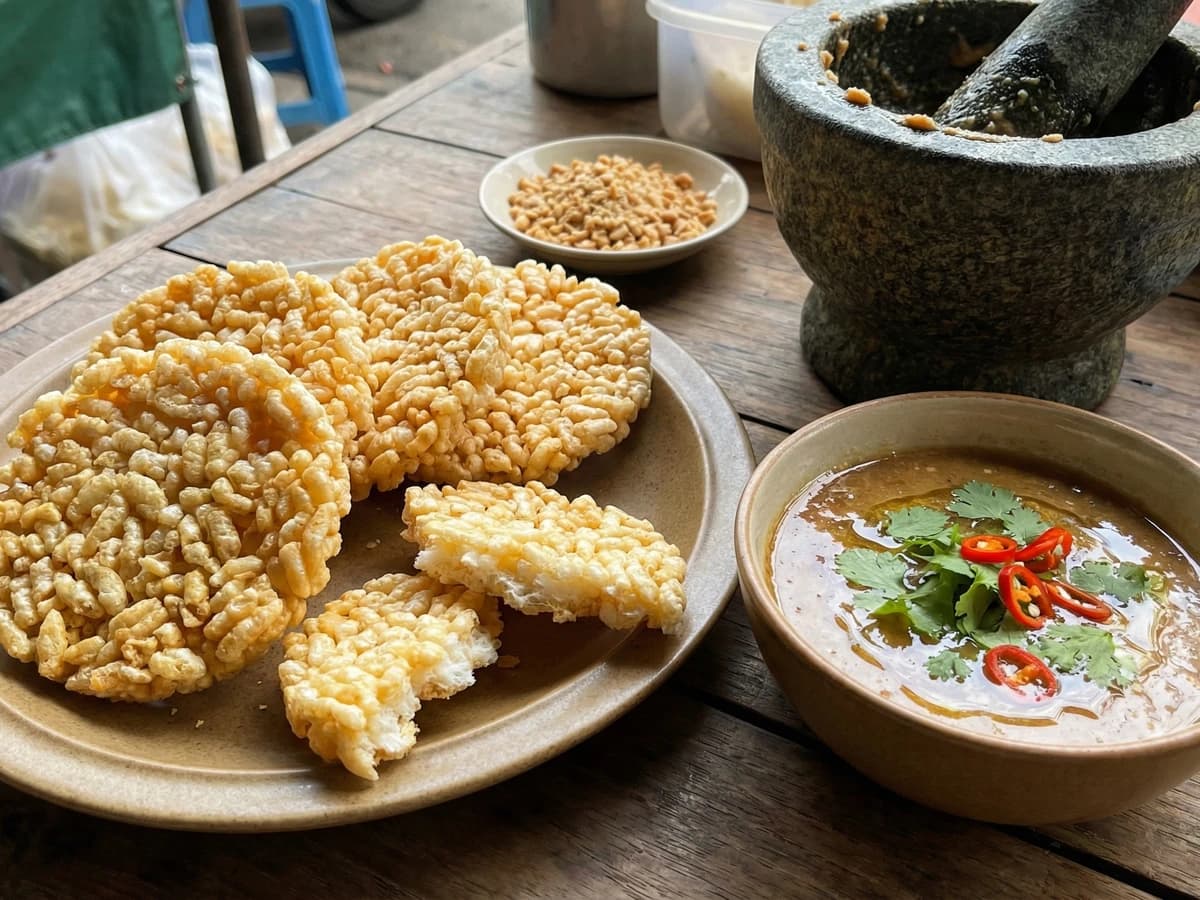
The kreung tam doesn't rest, not even for a snack. Pounded paste cracked into coconut cream, spooned over golden rice that shatters on contact. Four pillars in every bite.
A cooking platform built around craft, culture, and the stories behind what we eat.

Created by
Chinese spring rolls made Thai: fish sauce in the filling, not soy. Sweet plum dipping sauce built on the four pillars. Street food is single-dish mastery, and the po pia vendor proves it two hundred rolls a day.
Po pia tod is a Chinese dish that became Thai the moment someone swapped soy sauce for fish sauce in the filling. That one substitution tells you everything about how Thai cuisine absorbs outside influences: not by copying, but by running them through the system.
Ajarn always said the four pillars govern Thai food, even the dishes that came from somewhere else. The Teochew Chinese brought spring rolls to Bangkok two hundred years ago. Thai vendors kept the wrapper, kept the technique, and rewired the seasoning. Nam pla instead of soy. White pepper instead of five-spice. And the dipping sauce, that's where the Thai identity lives: sweet plum sauce (nam jim buoy) balanced with vinegar and chili, or nam jim wan with its palm sugar backbone. The filling is Chinese. The soul is Thai.
The wrapper is wheat flour, not rice paper. This matters. Rice paper is Vietnamese. Thai po pia use thin, square wheat-flour sheets that blister and shatter when they hit hot oil. The filling has to be cool and dry before you roll, because moisture is the enemy. Wet filling makes soggy spring rolls. Soggy spring rolls are an insult to every vendor who's spent twenty years perfecting the roll-and-fry.
Here's what separates a good po pia from a bad one: the filling is cooked and seasoned BEFORE it goes into the wrapper. You're not cooking the filling inside the roll. You're cooking the wrapper around an already-finished filling. The frying is about texture, not flavor. The flavor was built in the wok. If your filling tastes flat before you roll, no amount of hot oil will save it. Season it right. Let it cool. Roll it tight. Fry it once. That's the method.
Po pia (ปอเปี๊ยะ) arrived in Thailand with Teochew Chinese immigrants who settled in Bangkok's Yaowarat district (Chinatown) during the late 18th and 19th centuries. The Thai adaptation replaced soy-based seasonings with fish sauce and introduced distinctly Thai dipping sauces like nam jim buoy (sweet plum sauce) and nam jim wan (sweet chili sauce), transforming a Southern Chinese snack into one of Thailand's most ubiquitous street foods. The fresh, unfried version (po pia sod) coexists alongside the fried version at most vendors, but po pia tod outsells it roughly ten to one at Bangkok street stalls.
Quantity
1 pack (about 25 sheets)
8-inch square, thawed if frozen
Quantity
100g
soaked in warm water for 10 minutes, drained, and cut into 3-inch lengths
Quantity
250g
Quantity
3 cloves
minced
Quantity
100g
finely shredded
Quantity
1 medium
julienned
Quantity
5
soaked, drained, and finely sliced
Quantity
1 tablespoon
Quantity
1 tablespoon
Quantity
1 teaspoon
Quantity
1 teaspoon
Quantity
1
beaten, for sealing wrappers
Quantity
for deep frying, at least 3 inches deep
Quantity
150ml
Quantity
1 tablespoon
Quantity
1
finely sliced
Quantity
for serving
| Ingredient | Quantity |
|---|---|
| spring roll wrappers (phaen po pia)8-inch square, thawed if frozen | 1 pack (about 25 sheets) |
| glass noodles (wun sen)soaked in warm water for 10 minutes, drained, and cut into 3-inch lengths | 100g |
| minced pork | 250g |
| garlic (kratiam) for fillingminced | 3 cloves |
| cabbage (kalampli)finely shredded | 100g |
| carrotjulienned | 1 medium |
| dried wood ear mushrooms (het hu nu)soaked, drained, and finely sliced | 5 |
| fish sauce (nam pla) | 1 tablespoon |
| oyster sauce | 1 tablespoon |
| white pepper (prik thai khao) | 1 teaspoon |
| granulated sugar | 1 teaspoon |
| eggbeaten, for sealing wrappers | 1 |
| vegetable oil | for deep frying, at least 3 inches deep |
| sweet plum sauce (nam jim buoy) | 150ml |
| rice vinegar | 1 tablespoon |
| bird's eye chili (prik khi nu)finely sliced | 1 |
| fresh lettuce leaves (optional) | for serving |
Heat a tablespoon of oil in a wok over high heat. Add the minced garlic, stir for five seconds until fragrant, then add the pork. Break it apart and cook until no pink remains, pressing it against the wok to get some color. You want the pork dry and crumbly, not swimming in liquid. Wet pork means soggy rolls. Add the cabbage, carrot, and wood ear mushrooms. Toss for two minutes. The cabbage should wilt but keep some structure. Add the soaked and drained glass noodles. Toss everything together.
Add the fish sauce, oyster sauce, sugar, and white pepper. Toss once. Taste. The filling should be well-seasoned on its own, slightly salty, a little sweet, with the warmth of white pepper. If it tastes bland at this stage, add more fish sauce. Nobody ever ruined po pia by having a filling that tasted too good. Transfer to a plate and spread it out to cool COMPLETELY. This is not optional. Hot filling creates steam inside the wrapper. Steam makes the roll blow out during frying. Patience.
Pour the sweet plum sauce into a small bowl. Add the rice vinegar and sliced bird's eye chili. Stir. Taste. The sauce should be sweet first, then sour from the vinegar, then a slow chili burn. This is the four pillars at work in a condiment: the plum sauce handles sweet and sour, the chili handles heat, and the nam jim buoy itself is seasoned with salt. The condiment completes what the filling started. Without it, po pia is just a fried roll. With it, it's Thai.
Place one wrapper on a dry surface with a corner pointing toward you, diamond-style. Place about two tablespoons of cooled filling in a line across the lower third. Fold the bottom corner up and over the filling, tuck it tight. Fold in both side corners toward the center. Now roll upward, keeping it snug, like you're rolling a very tight burrito. Brush the top corner with beaten egg to seal. Press gently. Set seam-side down on a tray. The roll should be compact. If it feels loose, it'll unravel in the oil.
Heat the oil in a wok or deep pan to 170°C (340°F). Test with a small piece of wrapper: it should sizzle immediately and float. Lower the spring rolls in gently, seam-side down, four or five at a time. Don't crowd the wok. Crowding drops the oil temperature and gives you pale, greasy rolls instead of golden, shattering ones. Fry for 3 to 4 minutes, turning once, until the wrapper is deep golden-brown and blistered. The sound changes from aggressive sizzling to a quieter crackle when they're done. Lift out with a spider strainer and drain on a wire rack, not paper towels. Paper towels trap steam against the bottom and make it soggy.
Slice each roll on the diagonal. One clean cut through the middle at an angle so the filling shows. Arrange on a plate lined with fresh lettuce leaves. Serve with the plum dipping sauce on the side. Po pia tod waits for nobody. The second they start cooling, the crispness starts dying. Fry, cut, serve, eat. That's the rhythm. Every market vendor in Bangkok knows this: spring rolls are sold the moment they leave the oil. There is no holding station. There is no warming drawer. There's the wok and there's your hand.
1 serving (about 200g)
Culinary guides, cultural storytelling, and the editorial depth that makes cooking meaningful.
Discover Culinary ExplorerChef Fai
The kreung tam doesn't rest, not even for a snack. Pounded paste cracked into coconut cream, spooned over golden rice that shatters on contact. Four pillars in every bite.
Chef Fai
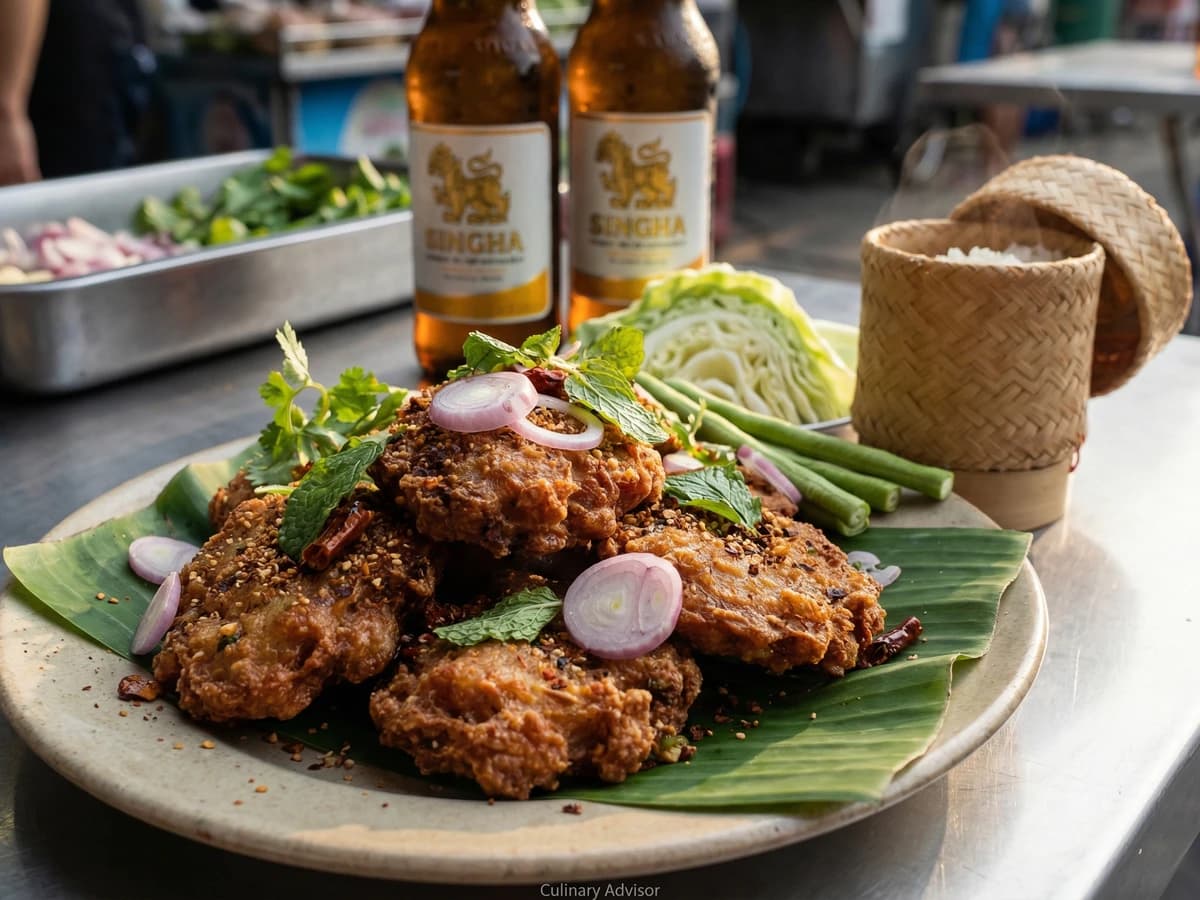
Isan's larb principles pressed into patties and fried golden: fish sauce for salt, lime for sour, khao khua for structure and crunch, prik pon for heat. No sugar. That's the rule that separates Isan from everything else.
Chef Fai
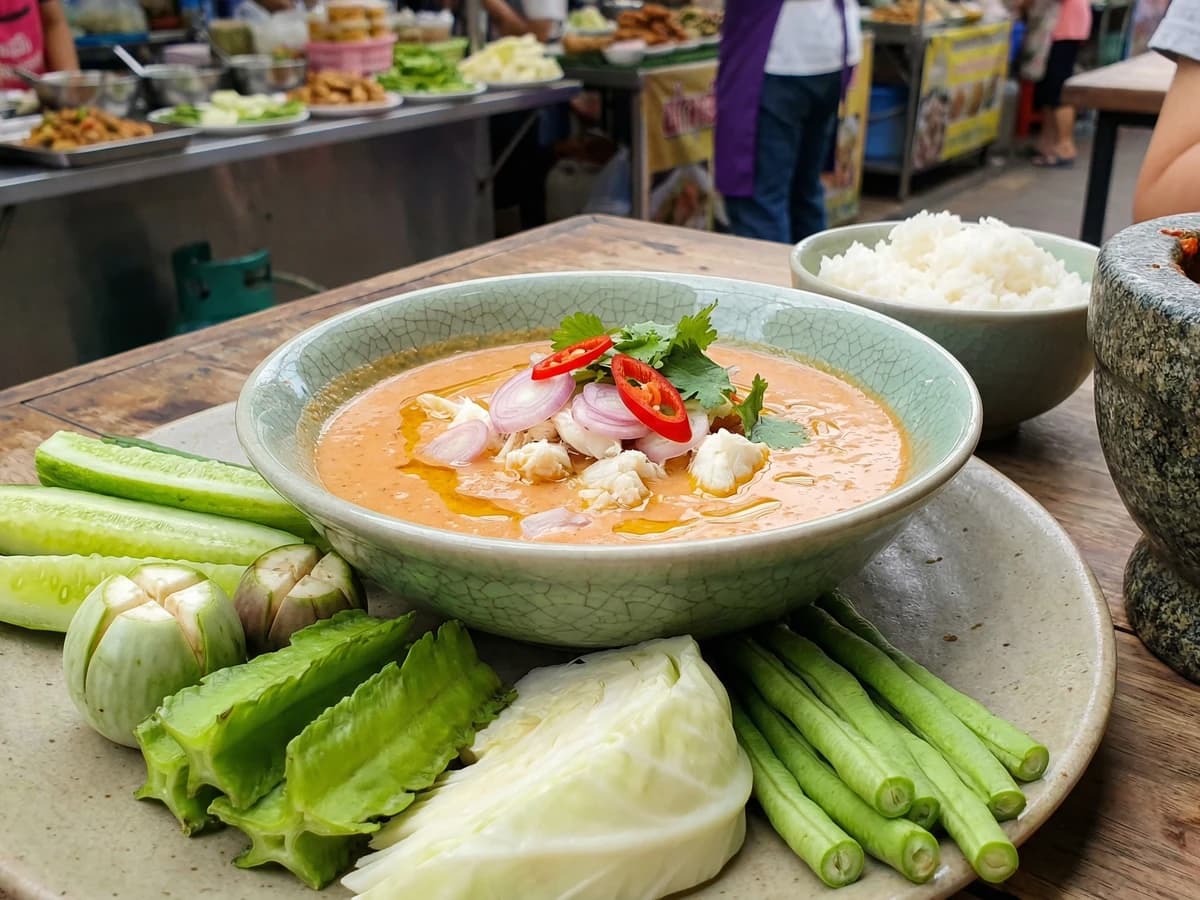
A kreung tam pounded in the krok, dissolved into cracked coconut cream, sweet crab folded through at the end. All four pillars balanced in a dip so silky you'll forget it started in a granite mortar. Central Thai home cooking at its most principled.

Chef Fai
Twenty-four meatballs, eight bamboo skewers, a charcoal grill the size of a shoebox, and one pot of nam jim built on the four pillars. The simplest vendor setup in Thailand proves the system works everywhere.