
Chef Takumi
Arare (あられ, small mochi rice crackers)
Arare begins as firm mochi, cut small and dried until patient enough to puff. Brush it with soy at the end, and the little hailstones turn crisp and savory.
A cooking platform built around craft, culture, and the stories behind what we eat.
Created by
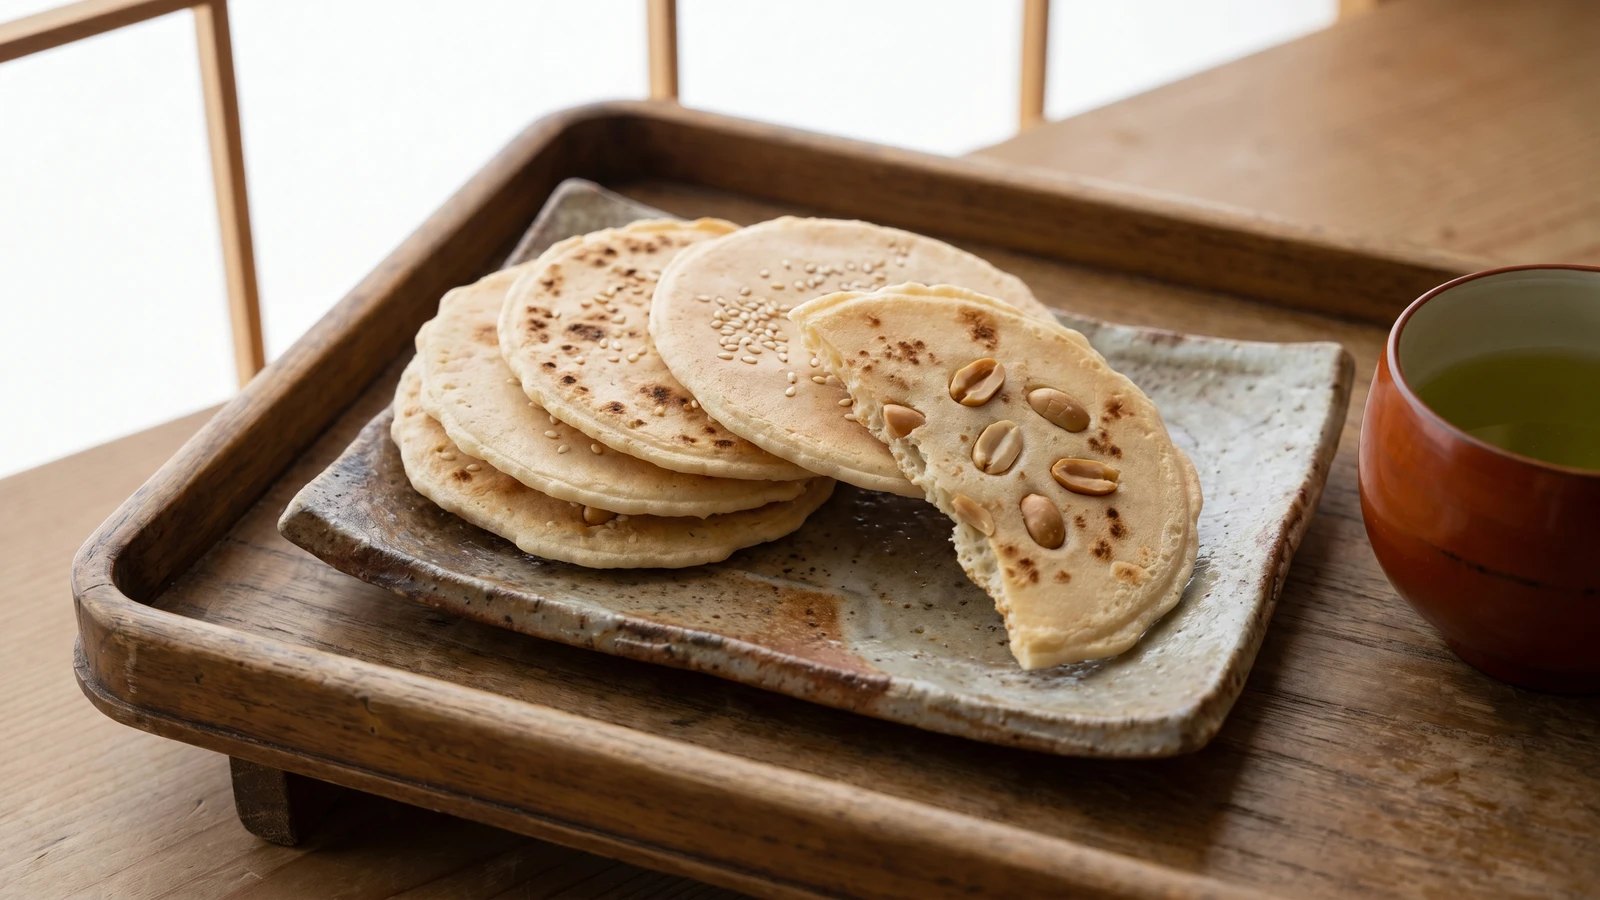
Nanbu senbei ask for plain things: flour, water, salt, heat, and a firm press. The prize is the crisp round cracker with its delicate lacy mimi edge.
Nanbu senbei look like they need a special inheritance: an iron mold, a practiced hand, perhaps a small committee of ancestors watching from the corner. They don't. The real thing begins with wheat flour, water, salt, and enough patience to let the dough rest before it meets the iron.
This is not the rice senbei many people know. It is a northern wheat cracker, spare and direct, pressed with sesame or peanuts and baked until dry, crisp, and faintly browned. The one detail that decides it is thickness. Too thick, and the center eats like hard bread. Too thin, and it scorches before the middle dries. Press it firmly and evenly, and the edge spreads into the little lace called mimi, the ear. A good name. It listens for the cook.
We eat these as a plain sweetless snack, with tea, packed away for later, or broken into soup in the Nanbu country when the cracker is made for that purpose. Here, make the everyday sesame-and-peanut kind. Nothing hidden, nothing rich. The pleasure is the clean snap of wheat, the toast of the seeds, and that frill at the edge telling you the iron was hot enough.
Nanbu senbei belong to the old Nanbu domain of northern Honshū, especially the area now shared by Aomori and Iwate, where wheat and buckwheat were more important than polished rice in everyday food. Hachinohe in Aomori is closely associated with the cracker, and the sturdier otsuyu-senbei made there is used in senbei-jiru, a soup recognized as local fare. The round iron molds and the name preserve the link to the Nanbu clan, whose territory shaped the foodways of the region through the Edo period.
Quantity
250g
Quantity
1/2 teaspoon
Quantity
1 teaspoon
Quantity
155ml, plus 1 tablespoon if needed
Quantity
2 tablespoons
Quantity
40g
split in halves
Quantity
a little
for wiping the mold or pan
| Ingredient | Quantity |
|---|---|
| all-purpose flour | 250g |
| fine sea salt | 1/2 teaspoon |
| sugar (optional) | 1 teaspoon |
| water | 155ml, plus 1 tablespoon if needed |
| toasted white sesame seeds | 2 tablespoons |
| roasted unsalted peanutssplit in halves | 40g |
| neutral oilfor wiping the mold or pan | a little |
Put the flour, salt, and sugar, if using, in a bowl and stir them together. Add the water gradually, mixing with chopsticks or your fingers until no dry flour remains. The dough should be firm and a little ragged, not soft like bread dough. A dry dough bakes crisp; a wet one steams inside first and takes too long to dry.
Knead the dough for three to four minutes, just until smooth, then cover it and rest it for twenty minutes. This rest is not idleness. The flour finishes drinking the water and the gluten relaxes, so the dough presses thinly instead of springing back like a stubborn cushion.
Divide the dough into 12 pieces, about 34g each, and roll each one into a ball. Flatten each ball into a puck about 3 inches wide. Keep the pieces covered while you work so the surface doesn't dry before it reaches the iron.
Press a pinch of sesame seeds and a few peanut halves onto one side of each puck. Press firmly enough that they sit in the dough, not on top of it. Seeds left loose will scorch or fall away before the cracker has finished baking.
Heat a Nanbu senbei mold over medium heat until a drop of water flicked on the surface jumps and disappears quickly. Wipe it with the thinnest film of oil, then wipe again with a cloth. Too much oil fries the surface; you want dry heat and clean browning.
Set one dough puck in the center of the hot mold, topping side up, close the mold, and press firmly for 20 seconds. Bake for about 2 minutes, turning the mold once if it heats unevenly, then open and check. The cracker should be pale gold with a dry surface and a thin frill around the edge. Continue 30 to 60 seconds more if the center still looks damp.
Transfer the cracker to a rack and repeat with the remaining dough. If the crackers cool leathery instead of crisp, put them in a 150 C oven for 8 to 10 minutes, then cool again. Crispness comes from driving out moisture, not from browning them darker.
Let the senbei cool completely before storing. They should snap cleanly at the edge and taste gently toasted, with the sesame and peanut clear against the wheat. Store only once fully cool, because trapped warmth softens the crackers you worked to dry.
1 serving (about 33g)
Culinary guides, cultural storytelling, and the editorial depth that makes cooking meaningful.
Discover Culinary ExplorerChef Takumi
Arare begins as firm mochi, cut small and dried until patient enough to puff. Brush it with soy at the end, and the little hailstones turn crisp and savory.

Chef Takumi
Chocolate shu cream is judged twice: first by the hollow shell, then by the custard. Dry the dough properly, choose chocolate with backbone, and the little puff behaves.

Chef Takumi
Start with the lightest choux: tiny unfilled puffs, properly dried over heat, loosened with eggs, and baked until the shell lifts hollow under a coat of pearl sugar.

Chef Takumi
Zarame senbei is not a cookie wearing a Japanese coat. It is a rice cracker, dried well, baked crisp, brushed with soy, then caught while hot with coarse sugar.