Culinary Explorer

A cooking platform built around craft, culture, and the stories behind what we eat.
Discover Culinary Explorer
Lotus Root Kinpira (れんこんのきんぴら, Renkon no Kinpira)

Lotus Root Kinpira (れんこんのきんぴら, Renkon no Kinpira)

Created by

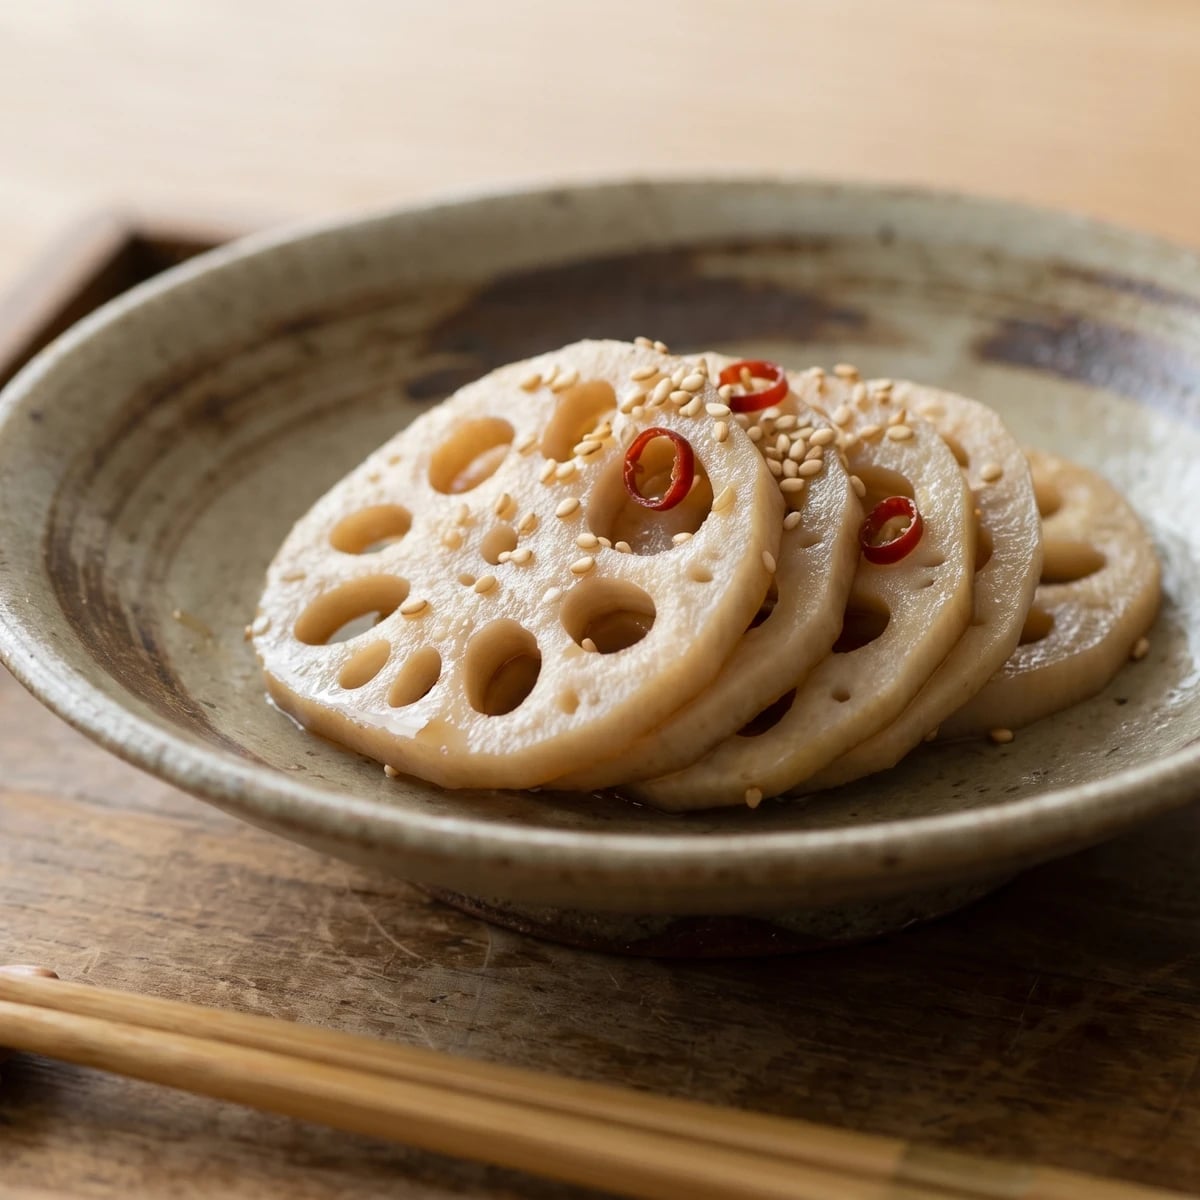
Lotus root is all clean cut and crisp bite here: thin coins warmed in sesame oil, glossed with soy and sweetness, and finished before the snap has a chance to leave.

Side Dishes
Japanese
Weeknight
Make Ahead
Meal Prep
15 min
Active Time
10 min cook25 min total
Yield4 side servings

Renkon announces itself when the knife goes through it: a white wheel pierced with clean holes, crisp enough to sound against the board. It is at its prime, shun, from autumn into winter, and in those months it needs little ceremony. Thin coins, sesame oil, soy, a little sweetness, and a pinprick of chili are enough.

Kinpira is not frantic cooking. We warm the slices first in oil so the surface dries and takes on a nutty scent, then let a small amount of seasoning reduce around them. The stockpot can stay quiet here. This dish belongs to oil, shōyu, mirin, and sugar, worked quickly until the lotus root shines.

The one detail is the cut. Two to three millimeters gives you enough surface for seasoning and enough body for the snap. Cut thicker and the soy sits outside. Cut thinner and the vegetable gives up its clean bite. Let the knife do the seasoning before the pan ever sees it.

This is everyday okazu, the side dish that gives rice something lively to answer, and it keeps beautifully for bentō or tomorrow's lunch. Nothing hidden. Good lotus root, briefly soaked, dried properly, and cooked without fuss will do almost all the work.

Kinpira takes its name from Kinpira Jōruri, an Edo-period puppet-theater cycle featuring the powerful warrior Sakata Kinpira, son of the folk hero Kintarō. The name became attached especially to thin-cut root vegetables such as gobō, or burdock root, fried and seasoned with soy sauce, sugar, and chili for a bold flavor and resilient bite. Renkon, lotus root, carries another Japanese association: its open holes made it an auspicious food for New Year, a way to see clearly into the year ahead.

The technique, the tradition, and the story behind every dish.

Discover Culinary Explorer

Ingredients

renkon (lotus root)

Quantity

300g

trimmed, lightly peeled, and sliced into 2 to 3 mm coins

cold water

Quantity

2 cups

for soaking

rice vinegar (optional)

Quantity

1 tablespoon

for the soaking water

toasted sesame oil

Quantity

1 tablespoon

dried red tōgarashi chili or ichimi tōgarashi

Quantity

1 dried chili or 1/4 teaspoon

seeds removed and sliced if using dried chili

sake

Quantity

1 tablespoon

mirin

Quantity

1 tablespoon

koikuchi shōyu (standard Japanese soy sauce)

Quantity

1 tablespoon

sugar

Quantity

1 teaspoon

toasted white sesame seeds

Quantity

2 teaspoons

Equipment Needed

  • Wide skillet or shallow frying pan
  • Saibashi (long cooking chopsticks), or a wooden spatula
  • Mandoline slicer, optional, for even coins
  • Fine-mesh sieve or colander

Instructions

  1. 1

    Slice the renkon

    Trim the ends and peel the renkon lightly, then slice it into coins 2 to 3 mm thick. If the section is very wide, halve it lengthwise first so the pieces are easier to eat. Keep the slices even: the seasoning is brief, and even thickness lets every coin stay crisp while still taking on the soy.

    This is the small measurement that decides the dish. Too thick and the flavor stays outside; too thin and the renkon loses the snap that makes it worth cooking.
  2. 2

    Soak and dry

    Stir the rice vinegar into the cold water and slide in the slices for 5 minutes, swishing once. This washes away surface starch and keeps the flesh pale without stealing its clean sweetness. Drain, rinse quickly, and dry the slices well on a towel; wet renkon sheds water in the pan, and the oil cannot do its work.

  3. 3

    Mix the seasoning

    Combine the sake, mirin, shōyu, and sugar in a small bowl, stirring until the sugar mostly dissolves. Have this ready before the pan is hot. Kinpira moves quickly, and measuring over the stove leaves the first slices cooking while the last ones wait.

  4. 4

    Bloom the chili

    Set a wide skillet over medium heat. Add the sesame oil and tōgarashi rings, and warm just until the chili darkens a shade and the oil smells nutty, about 30 seconds. If the chili blackens, start over. Burned chili is not character, it is bitterness.

  5. 5

    Cook the renkon

    Add the drained renkon and toss to coat. Spread the slices into a mostly single layer and cook for 2 to 3 minutes, stirring with saibashi, long cooking chopsticks, or a wooden spatula, until the cut edges turn slightly translucent and the slices click lightly against the pan. This first oiling helps the vegetable keep its bite once the seasoning goes in.

  6. 6

    Glaze and reduce

    Pour in the seasoning, toss well, and let it bubble briskly for 2 to 3 minutes until the pan is almost dry and each slice has a soy-dark gloss. Stop while there is still a faint sheen, not a puddle. Cook longer and the sugar tightens; cook shorter and the flavor stays in the pan instead of on the renkon.

    The point is not to make sauce. The point is to make the seasoning cling thinly, so the lotus root stays crisp and the glaze reads clean.
  7. 7

    Finish and rest

    Take the pan off the heat, scatter in the sesame seeds, and toss once. Let the kinpira rest for 10 minutes before serving. It tastes best warm or at room temperature because the seasoning settles as it cools, and the bite stays clearer than if you rush it straight from the pan. Mound it small and leave the plate some quiet space.

Chef Tips

  • Choose renkon that feels heavy and firm, with pale cut ends and no sour smell from the holes. If the cut faces are gray or soft, change the dish. Nothing hidden under soy will make tired lotus root taste fresh.
  • A mandoline makes even coins, but a steady knife is enough. This is not surgery, whatever the cookbooks imply. What matters is consistency, because the pan gives no special mercy to the thick slice.
  • Do not soak the slices for half a day. Five minutes in lightly vinegared water is enough to wash the starch and protect the color; longer soaking steals the clean sweetness.
  • No dashi is needed here. Kinpira is one of the places where the stockpot rests, and the vegetable, oil, soy, and sweetness speak plainly.
  • Serve it in a small mound, not spread flat. Odd corners and visible holes are part of the pleasure, and a little empty space makes the dish look calmer. Leave it room.

Advance Preparation

  • The seasoning can be mixed a day ahead and kept covered in the refrigerator. Stir before using, because the sugar settles.
  • Sliced renkon can sit in the vinegared water for up to 1 hour in the refrigerator. Drain and dry it well before cooking, or the oil will not catch the surface properly.
  • Finished kinpira keeps for 3 days refrigerated. Serve it at room temperature or warm it gently in a skillet; hard reheating softens the snap.

Frequently Asked Questions

Nutrition Information

1 serving (about 80g)

Calories
115 calories
Total Fat
4 g
Saturated Fat
1 g
Trans Fat
0 g
Unsaturated Fat
3 g
Cholesterol
0 mg
Sodium
270 mg
Total Carbohydrates
17 g
Dietary Fiber
4 g
Sugars
3 g
Protein
3 g

Note: Chef personas and recipes are created with AI assistance. Cook with care: follow safe food-handling practices, check doneness with a thermometer when needed, and adapt for allergies and your kitchen.

Where cooking meets culture.

Culinary guides, cultural storytelling, and the editorial depth that makes cooking meaningful.

Discover Culinary Explorer

More from Vegetable Nimono & Kinpira

Browse the full collection