
Chef Jeong-sun
Bori-ppang (보리빵, Barley Steamed Bread)
A plain Korean market bread of barley flour and makgeolli, steamed into small dense rounds with a measured lift from yeast, gentle sweetness, and the earthiness older cooks knew too well.
A cooking platform built around craft, culture, and the stories behind what we eat.
Created by
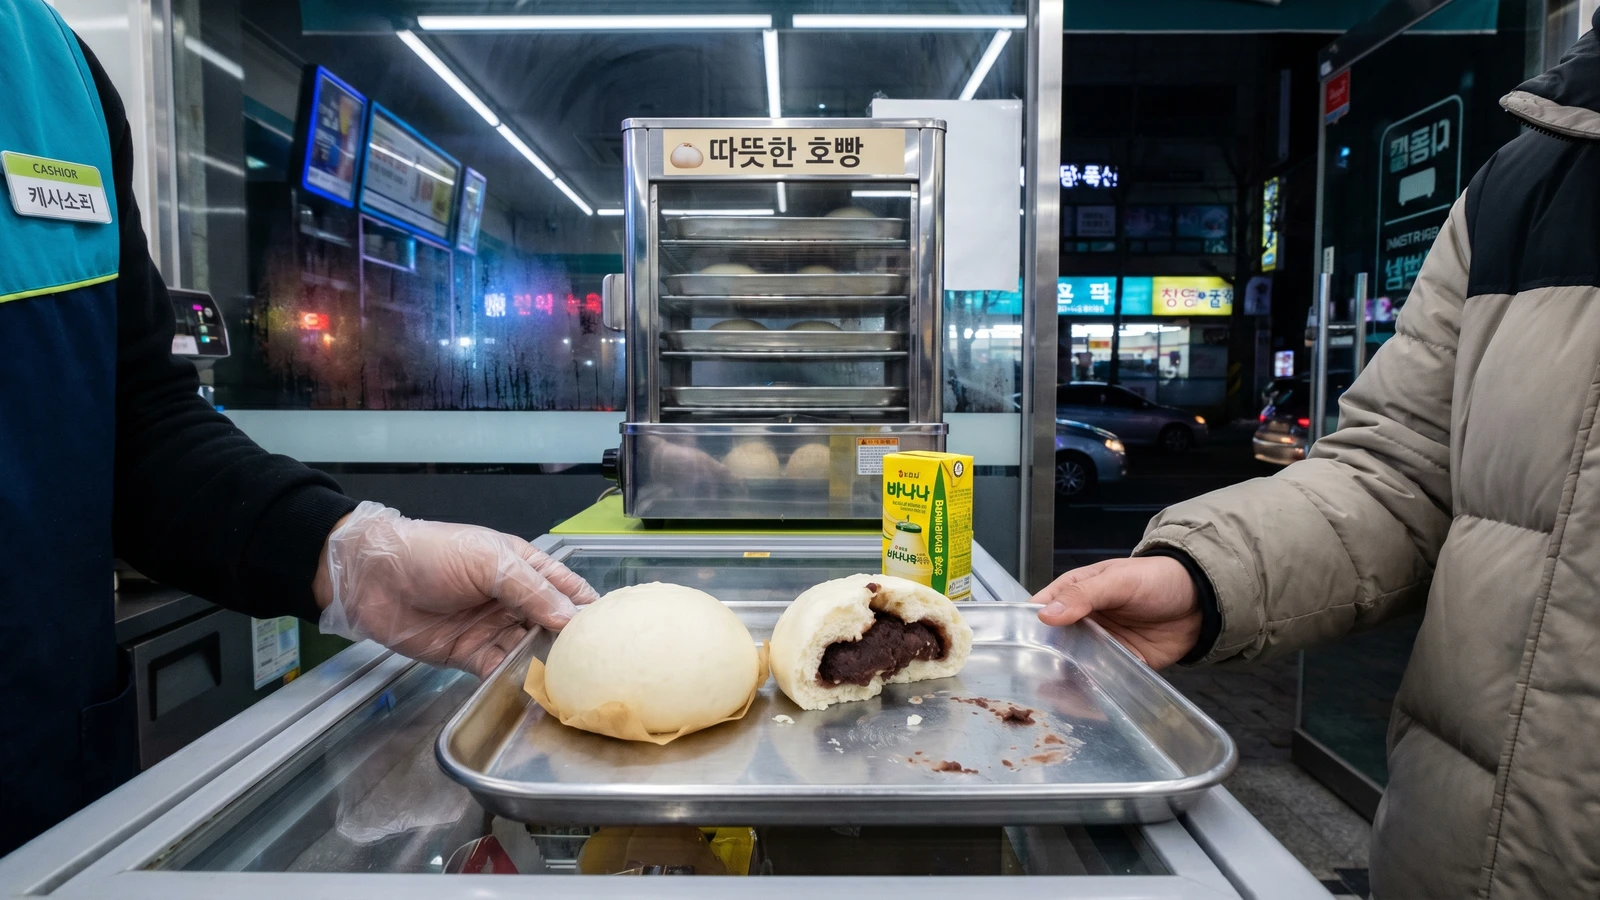
A winter convenience-store bun made at home: soft white dough wrapped tight around smooth sweet red bean paste, steamed until pillowy, then eaten too hot because waiting is not its nature.
Hoppang belongs to winter convenience stores: the glass warmer by the register, a student counting coins, a commuter buying one before the bus comes. It is not old court food and it doesn't need that costume. It is the modern cousin of jjinppang (찐빵, steamed bun), smoother, quicker, and made for cold hands.
The whole bun lives or dies by three small things: thick red bean filling, smooth dough, and a tight seal. If the danpat (단팥, sweetened red bean) is loose, it leaks. If the dough is under-kneaded, the skin looks rough and tears. If the seam is weak, the bun opens like it has something to confess. Notebook 19 says 45g filling to 65g dough. That one behaves.
I won't tell you this is difficult. It isn't. But you have to work cleanly and measure, because a bun this plain shows every mistake. 시대가 바뀌면 음식도 바뀌어야 해요. When times change, food must change too, so we use a no-ferment baking powder dough and a home steamer. What we don't change is the care: seal it well, steam it through, and eat it while it still warms your fingers.
Hoppang became a winter fixture after Samlip introduced its packaged hot bun in 1971, adapting market-style jjinppang for home steaming and shop warmers. The name is commonly explained from the sound of blowing on a hot bun, ho-ho, joined to ppang (빵, bread), and it soon became common speech beyond the original product. Its sweet red bean center belongs to Korea's long affection for pat (팥, red bean), but the hoppang itself is modern convenience food, not a palace dish.
Quantity
360g
chilled
Quantity
300g, plus 1 tablespoon
extra for dusting
Quantity
35g
Quantity
8g
Quantity
2g
Quantity
170ml
about 40 C
Quantity
18g
Quantity
8 squares, about 3 inches / 8 cm each
| Ingredient | Quantity |
|---|---|
| thick smooth sweet red bean paste (danpat or pat-anggeum)chilled | 360g |
| all-purpose flourextra for dusting | 300g, plus 1 tablespoon |
| sugar | 35g |
| baking powder | 8g |
| fine sea salt | 2g |
| warm waterabout 40 C | 170ml |
| neutral oil | 18g |
| parchment squares | 8 squares, about 3 inches / 8 cm each |
Divide the chilled sweet red bean paste into 8 portions of 45g each and roll them into balls. If the paste slumps instead of holding its shape, cook it in a small pan over medium-low heat for 6 to 8 minutes, stirring, until a spoon dragged through it leaves a clear path for 2 seconds. Cool it completely before shaping. Loose filling leaks, and no careful pleat can save it.
Whisk together the flour, sugar, baking powder, and salt in a bowl. Add the warm water and oil, then stir until the dough gathers into rough pieces. The water is warm to help the flour soften, not to ferment anything; this is the quick home version, closer to winter hoppang than a long-risen jjinppang.
Knead the dough on the counter for 6 to 7 minutes, using only a light dusting of flour if it sticks badly. It should become smooth, soft, and barely tacky. Smooth dough makes smooth skin, and hoppang is not kind to lazy kneading. Cover and rest it for 20 minutes so the flour hydrates and the dough rolls without shrinking.
Divide the rested dough into 8 pieces, about 65g each. Keep them covered while you work. Roll one piece into a 10 to 11 cm circle, leaving the center a little thicker than the edge. The thicker center carries the filling; the thinner edge seals without becoming a lump at the bottom.
Place one 45g ball of red bean paste in the center. Gather the dough up around it, pleating as you go, then pinch the seam shut firmly. Turn the bun seam-side down on a parchment square and cup your hand around it, rolling lightly to make a round shape. Do not trap a large pocket of air over the filling, because it expands and wrinkles the bun.
Let the shaped buns rest for 10 minutes while you bring 5 cm of water to a steady simmer in a steamer pot. Wrap the lid in a clean kitchen towel and tie the ends up away from the burner so condensation does not drip onto the buns. This corner is safe to modernize: a metal steamer, bamboo steamer, or electric steamer all work. The seal and the dough thickness are the parts you don't shorten.
Set the buns in the steamer at least 3 cm apart. Cover and steam over medium-high heat for 12 minutes. Do not lift the lid early. The dough needs steady heat to set, and a sudden chill makes the surface collapse. Turn off the heat and wait 3 minutes before opening the lid.
Lift the buns out with their parchment bottoms. The surface should look smooth and matte, and the dough should spring back when touched lightly. Eat them while the red bean is warm and soft. This is not a plated dessert. It belongs in two hands, on a cold walk home.
1 serving (about 110g)
Culinary guides, cultural storytelling, and the editorial depth that makes cooking meaningful.
Discover Culinary ExplorerChef Jeong-sun
A plain Korean market bread of barley flour and makgeolli, steamed into small dense rounds with a measured lift from yeast, gentle sweetness, and the earthiness older cooks knew too well.

Chef Jeong-sun
A porous, gently sour rice cake fermented with makgeolli and steamed until tender, the summer tteok made ahead for special tables because it keeps better than most rice cakes.

Chef Jeong-sun
Soft wheat buns from Gangwon's Anheung road stalls, risen with makgeolli for a faint tang and filled with chunky red bean, the comfort food you eat hot before the crumb firms.

Chef Jeong-sun
Soft wheat buns twisted into little flowers, plain enough to let a peppery stir-fry speak, but measured carefully so each one opens cleanly in the steamer.