Culinary Explorer

A cooking platform built around craft, culture, and the stories behind what we eat.
Discover Culinary Explorer
Grahamsbrod

Grahamsbrod

Created by Chef Freja

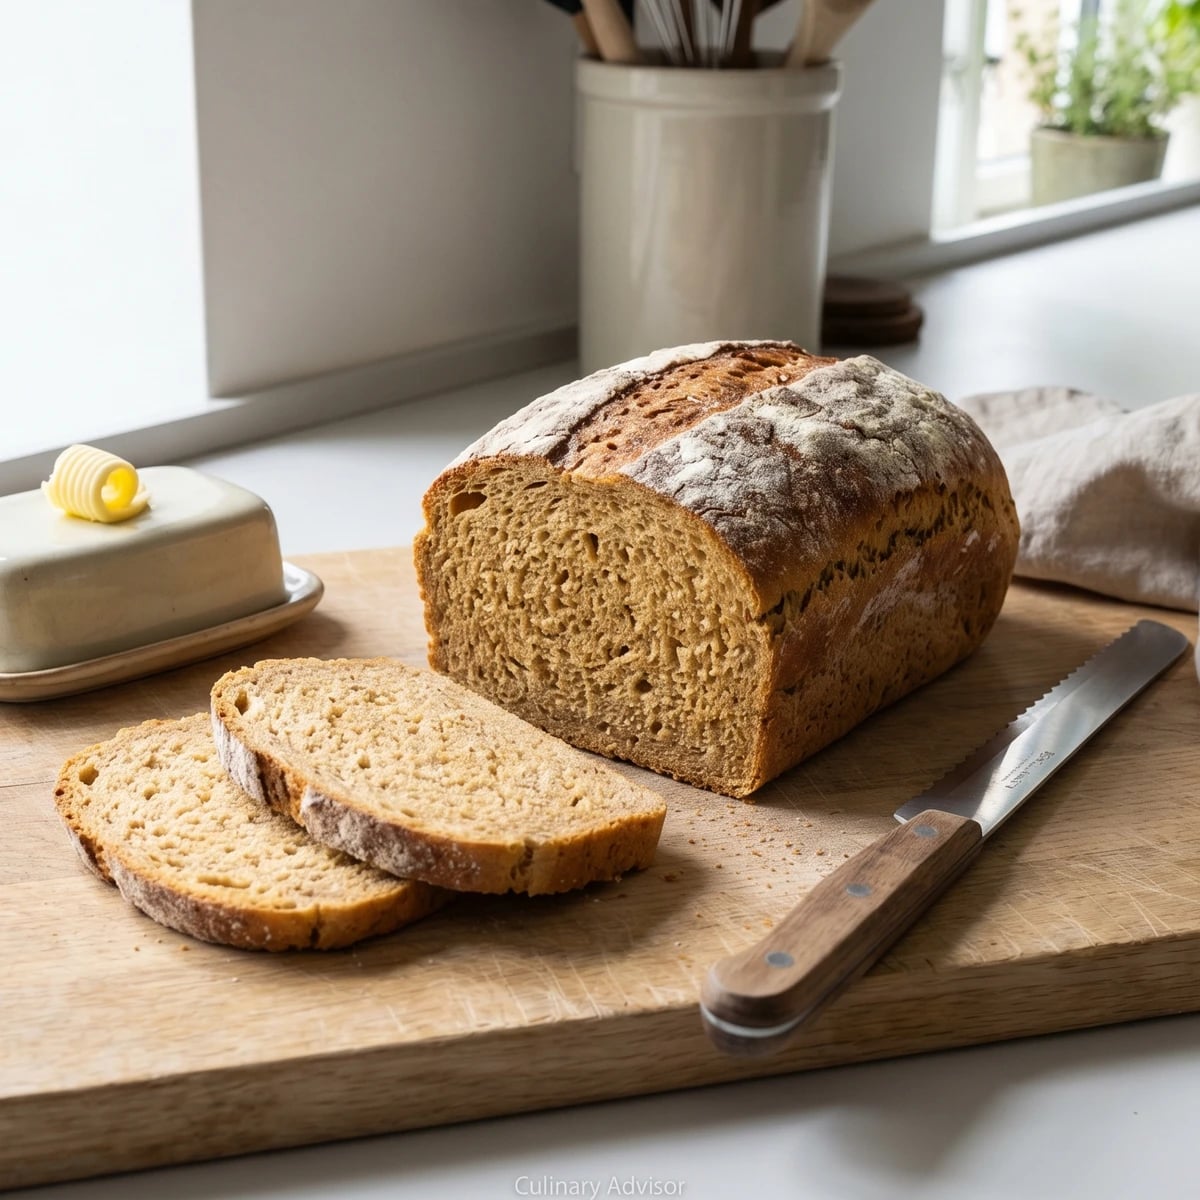
Danish whole wheat bread from coarse grahamsmel, honey-sweetened and golden, baked in a loaf pan and sliced for school lunches, open sandwiches, and the quiet mornings that hold a household together.

Breads
Danish
Weeknight
Meal Prep
Comfort Food
15 min
Active Time
40 min cook2 hr 45 min total
Yield1 loaf, about 12 slices

August in Denmark is the sound of bicycle bells again. School starts, the mornings cool, and kitchens across the country turn back to the rhythm of the madpakke, the packed lunch that every Danish child carries to school. At the center of that lunch box, more often than not, is grahamsbrod.

Grahamsbrod sits between rugbrod and white bread in the Danish bread order. It's lighter than rye, more substantial than franskbrod, and it has a sweetness from honey that children love and adults never quite outgrow. The flour is grahamsmel, a coarse whole wheat ground with the bran and germ intact, and it gives the bread its golden color, its nutty chew, and the reason it keeps well for days. You slice it for smorrebrod. You toast it for breakfast with butter and cheese. It's the bread that's always there.

This is a simple yeast bread, and I want you to feel ready before you begin. You'll knead it until the dough feels alive under your hands, let it rise twice, and bake it until the crust is firm and the kitchen smells like warm wheat and honey. Pay attention to the kneading: whole wheat dough needs more time than white because the bran cuts through the gluten strands as they form. Ten minutes, not five. That patience is the difference between a loaf that holds together beautifully when you slice it and one that crumbles on the cutting board. You'll know when it's right.

Grahamsmel takes its name from Sylvester Graham, an American minister whose 1830s crusade for whole grain flour reached Scandinavia through the health reform movements of the mid-nineteenth century. Danish millers adopted the coarse grind, but Danish bakers made the bread their own, adding honey and butter where Graham had insisted on plain austerity. By the early 1900s, grahamsbrod had become the everyday loaf of the Danish household, softer and sweeter than rugbrod, carried in school lunch boxes and sliced for afternoon smorrebrod at kitchen tables from Copenhagen to the smallest towns in Jutland.

The technique, the tradition, and the story behind every dish.

Discover Culinary Explorer

Ingredients

grahamsmel (coarse whole wheat flour)

Quantity

350g

strong white bread flour

Quantity

150g

instant dry yeast

Quantity

7g

fine sea salt

Quantity

2 teaspoons

runny honey

Quantity

3 tablespoons

lukewarm water

Quantity

300ml

unsalted butter

Quantity

30g

melted and cooled slightly

sunflower seeds (optional)

Quantity

50g

Equipment Needed

  • Loaf pan, 25cm by 13cm
  • Wire cooling rack
  • Large mixing bowl

Instructions

  1. 1

    Mix and knead the dough

    Combine the grahamsmel, bread flour, yeast, and salt in a large bowl. Stir the honey into the lukewarm water until it dissolves, then pour it into the flour along with the melted butter. Bring everything together with a wooden spoon until you have a rough, shaggy mass, then turn it out onto a lightly floured surface. Knead for a full ten minutes. This matters: whole wheat dough needs more time than white because the bran in the flour cuts through the gluten strands as they develop. After five minutes it will still feel rough and resistant. After ten, it will be smooth, elastic, and slightly tacky to the touch. That transformation is the gluten building the structure that holds the loaf together.

    If the dough sticks to the counter, resist adding more flour. Use a damp hand instead. Extra flour works into the crumb and makes it dry and tight.
  2. 2

    First rise

    Place the dough in a lightly oiled bowl, turn it once so the surface is coated, and cover with a damp cloth. Leave it somewhere warm for one hour, or until it has doubled in size. The honey feeds the yeast and gives a slightly faster, steadier rise than plain dough. You'll see the surface dome gently, and when you press it with a finger the indent will spring back slowly. That's the sign.

  3. 3

    Shape the loaf

    Tip the risen dough onto a clean surface and press it out gently with your palms to release the large air bubbles. If you're using sunflower seeds, scatter them across the surface now and fold the dough over itself several times to work them in. Shape it into a tight oval that fits your loaf pan, pulling the surface taut and tucking the seam underneath. Place it seam-side down in a buttered loaf pan. The shaping matters more than you'd think: a tight surface tension on top is what gives you a smooth, even crust that doesn't split unevenly in the oven.

    To get good surface tension, cup the dough with both hands on the counter and pull it gently toward you, letting the friction of the surface tighten the skin of the loaf. Rotate and repeat two or three times.
  4. 4

    Second rise

    Cover the pan with a damp cloth and leave for forty-five minutes. The dough should rise to just above the rim of the pan, no further. Watch it carefully toward the end. Over-proofed whole wheat bread collapses in the oven because the gluten structure is more fragile than in white dough. If the dough has risen level with the rim and feels pillowy when you touch it lightly, it's time.

    Press the side of the dough lightly with your finger. If the indent springs back slowly but doesn't fill in completely, the proof is right. If it springs back fast, give it ten more minutes. If it doesn't spring back at all, it has gone too far.
  5. 5

    Bake the loaf

    Heat the oven to 190°C. Place the loaf on the middle rack and bake for thirty-five to forty minutes. The crust should turn deep golden brown, and when you tap the top it should feel firm and sound crisp. Turn the loaf out of the pan and knock on the bottom. You want a hollow, resonant sound, like tapping on a drum. If it sounds dense or dull, return it to the oven directly on the rack for five more minutes. The honey in the dough helps the crust color, so trust the knock test over the color alone.

  6. 6

    Cool before slicing

    Set the loaf on a wire rack and leave it for at least one hour. I know. But whole wheat bread holds moisture differently than white, and if you cut into it while it's warm, the crumb will be gummy and the slices will tear apart in your hands. The bread is still cooking as it cools, the steam inside finishing what the oven started. The joy of waiting. When you finally slice it and see the golden, even crumb with its fine grain and scattered seeds, you'll understand why the hour mattered.

Chef Tips

  • Look for grahamsmel or coarse whole wheat flour with visible flecks of bran and germ. The bag should feel gritty when you press it. Fine whole wheat flour makes a different bread entirely, softer and less interesting. The coarseness is the character.
  • Honey is traditional and it does more than sweeten. It helps the crust brown, keeps the crumb moist for days, and feeds the yeast for a steady, even rise. Use runny honey so it dissolves easily into the water. If yours has crystallized, warm it gently first.
  • This bread keeps beautifully. Wrap it in a clean cloth, not plastic, and store at room temperature. It will stay good for four to five days because the whole grain and honey hold moisture. After that, slice and toast it. Toasted grahamsbrod with butter is a second life, not a compromise.
  • Grahamsbrod is the natural base for a leverpostej smorrebrod. Spread it with liver pate, lay on pickled beetroot and a few cress leaves, and you have the madpakke that built Denmark. It also takes cheese, cold cuts, and soft-boiled egg beautifully. Cooked with love, shared with ease.

Advance Preparation

  • The dough can be mixed and given its first rise the night before. After the first rise, press it down, cover the bowl tightly with cling film, and refrigerate overnight. The next morning, shape it cold, place it in the buttered pan, and allow about an hour and a half for the second rise as it comes back to room temperature. Then bake as usual.
  • Grahamsbrod freezes well for up to three months. Slice before freezing so you can take out exactly what you need for the morning's madpakke without thawing the whole loaf.

Frequently Asked Questions

Nutrition Information

1 serving (about 72g)

Calories
205 calories
Total Fat
5 g
Saturated Fat
2 g
Trans Fat
0 g
Unsaturated Fat
3 g
Cholesterol
5 mg
Sodium
385 mg
Total Carbohydrates
36 g
Dietary Fiber
4 g
Sugars
5 g
Protein
6 g

Note: Chef personas and recipes are created with AI assistance. Cook with care: follow safe food-handling practices, check doneness with a thermometer when needed, and adapt for allergies and your kitchen.

Where cooking meets culture.

Culinary guides, cultural storytelling, and the editorial depth that makes cooking meaningful.

Discover Culinary Explorer

More from Danish Breads & Rugbrod

Browse the full collection