Culinary Explorer

A cooking platform built around craft, culture, and the stories behind what we eat.
Discover Culinary Explorer
Cottage Loaf

Cottage Loaf

Created by Chef Thomas

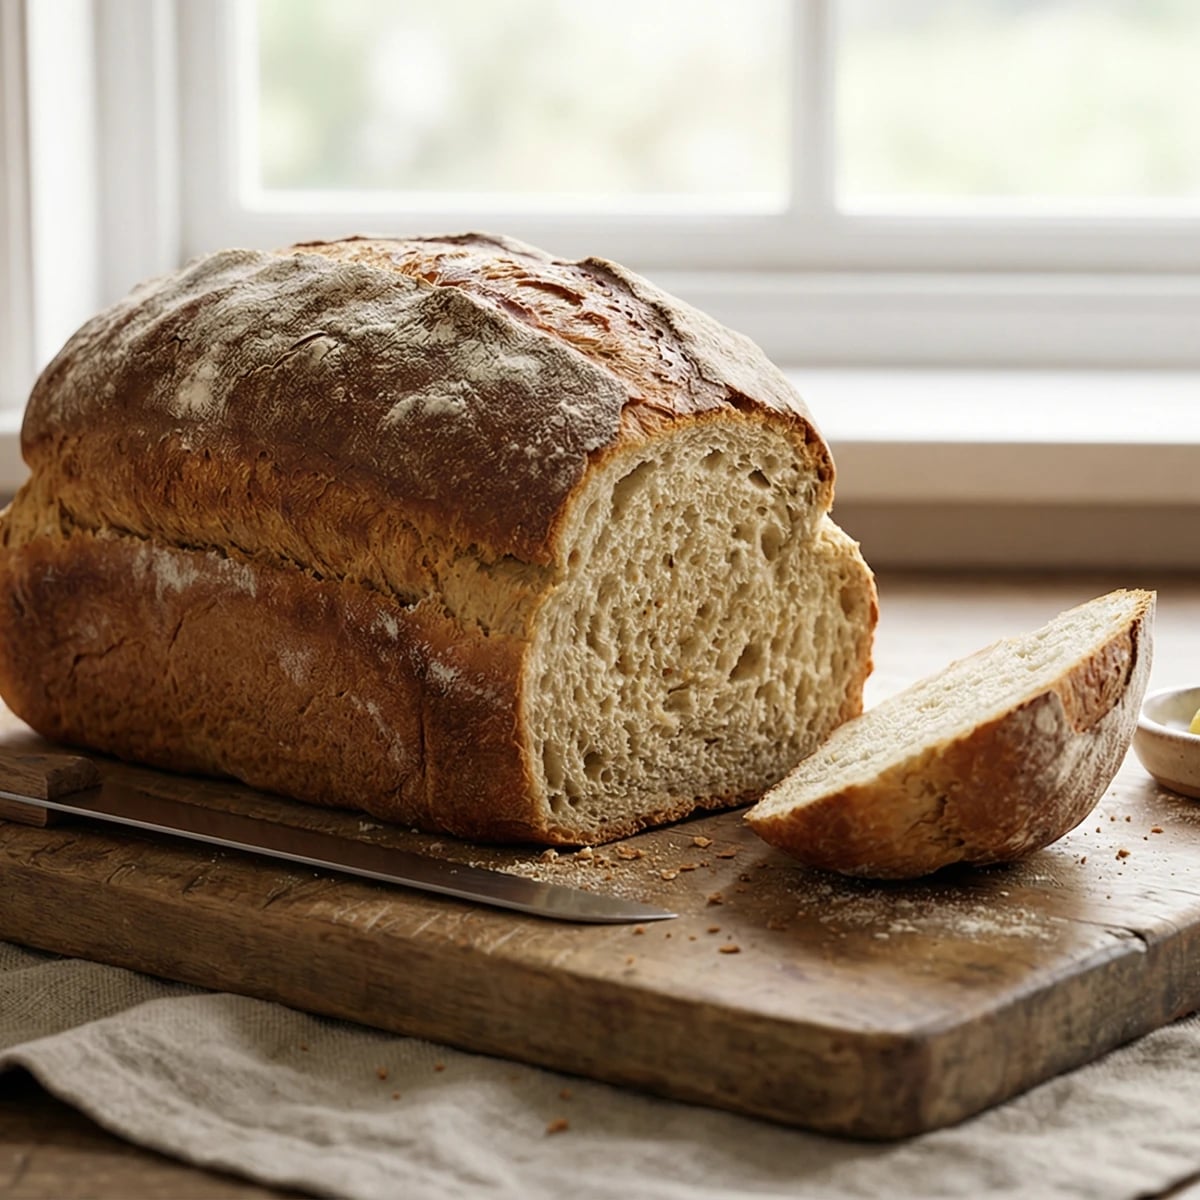
A loaf of two halves, the smaller perched on top of the larger and held there with a finger pressed through the middle, baked until the crust is deep gold and the kitchen smells like Saturday morning.

Breads
British
Weeknight
Special Occasion
30 min
Active Time
35 min cook3 hr 30 min total
Yield1 large loaf

There's a particular kind of Saturday that asks for bread. Nowhere to be, the kettle on, the radio playing something quiet in the background. The dough does most of the work, which is the trick of bread baking that nobody quite tells you. You're not really making it. You're keeping it company while it makes itself.

A cottage loaf is two rounds of dough stacked one on top of the other, the smaller crowning the larger, pinned together with a single push of the finger straight down through the middle. The shape used to be everywhere. It's vanished now from supermarket shelves because it doesn't fit a plastic bag and won't go through an automatic slicer, which feels like exactly the sort of reason a bread should still exist. Awkwardness is sometimes a virtue.

The dough is plain. Flour, water, yeast, salt. Nothing else. It needs time more than skill, and an oven hot enough to give it the crust it deserves. The first time I made one I wrote in the notebook: 'Two rounds, one above the other. Saturday. The kitchen smells right.' That's still about all there is to say about it.

Eat it that same evening, torn rather than sliced, with cold butter and good cheese and whatever soup is on the hob. There are few better feelings than putting a warm loaf in front of someone and watching them reach for it without asking.

The technique, the tradition, and the story behind every dish.

Discover Culinary Explorer

Ingredients

strong white bread flour

Quantity

500g

plus extra for dusting

fine sea salt

Quantity

10g

fast-action dried yeast

Quantity

7g

lukewarm water

Quantity

320ml

oil

Quantity

a little

for greasing the bowl

Equipment Needed

  • Large mixing bowl
  • Dough scraper
  • Heavy baking sheet
  • Wooden spoon (the handle is what you'll use to join the loaves)
  • Roasting tray for steam
  • Wire cooling rack

Instructions

  1. 1

    Mix the dough

    Tip the flour into a large bowl. Add the salt to one side and the yeast to the other. Keep them apart for a minute, salt is hard on yeast in direct contact, then stir the lot together with your hand. Pour in most of the water and start bringing the dough together. Add the rest of the water gradually until the bowl is clean and the dough is shaggy and slightly sticky. Different flours drink different amounts of water, so trust the feel of it more than the number. You want a dough that holds together but still tugs at your fingers a little.

    Lukewarm means blood temperature. Dip a finger in. If you can't really feel it, you're about right. Hot water kills the yeast.
  2. 2

    Knead until smooth

    Turn the dough out onto a lightly floured surface. Knead for ten minutes. Push it away from you with the heel of your hand, fold it back, turn it a quarter, push it away again. Find a rhythm. The dough will start out rough and slightly tacky and slowly become smooth, springy, and elastic. When you press a finger into it, the indent should bounce back slowly. That's it. Don't over-flour the surface. A slightly tacky dough makes a better loaf than a dry one.

  3. 3

    First prove

    Wipe out the bowl with a little oil and put the dough back in. Cover with a clean tea towel or a plate and leave somewhere warm and out of a draught. It needs to roughly double in size, which takes about an hour and a half in a normal kitchen, longer if it's cold. Don't watch the clock. Watch the dough. When it looks puffy and a little wobbly and your finger leaves a slow-fading dent, it's ready.

    If your kitchen is cold, an oven that's been switched on for thirty seconds and then off again is a perfect proving cupboard.
  4. 4

    Shape the two rounds

    Tip the risen dough onto a lightly floured surface and knock the air out gently with your knuckles. Divide it into two pieces, one about two-thirds and one about a third. You can weigh them if you like, but you can also just look at them. Shape each piece into a tight ball by tucking the edges underneath and rolling it on the work surface under a cupped hand until the surface is smooth and taut. The tension in the surface is what gives the loaf its shape later, so don't rush this bit.

  5. 5

    Stack and join

    Place the larger ball on a baking sheet lined with parchment, dusted with a little flour. Sit the smaller ball on top, centred. Now flour the handle of a wooden spoon, or two fingers if you prefer the old way, and push it straight down through the middle of the top ball, all the way through and into the bottom one, almost to the baking sheet. Twist gently and pull it back out. This is what holds the two rounds together as they prove and bake. It looks unlikely. It works.

  6. 6

    Second prove

    Dust the loaf lightly with flour and cover loosely with a tea towel. Leave it to prove for another thirty to forty-five minutes, until it looks puffy and the dough springs back slowly when prodded. While it proves, heat the oven to 220C/200C fan and put a roasting tray on the bottom shelf to heat up too.

  7. 7

    Bake with steam

    Slide the loaf into the oven. Pour a small jug of cold water into the hot roasting tray on the bottom shelf and shut the door quickly. The burst of steam helps the crust stay soft for the first few minutes, which lets the loaf rise properly before it sets. Bake for thirty to thirty-five minutes. The loaf is ready when it's a deep, dark gold all over and sounds hollow when you tap the bottom. If it sounds dull, give it another five minutes. A pale loaf is an underbaked loaf.

    The top round browns faster than the bottom. If it's getting too dark before the loaf is done, lay a piece of foil loosely over it for the last ten minutes.
  8. 8

    Cool completely

    Lift the loaf onto a wire rack and leave it alone. I know. The smell is unbearable and you've been waiting hours. But a loaf cut while it's still warm has a gummy crumb because the inside is still cooking from its own residual heat. Give it at least an hour. The crust will sing and crackle as it cools, which is one of the better sounds a kitchen makes.

Chef Tips

  • The flour matters more than anything else. Use a proper strong white bread flour with a high protein content. Plain flour won't develop the gluten structure you need to hold the two rounds together, and the loaf will sag instead of standing proud.
  • The press through the middle is the whole technique. Don't be timid about it. Push the spoon handle right down through the top ball and into the bottom one, almost to the baking sheet. If you stop halfway, the two rounds will separate as they rise and you'll end up with a loaf and a hat.
  • Steam in the oven is what gives you a proper crust. A hot roasting tray on the bottom shelf and a jug of cold water poured in as the loaf goes in is enough. No special equipment, no fuss. The hiss when the water hits is one of the more satisfying sounds in baking.
  • Resist slicing until the loaf is cool. A warm loaf cut open releases all its steam at once and the crumb turns gummy. Wait an hour, longer if you can bear it. The bread is still cooking from the inside until it cools.

Advance Preparation

  • For a slower, more flavourful loaf, mix the dough the night before, knead briefly, and leave it in the fridge to prove overnight. Bring it back to room temperature for an hour the next morning before shaping.
  • The baked loaf keeps for two days at room temperature, wrapped in a tea towel or stored in a paper bag. Don't put it in plastic, the crust will turn soft and sad.
  • Day-three bread makes the best toast you'll eat all week. After that, tear it into chunks, dry it in a low oven, and keep it in a jar for breadcrumbs.

Frequently Asked Questions

Nutrition Information

1 serving (about 63g)

Calories
155 calories
Total Fat
1 g
Saturated Fat
0 g
Trans Fat
0 g
Unsaturated Fat
1 g
Cholesterol
0 mg
Sodium
325 mg
Total Carbohydrates
31 g
Dietary Fiber
1 g
Sugars
0 g
Protein
5 g

Note: Chef personas and recipes are created with AI assistance. Cook with care: follow safe food-handling practices, check doneness with a thermometer when needed, and adapt for allergies and your kitchen.

Where cooking meets culture.

Culinary guides, cultural storytelling, and the editorial depth that makes cooking meaningful.

Discover Culinary Explorer

More from British Breads & Buns

Browse the full collection