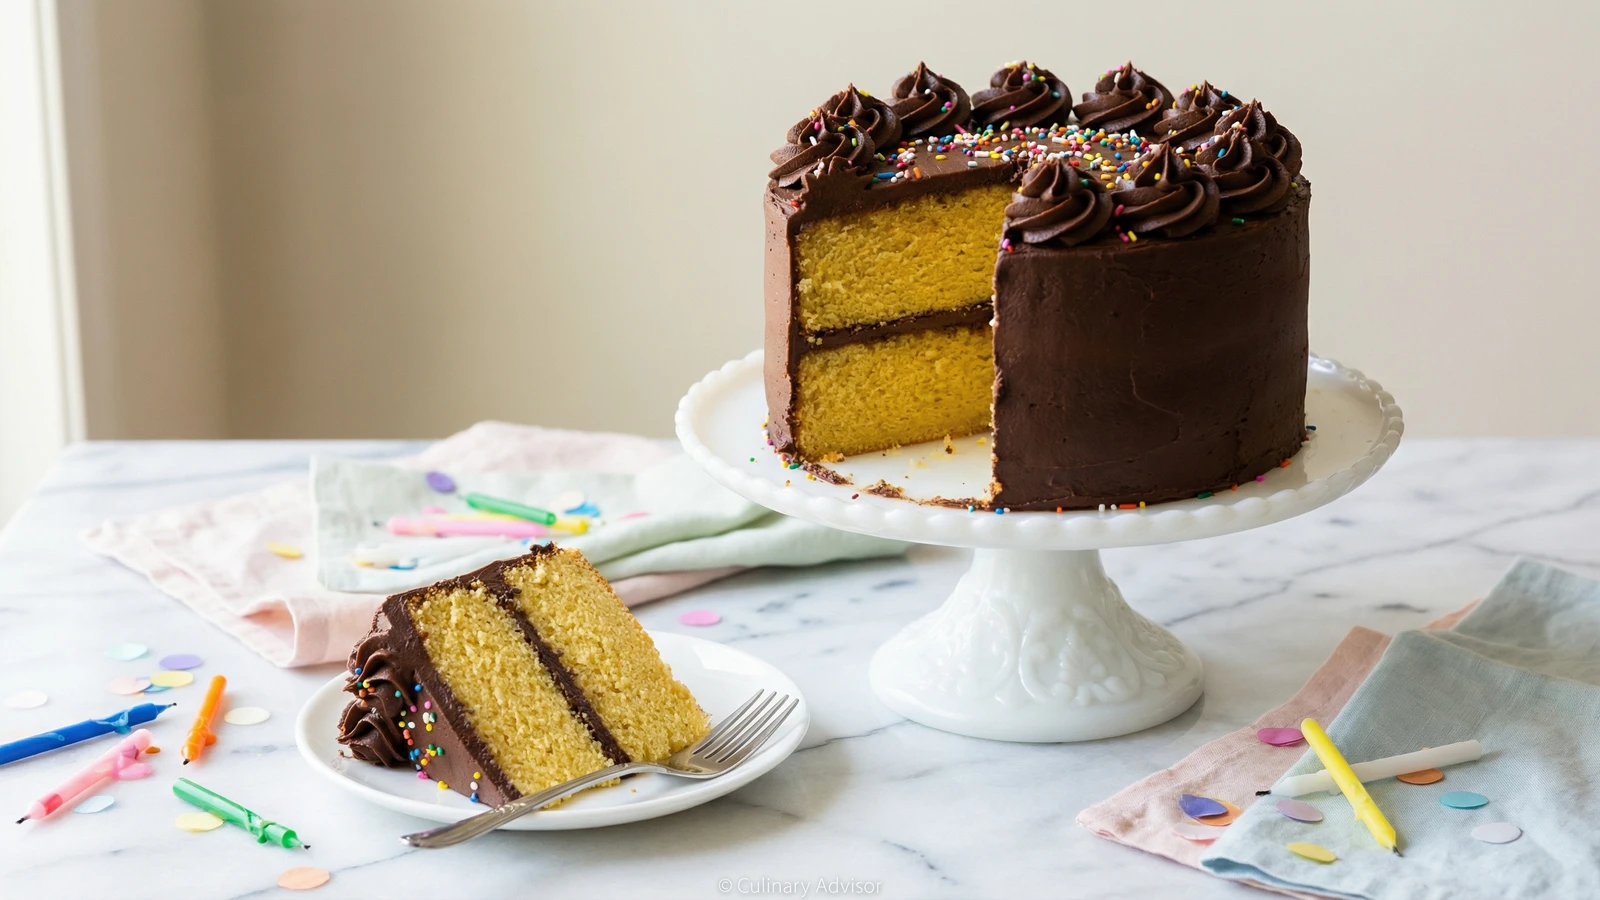
Two towering layers of buttery, golden cake with a crumb so tender it threatens to melt on contact, embraced by swirls of dark chocolate buttercream that makes store-bought frosting a distant, shameful memory.
Desserts
American
Birthday
Celebration
35 min
Active Time
30 min cook•2 hr 30 min total
YieldOne 9-inch two-layer cake, serving 12-16
This is the cake that launched a thousand birthday wishes. Before every grocery store offered sheet cakes decorated by disinterested teenagers, before boxed mixes promised convenience at the cost of flavor, American home bakers made this cake. They made it with butter, eggs, and the understanding that a birthday is not a day for shortcuts.
The secret to that distinctive golden color lives in the egg yolks. A proper yellow cake uses whole eggs plus extra yolks, creating richness that white cake simply cannot match. The crumb should be tender enough to yield to a fork without crumbling to dust, sturdy enough to support two layers of frosting without collapsing into sadness.
I have watched too many home bakers surrender to the box. They've been told that homemade cake is difficult, that only professionals can achieve that bakery texture. Nonsense. If you can measure accurately and resist the urge to overmix, you can produce a cake that will make the birthday child feel genuinely celebrated. The technique is forgiving. The ingredients are ordinary. The result is anything but.
The technique, the tradition, and the story behind every dish.
Position a rack in the center of your oven and preheat to 350°F. Butter two 9-inch round cake pans generously, dust with flour, and tap out the excess. Line the bottoms with parchment rounds for insurance. Nothing ruins a birthday faster than a cake stuck to the pan.
Use softened butter applied with your fingers. You'll feel any spots you missed. A pastry brush leaves gaps.
2
Combine dry ingredients
Whisk together the flour, baking powder, and salt in a large bowl until uniformly combined. This takes thirty seconds of actual whisking, not a casual stir. The baking powder must be evenly distributed or you'll have pockets of bitter, unleavened cake.
3
Cream butter and sugar
Beat the room-temperature butter in a stand mixer fitted with the paddle attachment on medium speed until smooth and creamy, about one minute. Add the sugar gradually and beat on medium-high for four to five minutes until pale, fluffy, and nearly doubled in volume. Scrape the bowl twice during this process. The mixture should look like pale yellow clouds.
This step builds the cake's structure. Rushing it produces a dense, sad crumb. Set a timer. The full five minutes matters.
4
Add eggs and yolks
Add the whole eggs one at a time, beating for thirty seconds after each addition. Then add the egg yolks together, beating until fully incorporated. The mixture may look slightly curdled. Add the vanilla and beat until smooth. Those extra yolks are the source of the golden color and tender texture.
5
Alternate wet and dry
Reduce mixer speed to low. Add the flour mixture in three additions, alternating with the milk in two additions, beginning and ending with flour. Mix each addition just until the streaks disappear. Stop the mixer, scrape the bottom of the bowl with a spatula, and fold once or twice to catch any unmixed flour hiding at the bottom.
Overmixing develops gluten and toughens the crumb. The moment you no longer see dry flour, stop. A few small lumps will bake out.
6
Divide and bake
Divide the batter evenly between prepared pans. A kitchen scale helps here: equal weight means level layers. Smooth the tops gently with an offset spatula. Bake for 28 to 32 minutes, rotating pans halfway through. The cakes are done when they spring back from a gentle touch in the center and pull slightly away from the pan edges. A toothpick inserted in the center should emerge with a few moist crumbs, not wet batter.
7
Cool completely
Let the cakes rest in their pans on a wire rack for fifteen minutes. Run a thin knife around the edges, then invert onto the rack, peel away the parchment, and cool completely. This takes at least one hour. Frosting a warm cake is an act of sabotage. The butter melts, the frosting slides, and you're left with a disaster no amount of sprinkles can salvage.
For the flattest layers, cool cakes top-side down. The weight gently flattens any dome that formed during baking.
8
Make the chocolate buttercream
Beat the softened butter in a clean mixer bowl on medium speed until completely smooth, about two minutes. Sift together the powdered sugar and cocoa powder. Add this mixture to the butter in three additions, beating on low speed after each. The first addition will look dry and crumbly. This is normal.
9
Add cream and finish frosting
Add the heavy cream, vanilla, and salt. Increase speed to medium-high and beat for three to four minutes until light, fluffy, and spreadable. The frosting should hold soft peaks and spread without tearing the cake. If too thick, add cream one tablespoon at a time. If too thin, add more sifted powdered sugar.
The salt isn't optional. It balances the sweetness and prevents the frosting from tasting like chocolate-flavored sugar paste.
10
Level the layers
If your cakes domed during baking, use a long serrated knife to trim them level. Place the first layer, cut-side down, on your serving plate or cake stand. Slide strips of parchment under the edges to keep the plate clean during frosting.
11
Fill and frost
Spread about one cup of buttercream over the first layer in an even blanket, stopping half an inch from the edge. Place the second layer top-side down on the frosting. Apply a thin crumb coat over the entire cake, sealing in loose crumbs. Refrigerate for twenty minutes until firm.
12
Apply final coat
Spread the remaining buttercream generously over the top and sides of the chilled cake. Use an offset spatula for the top and a bench scraper for the sides if you want smooth perfection. Or embrace the swirls and peaks of an honest homemade finish. Both are correct. Remove the parchment strips and stand back to admire your work.
Chef Tips
•Room temperature ingredients are non-negotiable. Cold eggs won't emulsify properly with butter, cold milk shocks the batter and deflates the air you've worked to incorporate. Set everything out two hours before you begin.
•Dutch-process cocoa gives the frosting a deeper, more rounded chocolate flavor than natural cocoa. The alkalization process removes harshness. It's worth seeking out.
•For a more assertive chocolate punch, add two ounces of melted and cooled bittersweet chocolate to the buttercream along with the cream.
•This cake improves overnight. The crumb moistens, the flavors marry, the frosting sets. Make it the day before the party if you can resist the temptation to eat it.
•Yellow cake pairs beautifully with strawberry, caramel, or cream cheese frosting if chocolate isn't the birthday child's preference. The technique remains identical.
Advance Preparation
•Unfrosted cake layers can be wrapped tightly in plastic and stored at room temperature for one day, or frozen for up to three months. Thaw at room temperature while still wrapped to prevent condensation.
•Chocolate buttercream can be made up to one week ahead and refrigerated. Bring to room temperature and rewhip before using.
•The fully assembled cake keeps beautifully at room temperature, covered loosely, for up to three days. Refrigerate only if your kitchen is above 75°F, and bring to room temperature before serving for best texture.
Frequently Asked Questions
Nutrition Information
1 serving (about 110g)
Calories
755 calories
Total Fat
47 g
Saturated Fat
40 g
Trans Fat
0.5 g
Unsaturated Fat
7 g
Cholesterol
95 mg
Sodium
380 mg
Total Carbohydrates
94 g
Dietary Fiber
1 g
Sugars
75 g
Protein
4 g
Where cooking meets culture.
Culinary guides, cultural storytelling, and the editorial depth that makes cooking meaningful.