
Chef Thomas
A Bloomer
A proper British bloomer, slashed deep and baked until the cuts open wide and the crust turns deep, glossy gold. The kind of loaf that makes the rest of the day feel deliberate.
A cooking platform built around craft, culture, and the stories behind what we eat.
Created by Chef Thomas
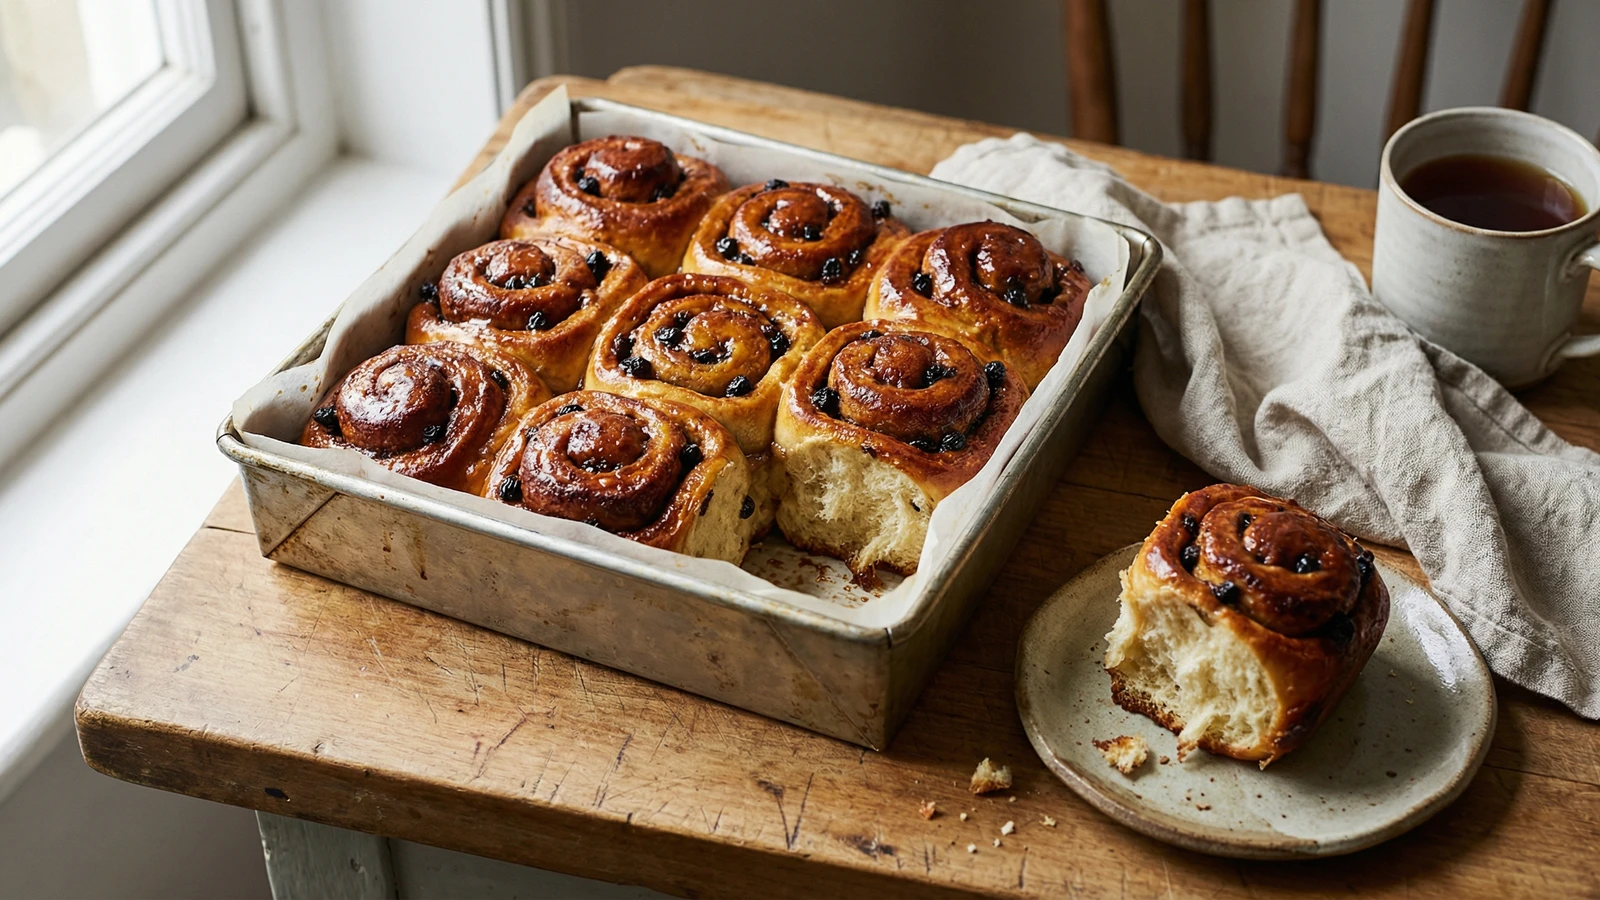
Soft, spiralled buns full of spiced sugar and currants, glazed sticky while still warm from the oven. The kind of baking that turns a wet Sunday into something worth getting out of bed for.
There's a particular kind of Sunday that asks for this. Cold outside, the windows already starting to fog, nothing pressing in the diary, and the sense that the day will be better if the kitchen smells of yeast and cinnamon for most of it. Chelsea buns are a slow afternoon's work. Not difficult, just patient. The dough needs time to rise twice, and you need to be willing to give it.
I don't know when I first made them, but I know I've made them dozens of times since, almost always on weekends when the weather had closed in and the children, when there were children, wanted something to do with their hands. The rolling and the cutting are the best bits. The little spirals fitted into the tin like a puzzle, knowing they'll swell into each other and come out as a single soft slab of sticky, sugary bread that you tear apart by hand.
They come from London originally, from the old Chelsea Bun House in the eighteenth century, where people queued in the street for them. I find that comforting somehow. Three hundred years on and we're still making the same thing, in domestic kitchens, for the same reason. A warm bun on a cold afternoon is a small kindness that hasn't gone out of fashion.
I wrote it down in the notebook the first time I got them right: dough, butter, currants, patience. Then underneath, in smaller writing: don't skip the glaze. The glaze is the difference between a nice bun and the kind that makes someone reach for a second one without speaking.
Quantity
500g
plus extra for dusting
Quantity
7g
Quantity
50g
Quantity
1 teaspoon
Quantity
300ml
warmed to blood temperature
Quantity
50g
melted and slightly cooled
Quantity
1
lightly beaten
Quantity
75g
very soft
Quantity
100g
Quantity
2 teaspoons
Quantity
1 teaspoon
Quantity
200g
Quantity
50g
Quantity
2 tablespoons
Quantity
2 tablespoons
| Ingredient | Quantity |
|---|---|
| strong white bread flourplus extra for dusting | 500g |
| fast-action dried yeast | 7g |
| caster sugar | 50g |
| fine sea salt | 1 teaspoon |
| whole milkwarmed to blood temperature | 300ml |
| unsalted buttermelted and slightly cooled | 50g |
| large egglightly beaten | 1 |
| unsalted butter (for filling)very soft | 75g |
| light brown soft sugar | 100g |
| ground mixed spice | 2 teaspoons |
| ground cinnamon | 1 teaspoon |
| currants | 200g |
| mixed peel (optional) | 50g |
| whole milk (for glaze) | 2 tablespoons |
| granulated sugar (for glaze) | 2 tablespoons |
Tip the flour into a large bowl. Add the yeast on one side and the salt and caster sugar on the other. Yeast and salt are old enemies and prefer not to meet directly. Make a well in the middle and pour in the warm milk, the melted butter, and the beaten egg. Stir with a wooden spoon until it comes together into a shaggy, untidy mass. Don't fuss over it. It just needs to know everyone is in the bowl.
Turn the dough out onto a lightly floured surface and knead for ten minutes. It will start sticky and a little uncooperative, then gradually transform into something smooth, elastic, and faintly tacky to the touch. You'll feel the change happen under your hands. When you press a finger into it, the dough should spring slowly back. Resist the urge to add more flour. Wet dough makes soft buns; tight dough makes bricks.
Lightly oil a clean bowl and tuck the dough into it. Cover with a damp cloth or a plate. Leave somewhere warm and draft-free until doubled in size. This usually takes about an hour and a half, though a cold kitchen will ask for two. The dough should look puffy and pillowy, and when you press a finger gently into it, the dent should stay rather than spring back.
Knock the dough back gently on a floured surface, just enough to deflate it. Roll it out into a rectangle roughly 30cm by 40cm, with a long edge facing you. Spread the soft butter all over the surface in a thin, generous layer, right to the edges. Leave a thumb's width clear along the top long edge so you've got something to seal the spiral with later.
Mix the brown sugar with the mixed spice and cinnamon in a small bowl. Scatter the spiced sugar over the buttered dough, then strew the currants and the mixed peel evenly across the lot. Press them gently with the flat of your hand so they sink into the butter and don't go rolling everywhere when you start to roll.
Starting from the long edge nearest you, roll the dough up away from yourself into a tight, even sausage. Take your time. You want it snug but not strangled. When you reach the clear strip at the top, pinch it gently along the seam to seal. Roll the cylinder so the seam sits underneath.
Trim the ragged ends off the cylinder. Cut the rest into nine equal pieces with a sharp knife. A bit of gentle sawing is better than pressing straight down, which squashes the spiral. Butter a square baking tin, about 23cm, and arrange the buns cut-side up in three rows of three, with a small gap between each one. They should be close enough to touch as they rise.
Cover the tin loosely with a tea towel and leave the buns to prove for forty-five minutes to an hour. They should swell and merge into each other, soft and puffy. While they prove, set the oven to 200C/180C fan.
Bake the buns for twenty to twenty-five minutes. They're ready when the tops are deep golden brown and the kitchen smells of cinnamon and warm bread and something faintly caramelized at the edges. If you tap one gently, it should sound hollow underneath the softness. The currants on top will have darkened to almost black. That's fine. That's where the chew is.
While the buns bake, gently warm the milk and granulated sugar together in a small pan until the sugar dissolves. As soon as the buns come out of the oven, brush the glaze generously over the tops. It will go sticky and shiny almost immediately. Let them sit in the tin for ten minutes before tearing them apart. They're meant to come away from each other in soft, pillowy clumps. That's the whole point.
1 serving (about 145g)
Culinary guides, cultural storytelling, and the editorial depth that makes cooking meaningful.
Discover Culinary ExplorerChef Thomas
A proper British bloomer, slashed deep and baked until the cuts open wide and the crust turns deep, glossy gold. The kind of loaf that makes the rest of the day feel deliberate.

Chef Thomas
A simple white loaf made from flour, water, yeast, and salt. The kind of bread that fills the kitchen with the smell of a Saturday morning and teaches you, slowly, everything you need to know about baking.

Chef Thomas
A dark, fruit-heavy Welsh tea loaf, soaked overnight in strong tea and baked slowly until the kitchen smells of spice and orange peel. Sliced thick and buttered cold.

Chef Thomas
Rich, butter-laden Georgian buns from Bath, glazed deep gold and crowned with crushed sugar nibs that crack beneath your teeth, the kind of bake that turns a Sunday afternoon into something deliberate.