Culinary Explorer

A cooking platform built around craft, culture, and the stories behind what we eat.
Discover Culinary Explorer
Bolo de Iogurte

Bolo de Iogurte

Created by

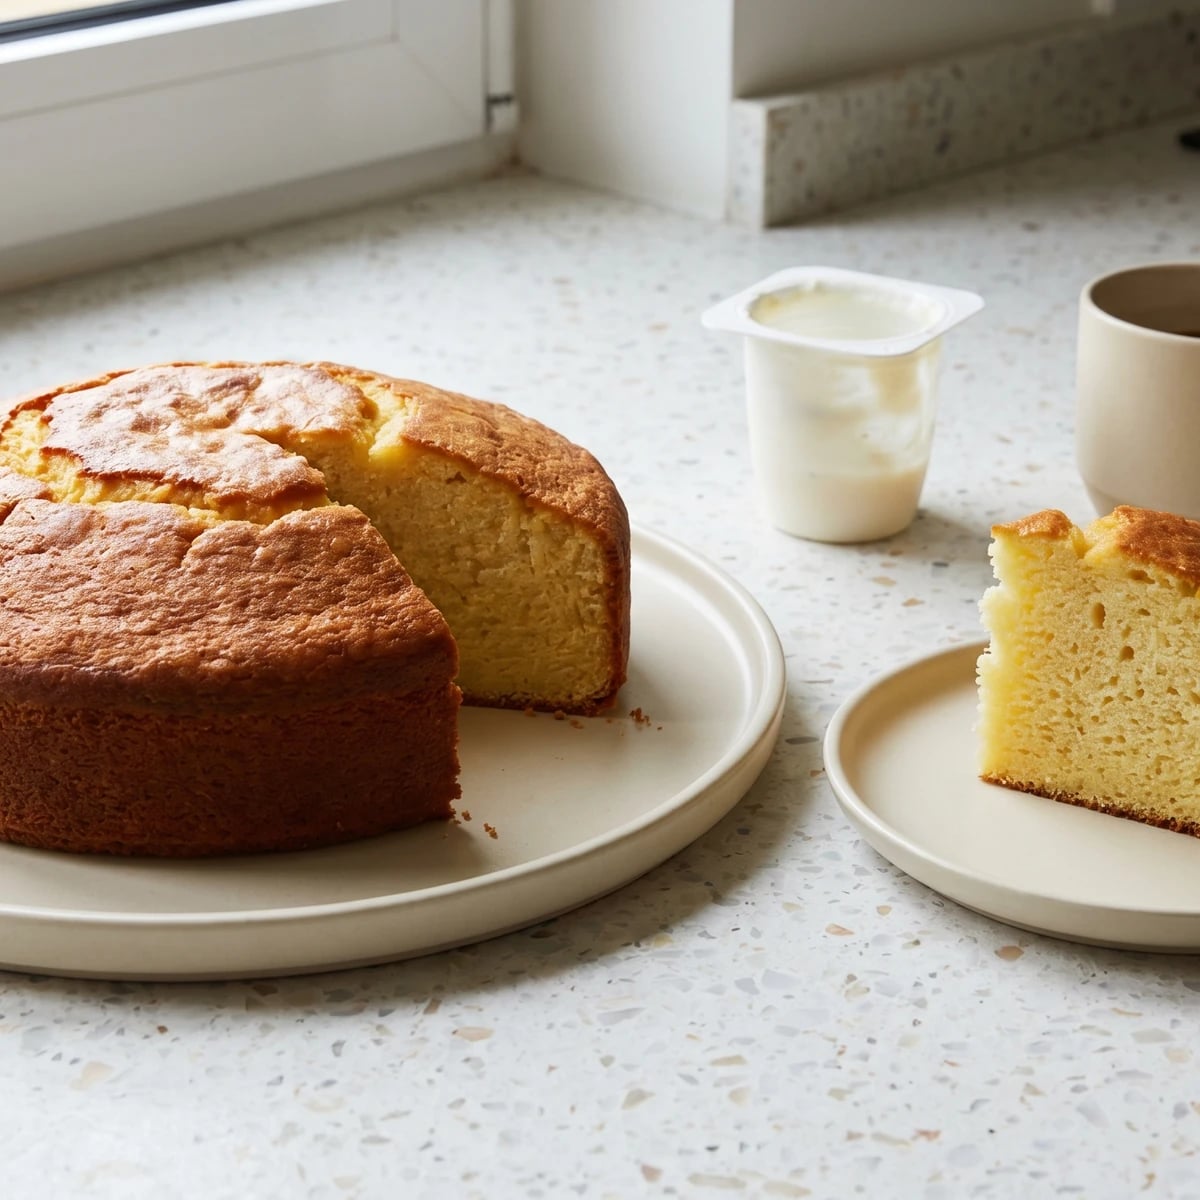
You think cake is where the kitchen exposes you. Wrong. This one uses the yogurt pot as the measure, so a gente takes away the drama and leaves you with breakfast.

Desserts
Brazilian
Comfort Food
Budget Friendly
Make Ahead
15 min
Active Time
40 min cook55 min total
Yield10 slices

You hear cake and your little voice says, isso não é pra mim. I know that voice. Mine used to say it too, usually right before I burned something simple and blamed destiny. Anota aí: cake is not a gift. Cake is order, a bowl, and the discipline to stop mixing when the batter is ready.

Bolo de iogurte is the kind of recipe that keeps people cooking because it works. The pot of yogurt becomes the measuring cup, which is the sort of smart shortcut I will hand you myself. It saves time without selling you a box of powder pretending to be homemade. You still use real eggs, real yogurt, flour, sugar, oil, and baking powder. Comida de verdade can be sweet. Don't let joyless people convince you otherwise.

This is not the pê-efe, I know. Rice, beans, a piece of meat or egg, something green, that's what resolves dinner and quietly keeps a country itself. But the everyday Brazilian table has coffee too, and someone cuts a simple bolo caseiro in the afternoon, and suddenly the house feels fed beyond the plate. That's worth learning.

The method is plain. Beat the wet ingredients until smooth so the eggs carry air. Add the flour gently so the crumb stays soft. Fold in the baking powder last because it starts working the moment it gets wet. Pour, bake, wait a little, then cut a slice that smells like a kitchen where somebody decided they could learn.

Bolo de iogurte belongs to the Brazilian bolo caseiro tradition, the everyday home cakes served with coffee rather than reserved for parties. The yogurt-pot measure became popular because commercial plain yogurt cups gave home cooks a reliable standard without a scale, especially in recipe notebooks and family kitchens from the late twentieth century onward. Its closest relatives are simple oil cakes from Europe and Brazil, but the cup-as-measure trick made this version feel especially domestic and reproducible.

The technique, the tradition, and the story behind every dish.

Discover Culinary Explorer

Ingredients

plain whole-milk yogurt

Quantity

1 cup, from one 170 g pot

eggs

Quantity

3 large

at room temperature

sugar

Quantity

1 cup

neutral oil

Quantity

1/2 cup, plus more for greasing

vanilla extract (optional)

Quantity

1 teaspoon

all-purpose flour

Quantity

2 cups

spooned and leveled

baking powder

Quantity

1 tablespoon

salt

Quantity

1/4 teaspoon

all-purpose flour

Quantity

1 tablespoon

for dusting the pan

Equipment Needed

  • 22 cm round tube pan or 23 cm round cake pan
  • Large mixing bowl
  • Whisk or silicone spatula
  • Cooling rack

Instructions

  1. 1

    Prepare the pan

    Heat the oven to 180 C (350 F). Grease a 22 cm round tube pan or a 23 cm round cake pan with oil, then dust it with flour and tap out the excess. The pan should look thinly coated, not clumpy. That dry flour layer gives the cake something to release from, so you don't bake a beautiful cake and then perform surgery to remove it.

  2. 2

    Use the pot

    Empty the yogurt into a mixing bowl, then rinse and dry the pot if you want to use it as your measure. One pot of yogurt is about 3/4 cup, so the classic version is 1 pot yogurt, 2 pots sugar, 1 pot oil, and 3 pots flour. I give you cups too, because receitas que funcionam don't make you guess.

  3. 3

    Beat the wet

    In the bowl with the yogurt, add the eggs, sugar, oil, and vanilla if using. Whisk for 1 to 2 minutes, until the mixture looks smooth, pale, and a little glossy. This dissolves some of the sugar and breaks up the eggs evenly, so the cake bakes tender instead of streaky and heavy.

  4. 4

    Add the flour

    Add the flour and salt. Stir with a whisk or spatula just until you don't see dry flour anymore. Stop there. A few tiny lumps are fine. Keep beating and you wake up the gluten in the flour, then the crumb turns tough and you stand there wondering why your simple cake chews like bread.

  5. 5

    Fold the leavening

    Sprinkle the baking powder over the batter and fold gently, scraping the bottom of the bowl, until it's evenly mixed. Do this last because baking powder starts working once it touches liquid. Fold, don't whip. You want the lift in the oven, not spent in the bowl.

  6. 6

    Bake until set

    Pour the batter into the prepared pan and smooth the top. Bake for 35 to 45 minutes, until the cake is golden, the top springs back when touched lightly, and a toothpick inserted in the center comes out clean or with a few moist crumbs. Wet batter means it needs more time. A dry toothpick plus a hard, dark edge means you waited too long.

  7. 7

    Cool and unmold

    Let the cake rest in the pan for 10 minutes, then run a thin knife around the edges and turn it out onto a rack or plate. Wait until it's warm, not hot, before slicing. Cut too soon and the crumb compresses under the knife, because it hasn't finished setting. Patience is also a technique. Annoying, but true.

Chef Tips

  • Use plain whole-milk yogurt. Flavored yogurt brings perfume, extra sugar, and factory decisions into your cake. A real yogurt gives moisture and a gentle tang without shouting.
  • The yogurt pot method is the honest shortcut here. A cake mix is not. One teaches you the structure of a simple cake; the other teaches you to depend on a box.
  • If your eggs are cold, put them in a bowl of warm water for 5 minutes. Room-temperature eggs blend faster, and a smoother batter gives you a softer crumb.
  • For a citrus version, rub 1 tablespoon of lemon or orange zest into the sugar before mixing. Only do this when the fruit smells good and the peel is fresh. Tired citrus brings perfume from nowhere useful.
  • Store the cake covered at room temperature for 3 days. It stays moist because the yogurt holds water in the crumb, which is kitchen math, not magic.

Advance Preparation

  • Bake the cake up to 2 days ahead. Keep it covered at room temperature, and slice only when serving so it stays softer.
  • Freeze individual slices wrapped well for up to 2 months. Thaw at room temperature, then warm briefly if you want the crumb soft again.
  • Measure the dry ingredients the night before and leave them covered. Add the baking powder only when mixing, so it stays active.

Frequently Asked Questions

Nutrition Information

1 serving (about 85g)

Calories
305 calories
Total Fat
14 g
Saturated Fat
3 g
Trans Fat
0 g
Unsaturated Fat
11 g
Cholesterol
60 mg
Sodium
240 mg
Total Carbohydrates
40 g
Dietary Fiber
1 g
Sugars
21 g
Protein
5 g

Note: Chef personas and recipes are created with AI assistance. Cook with care: follow safe food-handling practices, check doneness with a thermometer when needed, and adapt for allergies and your kitchen.

Where cooking meets culture.

Culinary guides, cultural storytelling, and the editorial depth that makes cooking meaningful.

Discover Culinary Explorer

More from Bolos Caseiros & Lanche da Tarde

Browse the full collection