
Chef Dean
Chicken Tortilla Soup
A smoky, brick-red broth alive with charred tomatoes and toasted chiles, ladled over shredded chicken and crowned with a mountain of crispy tortilla strips, cool avocado, sharp cheese, and a generous squeeze of lime.
A cooking platform built around craft, culture, and the stories behind what we eat.

Created by
A true bowl of red built from toasted dried chiles and tender chunks of beef braised until they surrender to your fork. No beans. No tomatoes. Just the unapologetic flavors that put Texas chili in a class of its own.
Let me be direct with you: if your chili has beans, it isn't Texas chili. It might be delicious. It might be the chili your family has made for generations. But in Texas, the bowl of red stands alone as a meat and chile dish, pure and uncompromised. This isn't snobbery. It's regional identity. And identity matters in the kitchen.
The origins trace back to the chili queens of San Antonio, women who set up tables in the plazas after dark and ladled out bowls of this fiery stew to workers, soldiers, and anyone with a few coins and an appetite. They built their reputations on dried chiles, cumin, and beef that had simmered until it fell apart at the mere suggestion of a fork. No filler. No apologies.
This recipe demands dried chiles. You cannot replicate this dish with powder from a jar, no matter what the back of that jar promises. Ancho chiles bring sweetness and body. Guajillos add brightness and a clean heat. Chile de arbol provides the fire. Toast them until fragrant, rehydrate them, and blend them into a paste that becomes the soul of your chili. This step takes twenty minutes and makes all the difference.
The beef should be chuck, cut into proper chunks. Ground meat has its place, but not here. You want pieces that hold their shape through hours of braising, then yield completely when you bite down. Serve this in deep bowls with nothing but raw onion, sharp cheddar, and maybe a wedge of cornbread on the side. The chili speaks for itself.
Quantity
4 pounds
cut into 1½-inch cubes
Quantity
6
stemmed and seeded
Quantity
4
stemmed and seeded
Quantity
4
stemmed
Quantity
4 cups
warmed
Quantity
1 bottle (12 oz)
Quantity
3 tablespoons
Quantity
1 large
diced
Quantity
8 cloves
minced
Quantity
3 tablespoons
Quantity
1 tablespoon
Quantity
2 teaspoons
Quantity
1 teaspoon
Quantity
3 tablespoons
Quantity
2 tablespoons
Quantity
1 tablespoon
Quantity
to taste
Quantity
to taste
| Ingredient | Quantity |
|---|---|
| beef chuckcut into 1½-inch cubes | 4 pounds |
| dried ancho chilesstemmed and seeded | 6 |
| dried guajillo chilesstemmed and seeded | 4 |
| dried chiles de arbolstemmed | 4 |
| beef stockwarmed | 4 cups |
| Mexican lager beer | 1 bottle (12 oz) |
| bacon fat or lard | 3 tablespoons |
| yellow oniondiced | 1 large |
| garlicminced | 8 cloves |
| ground cumin | 3 tablespoons |
| dried Mexican oregano | 1 tablespoon |
| smoked paprika | 2 teaspoons |
| cayenne pepper | 1 teaspoon |
| masa harina | 3 tablespoons |
| apple cider vinegar | 2 tablespoons |
| brown sugar | 1 tablespoon |
| kosher salt | to taste |
| black pepper | to taste |
Heat a large dry skillet over medium heat. Working in batches, press the dried chiles flat against the hot surface with a spatula. Toast for 20 to 30 seconds per side until they become pliable and release a deep, earthy fragrance. Watch carefully. The line between toasted and burnt is thin, and burnt chiles will make your chili bitter. Transfer to a large heatproof bowl as they finish.
Pour 3 cups of the warm beef stock over the toasted chiles, pressing them down to submerge. Let them soak for 25 to 30 minutes until completely soft and pliable. They should tear easily when pinched. Reserve the soaking liquid.
Transfer the softened chiles to a blender along with 1 cup of the soaking liquid. Blend on high for 2 to 3 minutes until completely smooth. You want a paste with no visible pieces. Scrape down the sides as needed. If the mixture is too thick to blend, add more soaking liquid in small splashes. Press the paste through a fine-mesh strainer into a bowl, discarding the solids. This straining step removes any remaining bits of skin and seeds. Don't skip it.
Pat the beef cubes thoroughly dry with paper towels. Moisture prevents browning. Season generously with salt and pepper. Heat the bacon fat in a large Dutch oven over high heat until it shimmers and just begins to smoke. Working in batches of 8 to 10 pieces to avoid crowding, sear the beef on all sides until a deep brown crust forms. This takes 3 to 4 minutes per batch. Don't rush it. That crust is flavor. Transfer browned meat to a plate and continue with remaining batches, adding more fat if the pot looks dry.
Reduce heat to medium. Add the diced onion to the pot and cook, stirring occasionally, until softened and golden at the edges, about 6 minutes. The fond on the bottom of the pot will begin to dissolve into the onions. Add the garlic and cook for another minute until fragrant. Add the cumin, oregano, smoked paprika, and cayenne. Stir constantly for 30 seconds to bloom the spices in the fat. You'll smell them come alive.
Pour in the beer, scraping up every bit of fond from the bottom. Let it bubble vigorously for 2 minutes to cook off the raw alcohol. Stir in the strained chile paste, remaining beef stock, brown sugar, and vinegar. Return all the seared beef and any accumulated juices to the pot. The liquid should come about three-quarters up the sides of the meat. Bring to a simmer, then reduce heat to low. Cover and cook for 2½ to 3 hours, stirring every 30 minutes. The chili is ready when the beef breaks apart with gentle pressure from a wooden spoon.
Ladle about ½ cup of the hot chili liquid into a small bowl. Whisk in the masa harina until smooth with no lumps. Pour this slurry back into the pot and stir to combine. Simmer uncovered for 10 minutes. The masa adds body and a subtle corn flavor that's traditional to Texas chili. The consistency should coat a spoon but still flow easily. If it's too thick, add splashes of stock. Too thin, simmer a bit longer.
Taste the chili carefully. Adjust salt. Add more cayenne if you want more heat. The vinegar should provide brightness without being identifiable. If the flavors taste flat, a small splash more will pull everything together. Turn off the heat and let the chili rest for 15 minutes before serving. This resting period allows the flavors to settle and the beef to absorb more of the sauce.
Ladle the chili into deep bowls. Serve with diced raw onion, shredded sharp cheddar, sour cream, and pickled jalapeños on the side. Saltine crackers or cornbread are the only acceptable accompaniments. Do not serve over rice. Do not add beans on top. Let the bowl of red stand on its own merits.
1 serving (about 380g)
Culinary guides, cultural storytelling, and the editorial depth that makes cooking meaningful.
Discover Culinary ExplorerChef Dean
A smoky, brick-red broth alive with charred tomatoes and toasted chiles, ladled over shredded chicken and crowned with a mountain of crispy tortilla strips, cool avocado, sharp cheese, and a generous squeeze of lime.

Chef Dean
Tender chunks of oak-smoked brisket simmered with velvety black beans, toasted dried chiles, and warm spices in a bowl of pure Texan comfort that rewards patience with every smoky, soul-satisfying spoonful.
Chef Juliette
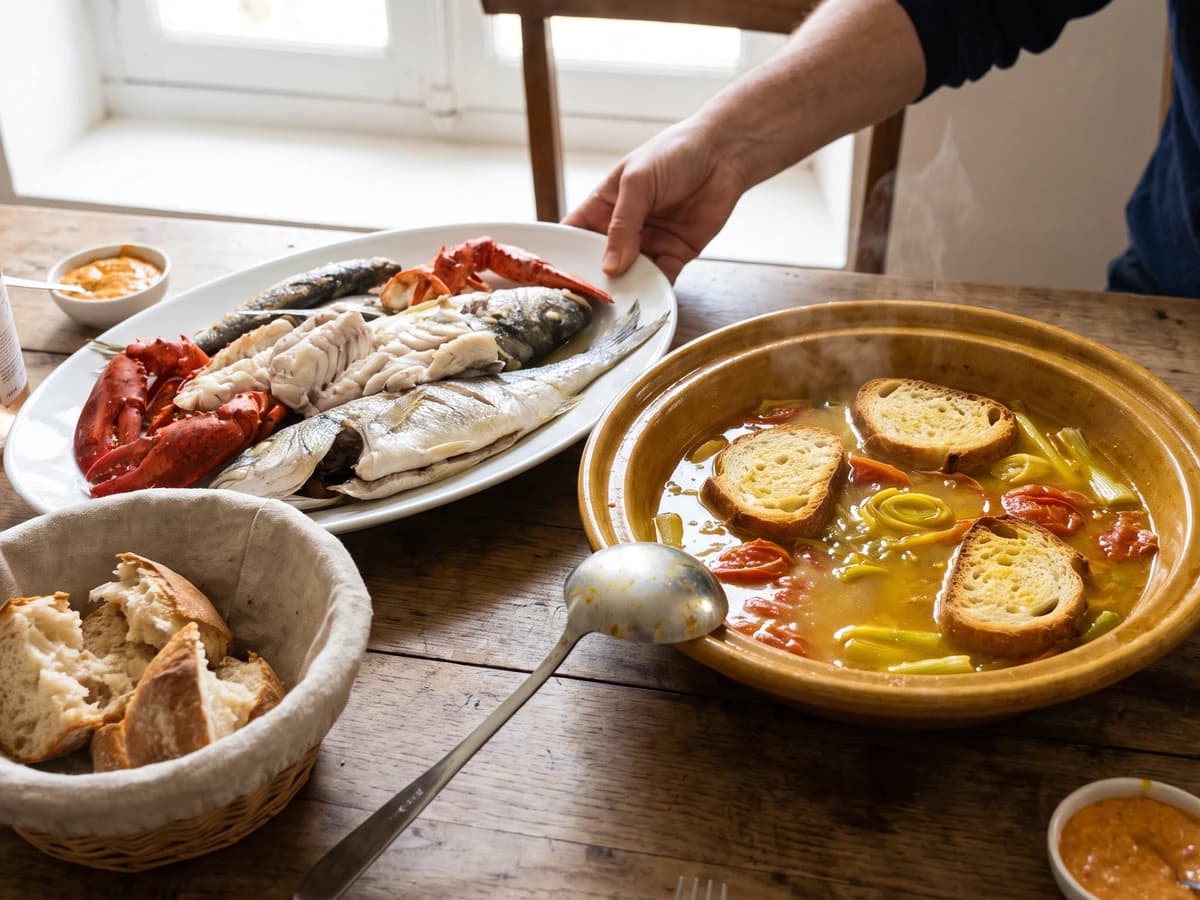
Marseille's great fish stew, saffron-gold and garlic-scented, proves that a hard boil can be the careful choice: it binds olive oil into broth before the whole pot meets bread.
Chef Juliette
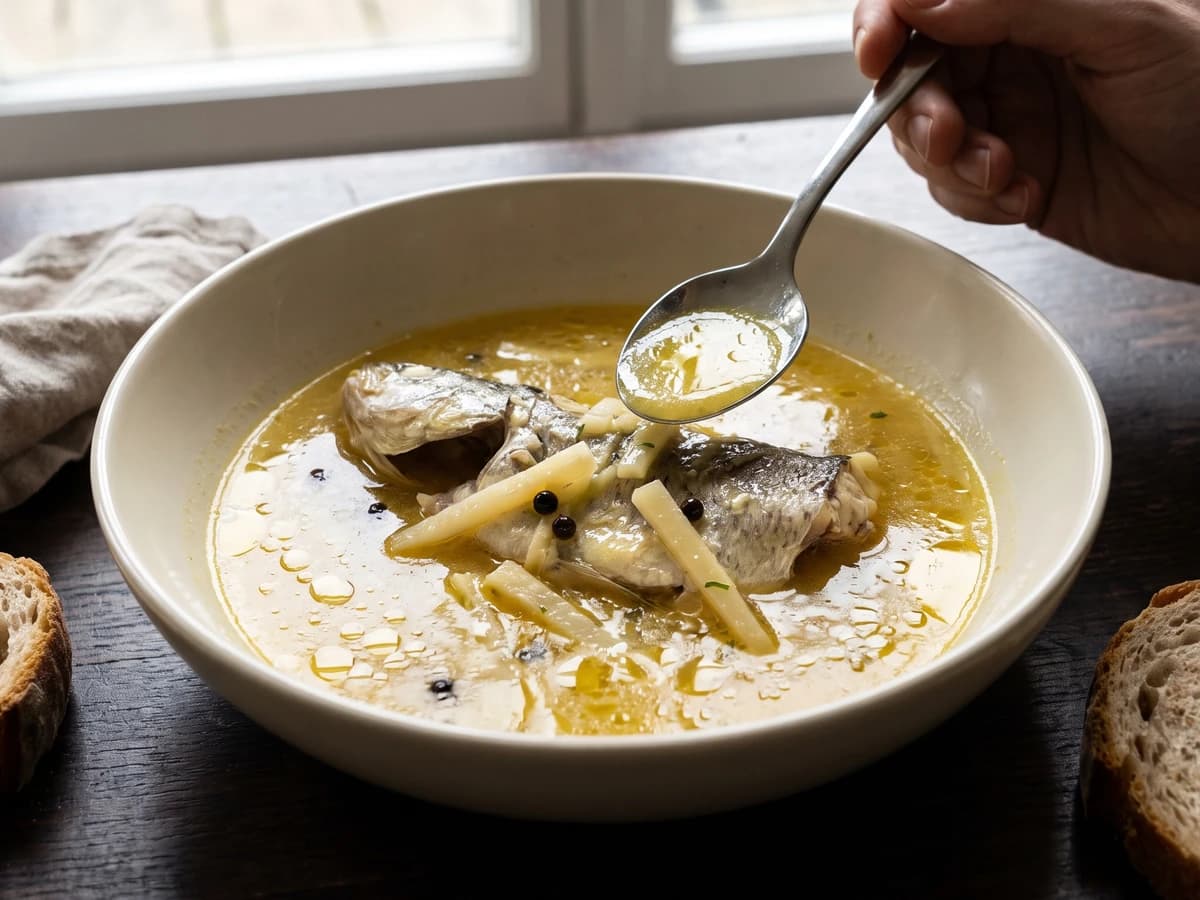
Waterzoi asks fresh, bone-in river fish to thicken its own buttery broth, with parsley root and pepper for company. No flour, no stockpot, just a brisk simmer watched closely.