Culinary Explorer

A cooking platform built around craft, culture, and the stories behind what we eat.
Discover Culinary Explorer
Sourdough Bagels

Sourdough Bagels

Created by

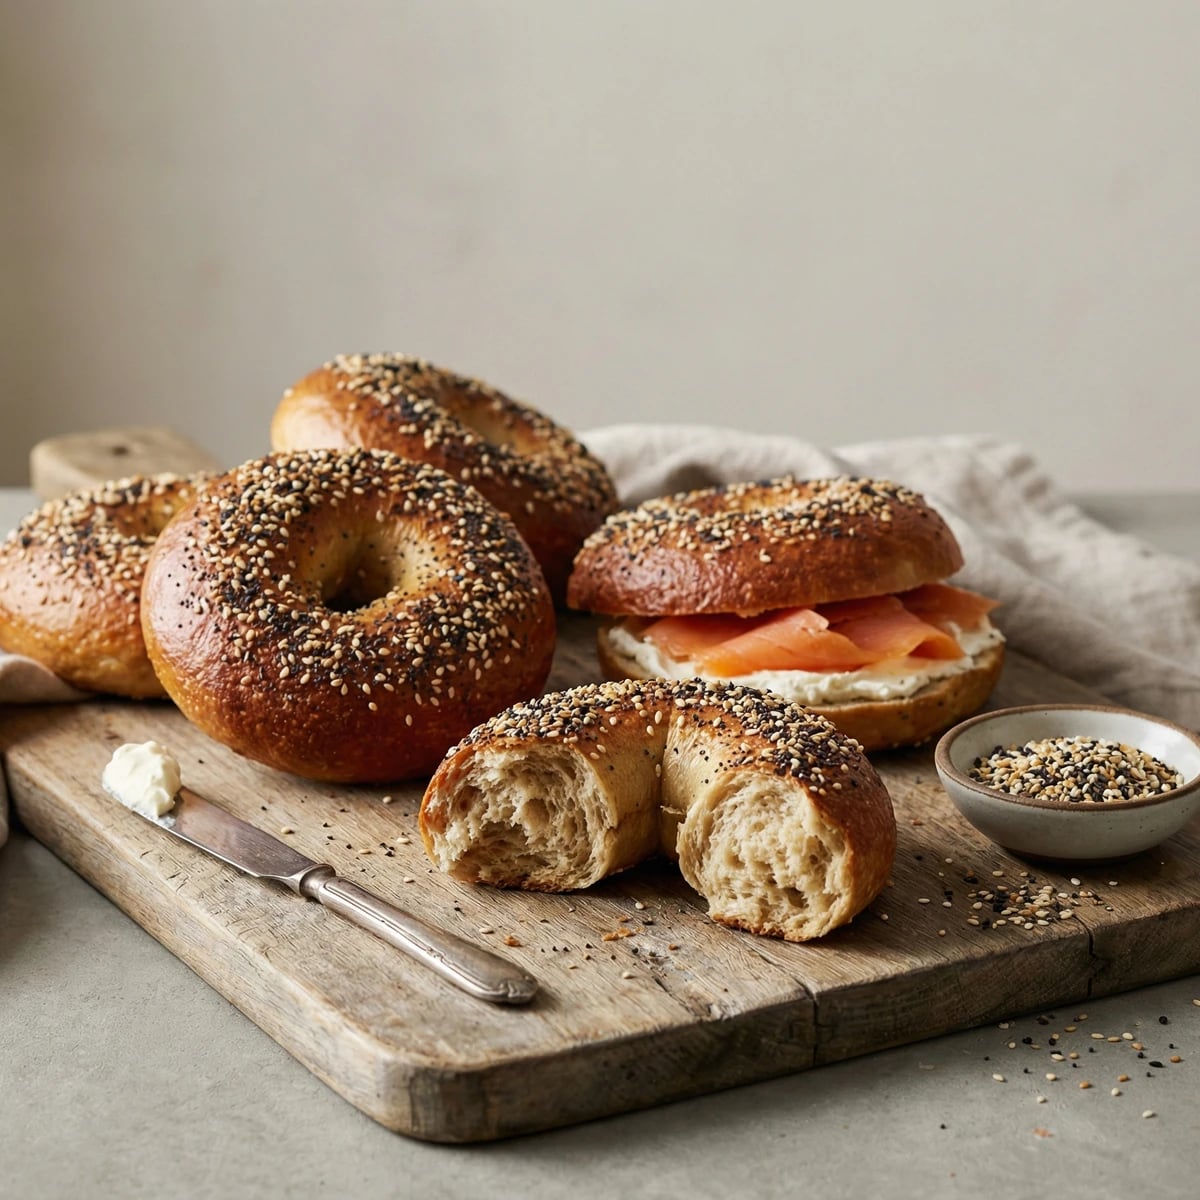
Dense, chewy bagels with that distinctive sourdough tang and shatteringly thin crust, made the way they were before commercial yeast arrived in America. Worth every minute of the wait.

Breads
Jewish
Weeknight
Make Ahead
45 min
Active Time
25 min cook14 hr total
Yield8 bagels

The bagel arrived in America in the holds of immigrant ships, carried by Eastern European Jews who understood that good bread requires time. Those early bakers had no instant yeast. They worked with wild cultures, building flavor through patience. This recipe returns to that tradition.

Sourdough brings a complexity that commercial yeast simply cannot replicate. The long fermentation develops organic acids that tenderize the gluten while adding depth. You'll taste the difference in every bite. That characteristic tang harmonizes with the malt sweetness from the boiling water, creating layers of flavor that make store-bought bagels seem like pale imitations.

The technique matters here. A proper bagel is dense and chewy, not soft and pillowy like sandwich bread. We achieve this through a stiff dough with less hydration than typical bread, vigorous mixing to develop strong gluten, and that essential boiling step that sets the crust before baking. The boil gelatinizes the exterior starch, creating the thin, shiny shell that defines a real bagel.

I've simplified this process for the home kitchen without sacrificing authenticity. You'll shape your bagels in the evening, let them cold-ferment overnight in the refrigerator, then boil and bake them fresh in the morning. The reward is bagels that taste like they came from a proper bakery on the Lower East Side, because you made them with the same respect for craft.

The technique, the tradition, and the story behind every dish.

Discover Culinary Explorer

Ingredients

active sourdough starter

Quantity

150g (1/2 cup plus 2 tablespoons)

fed within 8 hours

warm water

Quantity

280g (1 cup plus 2 tablespoons)

90-95°F

bread flour

Quantity

500g (4 cups)

plus more for dusting

fine sea salt

Quantity

10g (2 teaspoons)

barley malt syrup

Quantity

30g (2 tablespoons)

or substitute honey

water for boiling

Quantity

4 quarts

barley malt syrup for boiling

Quantity

2 tablespoons

baking soda

Quantity

1 tablespoon

cornmeal or semolina

Quantity

for dusting pans

sesame seeds (optional)

Quantity

as needed for topping

poppy seeds (optional)

Quantity

as needed for topping

dried onion flakes (optional)

Quantity

as needed for topping

coarse salt (optional)

Quantity

as needed for topping

Equipment Needed

  • Kitchen scale for accurate measurements
  • Large Dutch oven or wide pot for boiling
  • Spider strainer or large slotted spoon
  • Stand mixer with dough hook (optional but helpful for this stiff dough)
  • Instant-read thermometer
  • Sheet pans
  • Wire cooling rack

Instructions

  1. 1

    Mix the dough

    In a large bowl, combine your active starter with the warm water and malt syrup. Stir until the starter dissolves and the mixture looks milky with swirls of culture throughout. Add the flour and salt. Mix with a wooden spoon until a shaggy mass forms. This dough is stiff, stiffer than any bread dough you've made. That's correct. The low hydration creates the dense, chewy texture that defines a proper bagel.

    Your starter should have doubled within 4-8 hours of feeding and look bubbly and active. A sluggish starter produces flat, dense bagels without the proper rise.
  2. 2

    Knead until smooth

    Turn the dough onto a clean, unfloured surface. Knead vigorously for 10-12 minutes. The dough will resist you. Push through the heel of your palm, fold, rotate, repeat. You're building a strong gluten network that will trap the fermentation gases and give your bagels structure. The dough is ready when it becomes smooth, slightly tacky but not sticky, and springs back when you poke it. If using a stand mixer, knead on medium speed with the dough hook for 8 minutes.

    Resist adding flour during kneading. The dough will feel dry at first but will smooth out as the gluten develops. Extra flour creates tough, heavy bagels.
  3. 3

    Bulk ferment

    Shape the dough into a ball and place it in a lightly oiled bowl. Cover with plastic wrap or a damp kitchen towel. Let it rise at room temperature (68-72°F) for 3-4 hours. The dough should increase by about 50 percent in volume. It won't double like a yeasted bread. Sourdough works slower and steadier. You'll see the surface become slightly domed and puffy.

  4. 4

    Divide the dough

    Line a sheet pan with parchment and dust it generously with cornmeal or semolina. Turn your dough onto a lightly floured surface and press it gently into a rough rectangle. Divide into 8 equal pieces, about 115g (4 ounces) each. A kitchen scale ensures uniformity. Uneven bagels bake unevenly, leaving you with some overdone and others underdone.

  5. 5

    Shape the bagels

    Working with one piece at a time, roll the dough against the counter using your cupped palm to form a tight ball. The friction between dough and counter creates surface tension. Let the balls rest under a towel for 5 minutes to relax the gluten. Then poke your thumb through the center of each ball and stretch gently, rotating the dough around your fingers until the hole measures about 2 inches across. The hole will shrink during proofing and baking. Make it larger than you think necessary.

    Some bakers prefer the rope method: roll each piece into a 9-inch rope, wrap around your palm, and roll the overlapped ends together on the counter. Both methods work. Use whichever feels more natural to you.
  6. 6

    Cold proof overnight

    Place the shaped bagels on your prepared pan, leaving 2 inches between them. Cover tightly with plastic wrap. Refrigerate for 8-16 hours. This overnight rest does three things: it develops complex sourdough flavor through slow fermentation, makes your morning baking manageable, and allows the gluten to relax for a more tender chew. The bagels will puff slightly but not dramatically.

  7. 7

    Test readiness

    The next morning, fill a small bowl with cool water. Drop one bagel into the bowl. If it floats within 30 seconds, your bagels are ready to boil. If it sinks and stays down, leave the pan at room temperature for 30-60 minutes and test again. The float test tells you that fermentation has produced enough gas to give your bagels the proper lift.

  8. 8

    Prepare for boiling and baking

    Preheat your oven to 450°F with a rack in the center position. Line a fresh sheet pan with parchment and dust with cornmeal. Bring 4 quarts of water to a rolling boil in a wide pot or Dutch oven. Add the malt syrup and baking soda to the boiling water. The malt adds sweetness and deepens the crust color. The baking soda raises the pH, promoting better browning and that characteristic bagel chew.

  9. 9

    Boil the bagels

    Working in batches of 2-3 to avoid crowding, lower bagels into the boiling water. They'll sink briefly, then bob to the surface. Boil for 45 seconds, flip with a slotted spoon or spider, and boil 45 seconds more. Longer boiling creates a thicker, chewier crust. Shorter boiling yields a thinner, softer exterior. Lift each bagel and let excess water drip off for a few seconds before transferring to your prepared pan.

    Maintain a steady boil throughout. If the water temperature drops too much, your bagels will absorb water instead of developing that tight, glossy skin.
  10. 10

    Add toppings

    While the bagels are still wet and sticky from boiling, press them gently into your chosen toppings. Sesame seeds, poppy seeds, coarse salt, dried onion flakes, or a mixture of everything. The moisture from the boil acts as glue. Generous coverage is traditional. Don't be timid.

  11. 11

    Bake until golden

    Bake for 18-22 minutes, rotating the pan halfway through. The bagels are done when they're deep golden brown on top and sound hollow when you tap the bottom. The color should be confident, not pale. Underbaked bagels lack the proper crust and turn soft within hours. Transfer to a wire rack immediately. Let them cool for at least 15 minutes before slicing. The interior continues cooking during this rest.

Chef Tips

  • Barley malt syrup is the traditional choice for both the dough and the boiling water. Look for it at brewing supply stores, health food shops, or online. Honey works as a substitute but produces a slightly different flavor profile and lighter crust color.
  • If your kitchen runs cold, proof the dough in your oven with just the light turned on. The bulb generates enough gentle warmth to keep fermentation moving without overheating.
  • Day-old bagels revive beautifully with a quick toast. Split them first, then toast cut-side down in a dry skillet or under the broiler. The exterior crisps while the interior steams back to tenderness.
  • Freeze unsliced bagels in a single layer, then transfer to a freezer bag once solid. They keep for two months. Thaw at room temperature or split while frozen and toast directly.
  • For a proper New York breakfast, spread with cream cheese while still warm, layer with cured salmon, thin-sliced red onion, capers, and a few cracks of black pepper. Fresh tomato is welcome. Lettuce is not.

Advance Preparation

  • Starter should be fed 4-8 hours before mixing, or the night before if you mix in the morning.
  • Shaped bagels must cold-proof overnight (8-16 hours) in the refrigerator. Plan accordingly.
  • Baked bagels are best within 6 hours but remain good for 2 days stored in a paper bag at room temperature. Avoid plastic, which softens the crust.

Frequently Asked Questions

Nutrition Information

1 bagel (about 115g)

Calories
290 calories
Total Fat
1 g
Saturated Fat
0 g
Trans Fat
0 g
Unsaturated Fat
1 g
Cholesterol
0 mg
Sodium
575 mg
Total Carbohydrates
51 g
Dietary Fiber
2 g
Sugars
1 g
Protein
8 g

Note: Chef personas and recipes are created with AI assistance. Cook with care: follow safe food-handling practices, check doneness with a thermometer when needed, and adapt for allergies and your kitchen.

Where cooking meets culture.

Culinary guides, cultural storytelling, and the editorial depth that makes cooking meaningful.

Discover Culinary Explorer

More from The Bread Baker's Handbook

Browse the full collection