Culinary Explorer

A cooking platform built around craft, culture, and the stories behind what we eat.
Discover Culinary Explorer
Anadama Bread

Anadama Bread

Created by

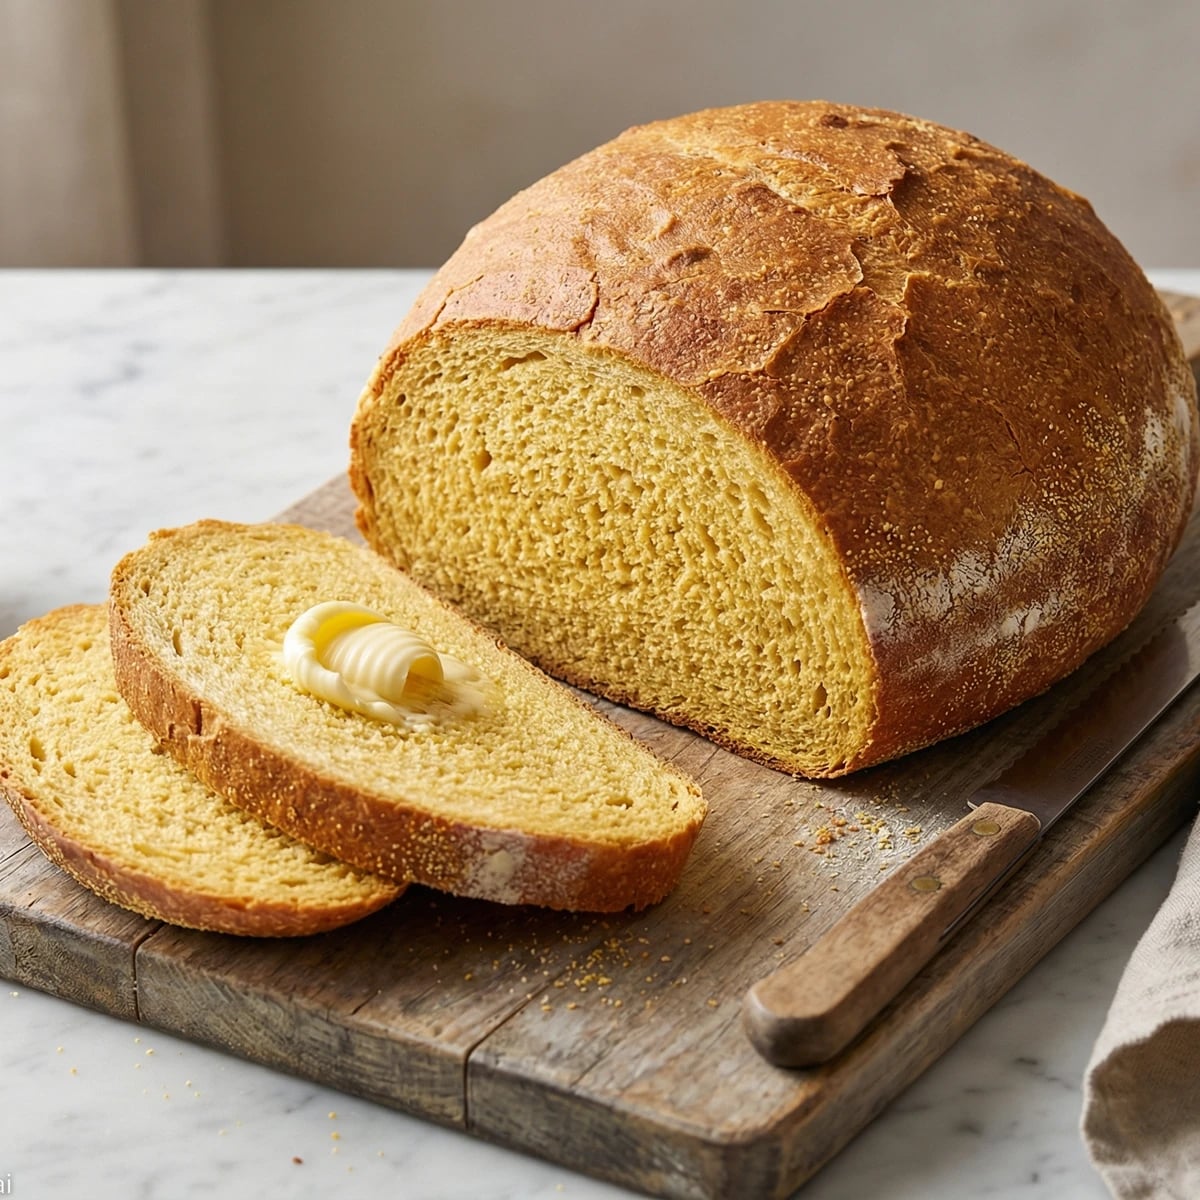
A colonial New England loaf with golden cornmeal crumb and dark molasses sweetness, crusty on the outside and tender within. The kind of bread that built fishing villages.

Breads
New England
Weeknight
Make Ahead
30 min
Active Time
40 min cook3 hr 30 min total
Yield1 loaf (about 12 slices)

Every great American bread has a story, and Anadama's tale is too good not to repeat. Legend holds that a Gloucester fisherman, fed up with his wife Anna's endless cornmeal mush, threw flour and yeast into the pot while muttering "Anna, damn her!" The resulting bread became a New England staple. Whether the story is true matters less than what it reveals: this is humble food, born from frustration and improvisation, transformed into something genuinely wonderful.

The combination of cornmeal and molasses gives Anadama its character. The cornmeal provides a subtle grit and golden color that no other bread achieves. The molasses contributes a mineral sweetness, darker and more complex than honey or sugar. Together they create a loaf that toasts beautifully, holds up to thick slabs of butter, and makes the finest ham sandwich you've ever eaten.

This is an honest bread that rewards patience. The dough is slightly sticky from the molasses. Don't fight it. Don't add flour until you've given it time to come together. Your hands will learn the feel of proper Anadama dough after one or two bakes. It should be tacky but workable, soft but not slack. Trust the process and you'll produce a loaf worthy of any New England kitchen.

The technique, the tradition, and the story behind every dish.

Discover Culinary Explorer

Ingredients

water

Quantity

1 cup (240ml)

yellow cornmeal, medium grind

Quantity

1/2 cup (85g)

unsalted butter

Quantity

3 tablespoons (42g)

cut into pieces

unsulphured molasses

Quantity

1/3 cup (113g)

fine sea salt

Quantity

1 1/2 teaspoons (9g)

warm water (100-110°F)

Quantity

1/4 cup (60ml)

active dry yeast

Quantity

2 1/4 teaspoons (7g)

bread flour

Quantity

3 cups (390g)

plus more for kneading

butter for greasing pan

Quantity

as needed

Equipment Needed

  • 9x5-inch loaf pan
  • Medium saucepan
  • Instant-read thermometer
  • Wire cooling rack
  • Bench scraper

Instructions

  1. 1

    Cook the cornmeal

    Bring 1 cup water to a boil in a medium saucepan. Reduce heat to low and whisk in the cornmeal in a slow, steady stream. Cook for 2 to 3 minutes, stirring constantly, until the mixture thickens to a porridge consistency. It should pull away from the sides of the pan slightly. Remove from heat immediately.

    Cooking the cornmeal first softens its texture and prevents a gritty crumb in the finished bread.
  2. 2

    Add butter and molasses

    Stir the butter pieces into the hot cornmeal until melted completely. Add the molasses and salt, stirring until everything is thoroughly combined. The mixture will be dark and glossy. Transfer to a large mixing bowl and let cool until lukewarm, about 20 to 25 minutes. It should feel barely warm when you press your finger to the surface. Too hot and you'll kill the yeast.

  3. 3

    Activate the yeast

    While the cornmeal cools, combine the warm water and yeast in a small bowl. Let stand for 5 to 10 minutes until the mixture becomes foamy and smells pleasantly yeasty. If nothing happens after 10 minutes, your yeast is dead. Start again with fresh yeast.

    Water temperature matters. Too hot (above 115°F) kills yeast. Too cold and it won't activate. Aim for the temperature of a warm bath.
  4. 4

    Form the dough

    Add the activated yeast to the cooled cornmeal mixture and stir to combine. Add the bread flour one cup at a time, mixing with a wooden spoon until a shaggy dough forms. The dough will be sticky. This is correct. Resist the urge to add more flour at this stage.

  5. 5

    Knead the dough

    Turn the dough onto a lightly floured surface. Knead for 8 to 10 minutes, adding small dustings of flour only as needed to prevent sticking. The dough is ready when it becomes smooth, slightly tacky, and springs back when you poke it with a finger. It won't be as elastic as a white bread dough because of the cornmeal, but it should hold together well and feel alive under your hands.

    Use a bench scraper to lift stuck dough from your work surface rather than adding more flour, which can make the bread dense.
  6. 6

    First rise

    Place the dough in a lightly oiled bowl, turning once to coat all sides. Cover tightly with plastic wrap or a damp kitchen towel. Set in a warm, draft-free spot and let rise until doubled in size, about 1 to 1 1/2 hours. The dough is ready when an impression made with your finger fills back slowly rather than springing back immediately.

  7. 7

    Shape the loaf

    Butter a 9x5-inch loaf pan generously. Punch down the risen dough to release the gas, then turn it onto a clean surface. Pat into a rough rectangle about 8 inches wide. Roll the dough tightly from a short end, pinching the seam to seal. Place seam-side down in the prepared pan. The dough should fill about two-thirds of the pan.

  8. 8

    Second rise

    Cover the pan loosely with plastic wrap or a towel. Let rise until the dough crowns about 1 inch above the rim of the pan, 45 minutes to 1 hour. Don't rush this. Underproofed bread will split along the sides in the oven. Properly proofed dough will hold a gentle impression when pressed.

  9. 9

    Bake the bread

    Position a rack in the center of the oven and preheat to 375°F during the last 15 minutes of rising. Bake the loaf for 35 to 40 minutes, until the top is deeply golden brown and the internal temperature reaches 190°F on an instant-read thermometer. The crust should feel firm when tapped and produce a hollow sound.

    If the top browns too quickly, tent loosely with foil for the last 10 minutes of baking.
  10. 10

    Cool completely

    Remove the bread from the oven and let rest in the pan for 10 minutes. Run a knife around the edges and turn the loaf onto a wire rack. Let cool completely before slicing, at least 1 hour. Cutting warm bread crushes the crumb and releases moisture that should stay in the loaf. Patience rewards you with clean slices and better texture.

Chef Tips

  • Use unsulphured molasses, not blackstrap. Blackstrap is bitter and will overpower the bread. Grandma's or Brer Rabbit brands work well.
  • Medium-grind cornmeal gives the best texture. Fine cornmeal disappears; coarse grind makes the bread gritty. If you can only find fine, increase the amount by 2 tablespoons.
  • This bread keeps exceptionally well. Wrap tightly in plastic and store at room temperature for up to 4 days. The molasses acts as a natural preservative.
  • Toast thick slices and spread with salted butter while warm. The combination of the molasses sweetness and butter richness is the whole point of this bread.
  • For a darker, more pronounced molasses flavor, increase the molasses to 1/2 cup. The bread will be stickier and slightly denser, but intensely flavorful.

Advance Preparation

  • The cornmeal mixture can be prepared and cooled up to 2 hours ahead. Cover and hold at room temperature before adding yeast.
  • Shaped dough can be refrigerated overnight for the second rise. Cover tightly with plastic wrap. Remove from refrigerator 1 hour before baking to take the chill off.
  • Baked bread freezes beautifully for up to 3 months. Wrap tightly in plastic, then foil. Thaw at room temperature and refresh in a 350°F oven for 10 minutes.

Frequently Asked Questions

Nutrition Information

1 serving (about 65g)

Calories
195 calories
Total Fat
4 g
Saturated Fat
2 g
Trans Fat
0 g
Unsaturated Fat
2 g
Cholesterol
7 mg
Sodium
292 mg
Total Carbohydrates
34 g
Dietary Fiber
1 g
Sugars
7 g
Protein
4 g

Note: Chef personas and recipes are created with AI assistance. Cook with care: follow safe food-handling practices, check doneness with a thermometer when needed, and adapt for allergies and your kitchen.

Where cooking meets culture.

Culinary guides, cultural storytelling, and the editorial depth that makes cooking meaningful.

Discover Culinary Explorer

More from The Bread Baker's Handbook

Browse the full collection