Chef Juliana
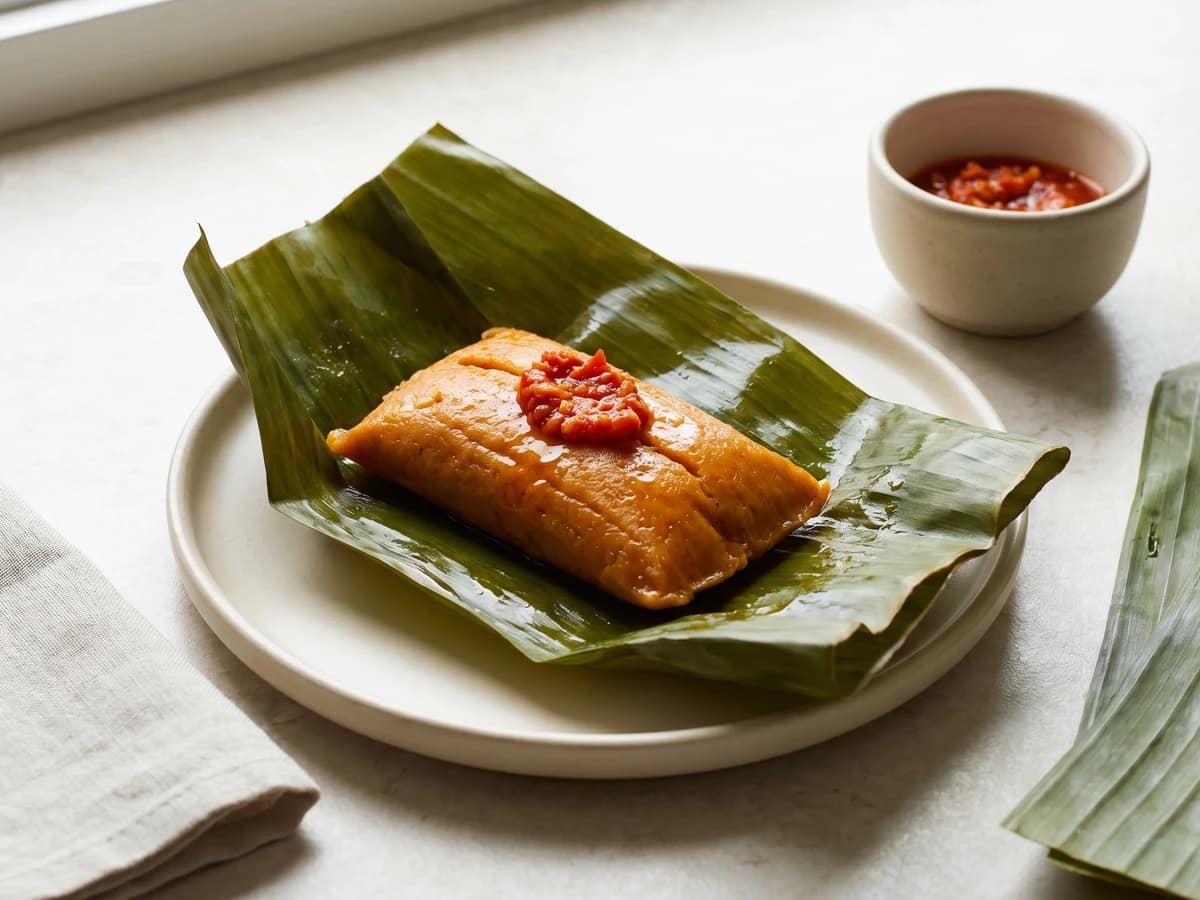
Abará
You think banana leaves and hand-whipped bean massa mean “isso não é pra mim.” Wrong. Soak, peel, beat, wrap, steam. Abará is learned by touch, not inherited by magic.
A cooking platform built around craft, culture, and the stories behind what we eat.

Created by
You don't need bakery hands for this. You need a pan, a rolling pin, a real refogado, and the nerve to learn one dough that feeds birthdays, game day, and the freezer.
You look at a tray of risoles and think, quietly, isso não é pra mim. Dough, filling, sealing, frying. Too many chances to ruin dinner. Good. Say the fear out loud so a gente can take it apart properly.
Risoles belong to that Brazilian habit of making food stretch without making it sad. A little ground beef, cooked with onion and garlic, becomes a whole tray of salgados. The same refogado that starts your feijão starts the filling here: onion until it goes soft, garlic just until it smells alive, meat browned instead of boiled grey. No packet, no powder pretending to be flavor. Comida de verdade does not need a disguise.
The dough is not magic. It's boiled liquid and flour stirred until it pulls from the pan, then kneaded while warm so it turns smooth. That's the ponto. Roll it, cut circles, fill, fold, seal, bread, fry. Step by step. Cozinhar não é dom, é um aprendizado, and this is one of those receitas que funcionam when someone bothers to write every move down.
Serve risoles with coffee at a birthday, with cold drinks during a game, or next to rice, beans, couve, and salad when leftovers need to resolver o jantar. The pê-efe is still the spine of the house, but a good salgado in the freezer is the friend who shows up on a chaotic Tuesday.
Risoles in Brazil descend from European rissoles, especially the French rissole, small filled pastries that traveled through Portuguese and urban bakery traditions. In Brazil they became a padaria and festa staple: boiled wheat dough, savory filling, breadcrumbs, and a quick fry, usually shaped as half-moons and sold beside coxinha, empadinha, and bolinha de queijo. The name sounds imported, but the Brazilian version is its own everyday salgado, built for trays, counters, birthdays, and freezing.
Quantity
2 tablespoons
Quantity
1 medium
finely chopped
Quantity
3 cloves
minced
Quantity
1 pound
Quantity
1 teaspoon, plus more to taste
Quantity
1/2 teaspoon
Quantity
1 tablespoon
Quantity
1 medium
seeded and finely chopped
Quantity
1/3 cup
chopped
Quantity
2 tablespoons
chopped
Quantity
1 tablespoon
for tightening the filling
Quantity
2 cups
Quantity
1 cup
Quantity
2 tablespoons
Quantity
1 teaspoon
for the dough
Quantity
3 cups
leveled, for the dough
Quantity
1/2 cup
for rolling
Quantity
2 large
Quantity
2 tablespoons
for breading
Quantity
2 cups
Quantity
4 cups
for frying
| Ingredient | Quantity |
|---|---|
| oil | 2 tablespoons |
| onionfinely chopped | 1 medium |
| garlicminced | 3 cloves |
| ground beef | 1 pound |
| salt | 1 teaspoon, plus more to taste |
| black pepper | 1/2 teaspoon |
| tomato paste | 1 tablespoon |
| tomatoseeded and finely chopped | 1 medium |
| green olives (optional)chopped | 1/3 cup |
| parsleychopped | 2 tablespoons |
| all-purpose flourfor tightening the filling | 1 tablespoon |
| whole milk | 2 cups |
| water or homemade beef broth | 1 cup |
| butter | 2 tablespoons |
| saltfor the dough | 1 teaspoon |
| all-purpose flourleveled, for the dough | 3 cups |
| all-purpose flourfor rolling | 1/2 cup |
| eggs | 2 large |
| milkfor breading | 2 tablespoons |
| fine dry breadcrumbs | 2 cups |
| neutral oilfor frying | 4 cups |
Warm the oil in a wide skillet over medium heat. Add the onion and cook, stirring now and then, until it goes soft and see-through, about 5 minutes. Add the garlic and cook for 1 minute, just until you can smell it. This is where the filling begins, so don't rush it, and don't burn the garlic unless you want bitterness following you around like bad gossip.
Add the ground beef, salt, and pepper. Break it up with a spoon and cook until the meat loses its raw color, then let it sit in contact with the pan in short stretches so it can dourar, about 8 to 10 minutes. If the pan looks crowded and wet, raise the heat a little and keep stirring until the liquid cooks off. Wet meat boils. Dry contact browns. That's the difference between flavor and grey sadness.
Stir in the tomato paste and cook for 1 minute, until it darkens slightly and smells sweet instead of sharp. Add the chopped tomato and cook until it collapses and the skillet looks mostly dry, about 4 minutes. Stir in the olives, if using, parsley, and 1 tablespoon flour. Cook for 1 minute more. The filling should be moist but not loose, because a wet filling leaks, and leaking risoles make frying dramatic in the worst way. Spread it on a plate to cool.
In a heavy pot, combine the milk, water or broth, butter, and salt. Bring it to a full boil over medium-high heat, with bubbles across the surface, not just a shy simmer at the edges. The flour needs real heat to hydrate all at once, or the dough turns lumpy and sulky.
Lower the heat to medium-low and add the 3 cups flour all at once. Stir hard with a wooden spoon until the mixture becomes one heavy mass and pulls away from the sides and bottom of the pot, about 3 to 4 minutes. Keep cooking and turning it until the dough looks smooth and a thin film forms on the bottom of the pot. That's the ponto. Stop too soon and it stays sticky; cook it properly and it behaves.
Tip the dough onto a clean counter lightly dusted with flour. Let it cool just until you can touch it, then knead for 2 to 3 minutes until smooth and elastic. Cover it with a clean towel while you work. Warm dough seals better; cold dough cracks at the edges and then acts innocent in the oil.
Divide the dough in half. Roll one half to about 1/8 inch thick, keeping the other half covered. Cut circles with a 3 1/2-inch cutter or the rim of a wide glass. Gather scraps and reroll once. Thin dough fries crisp and balanced; thick dough turns bready and steals the filling's attention.
Put 1 tablespoon cooled beef filling in the center of each circle. Fold the dough over into a half-moon and press the edges firmly with your fingers, then pinch or press with a fork to seal. Don't overfill. I know the generous hand feels virtuous, but here it is sabotage. A risole needs room to close.
Beat the eggs with 2 tablespoons milk in a shallow bowl. Put the breadcrumbs in another bowl. Dip each risole in the egg mixture, let the excess drip off, then coat in breadcrumbs, pressing gently so the crumb sticks all over. The egg is glue, not a bath. Too much liquid makes the crust heavy and patchy.
Heat the oil in a heavy pot to 350°F, or until a breadcrumb dropped in sizzles right away without turning dark instantly. Fry 4 to 5 risoles at a time, turning once, until evenly golden, about 3 to 4 minutes. Don't crowd the pot. The oil temperature drops, the crust drinks oil, and then everyone pretends fried food is the problem. No, the problem was impatience.
Lift the risoles out with a slotted spoon and drain on a rack or paper towels. Let them sit for 3 minutes before eating so the filling settles and nobody burns their mouth trying to look brave. Serve warm, with hot sauce if you like, or cool completely before freezing.
1 serving (about 80g)
Culinary guides, cultural storytelling, and the editorial depth that makes cooking meaningful.
Discover Culinary ExplorerChef Juliana
You think banana leaves and hand-whipped bean massa mean “isso não é pra mim.” Wrong. Soak, peel, beat, wrap, steam. Abará is learned by touch, not inherited by magic.

Chef Juliana
You think food of Iansã from the baianas' tabuleiro is not for your stove. Anota aí: soaked feijão-fradinho, real dendê, and hand-whipping make a home version learnable.

Chef Juliana
You think fried salgados belong to the birthday table you buy, not the one you make. Wrong. Learn the dough, seal the cheese, and the freezer starts working for you.

Chef Juliana
You think stuffed fried bolinhos are for the boteco cook, not your kitchen. Wrong. Mash the aipim warm, keep the filling dry, fry in small batches, and the tray disappears.