
Chef Juliette
Ordinary Brioche Paste
Pâte à brioche ordinaire teaches enriched dough properly: wake the leaven, build strength before the last egg, then work in pliable butter by stages and let one long fermentation do its quiet work.
A cooking platform built around craft, culture, and the stories behind what we eat.
Created by
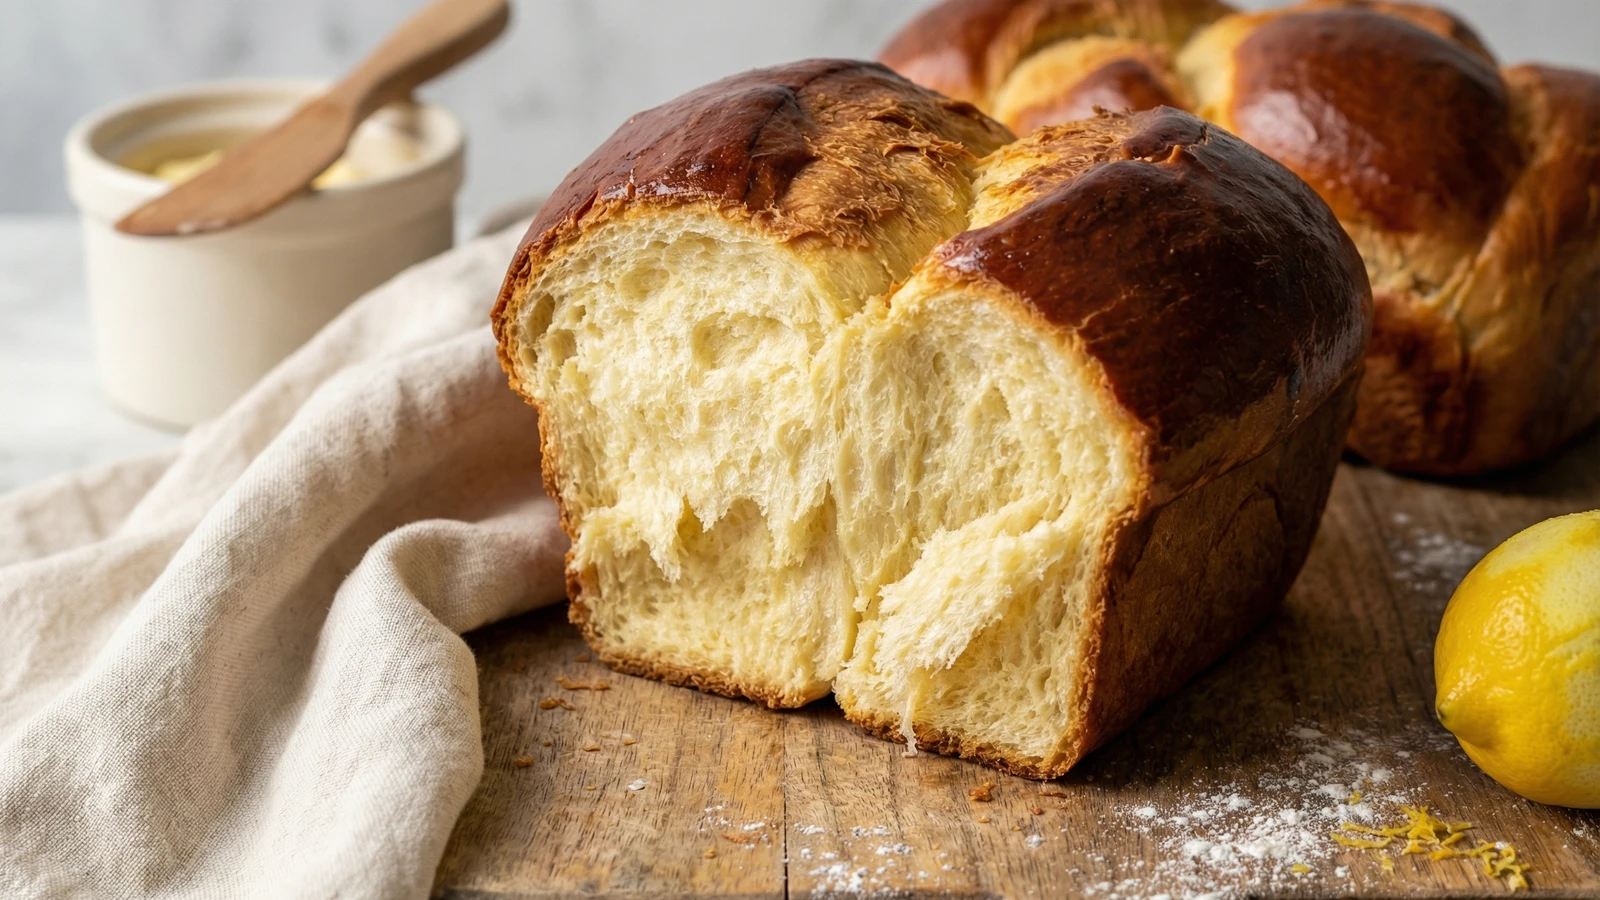
A golden, tender loaf fragrant with lemon zest and rich with eggs and butter, this Azorean classic traveled to Hawaii and changed American baking forever. The bread your grandmother would have made for Easter, if your grandmother came from the islands.
This bread tells a story of migration. Portuguese families from the Azores and Madeira carried this recipe across the Atlantic to Hawaii in the late 1800s, where they came to work the sugar plantations. They brought their language, their festivals, and their bread. What we now call Hawaiian sweet bread is simply this loaf, adapted to a new home. King's Hawaiian built an empire on a recipe that Azorean grandmothers had been making for generations without fanfare or trademark.
The dough is enriched in every sense. Eggs give it structure and that characteristic golden color. Butter provides richness. Milk creates tenderness. And lemon zest, just enough to notice, lifts the whole thing from ordinary to memorable. This is not a bread that apologizes for itself. It's unapologetically soft, honestly sweet, and worthy of your best butter.
Enriched doughs require patience. The fat and sugar interfere with gluten development, so the kneading takes longer than a lean bread. Don't rush it. The windowpane test will tell you when you've arrived. And the proofing will seem slow because enriched doughs rise more sluggishly than their leaner cousins. This is normal. Trust the process. The result is a loaf with a crumb so tender it practically pulls apart in your hands, with a crust that shatters into golden flakes.
I've made this bread for Easter morning more times than I can count. It's equally good torn into pieces and eaten plain, sliced thick for French toast, or used as the foundation for the most decadent bread pudding you'll ever taste. Good bread serves many purposes.
Quantity
1 cup (240ml)
warmed to 110°F
Quantity
2¼ teaspoons (7g)
Quantity
¾ cup (150g)
divided
Quantity
5 cups (625g)
plus more for kneading
Quantity
1 teaspoon (6g)
Quantity
4
room temperature
Quantity
8 tablespoons (113g)
softened
Quantity
2
zested
Quantity
1 teaspoon
Quantity
1
beaten with 1 tablespoon milk for egg wash
| Ingredient | Quantity |
|---|---|
| whole milkwarmed to 110°F | 1 cup (240ml) |
| active dry yeast | 2¼ teaspoons (7g) |
| granulated sugardivided | ¾ cup (150g) |
| all-purpose flourplus more for kneading | 5 cups (625g) |
| fine sea salt | 1 teaspoon (6g) |
| large eggsroom temperature | 4 |
| unsalted buttersoftened | 8 tablespoons (113g) |
| lemonszested | 2 |
| vanilla extract | 1 teaspoon |
| large eggbeaten with 1 tablespoon milk for egg wash | 1 |
Pour the warm milk into a large mixing bowl. It should feel like bathwater against your wrist, between 105°F and 115°F. Sprinkle the yeast over the surface along with one tablespoon of the sugar. Let it sit undisturbed for ten minutes. The mixture should become foamy and smell distinctly yeasty, like fresh bread dough. If nothing happens, your yeast is dead. Start over with fresh yeast and check your milk temperature.
Whisk the four eggs in a separate bowl until thoroughly combined. Add them to the bloomed yeast along with the remaining sugar, the lemon zest, and vanilla extract. Whisk until the sugar dissolves. The mixture will be pale yellow and fragrant with citrus. This is your foundation.
Add three cups of the flour and all of the salt to the wet ingredients. Stir with a wooden spoon until a shaggy mass forms. The dough will be sticky and rough. Add the softened butter in pieces, working it into the dough with your hands or the spoon. It will seem like too much butter. It isn't. Continue adding flour, half a cup at a time, until the dough pulls away from the sides of the bowl but remains tacky to the touch. You may not need all five cups.
Turn the dough onto a lightly floured surface. Knead for twelve to fifteen minutes, adding small dustings of flour only when the dough sticks aggressively to your hands. The motion is push, fold, quarter turn, repeat. The dough will transform from rough and sticky to smooth and elastic. When properly kneaded, it will spring back when poked and pass the windowpane test: stretch a small piece thin enough to see light through without tearing.
Shape the dough into a smooth ball and place it in a large, lightly greased bowl. Turn it once to coat with oil. Cover tightly with plastic wrap and let rise in a warm place until doubled in size, about ninety minutes to two hours. Enriched doughs rise slowly. The surface should look pillowy and slightly domed. Press two fingers into the dough. If the indentation remains, you're ready.
Punch down the dough to release the gas. Turn it onto a clean surface and divide it in half with a bench scraper or sharp knife. For traditional round loaves, shape each half into a tight ball by pulling the edges underneath and pinching to seal, then rolling between your cupped hands and the counter. For braided loaves, divide each half into three equal pieces, roll into ropes about fourteen inches long, and braid from the center outward, pinching the ends and tucking them under.
Place the shaped loaves on parchment-lined baking sheets, leaving at least four inches between them. Cover loosely with plastic wrap or a clean kitchen towel. Let rise until nearly doubled, about sixty to ninety minutes. The loaves should look puffy and hold a gentle fingerprint. Don't over-proof. If the dough feels fragile or starts to deflate when touched, it has gone too far.
Position a rack in the center of your oven and heat to 350°F. Beat the remaining egg with the tablespoon of milk until smooth. Using a pastry brush, paint the loaves generously with the egg wash, getting into all the crevices of braided loaves. This creates the glossy, mahogany crust that makes this bread beautiful. Be gentle. You don't want to deflate your work.
Bake for thirty to thirty-five minutes, rotating the pans halfway through for even color. The loaves are done when deeply golden brown and an instant-read thermometer inserted into the center reads 190°F. The crust should sound hollow when tapped. If the tops brown too quickly, tent loosely with aluminum foil for the final ten minutes.
Transfer the loaves to a wire rack immediately. The bread will feel soft when hot. Don't mistake this for underdone. As it cools, the crumb sets and the crust develops its characteristic light crackle. Wait at least thirty minutes before slicing, though an hour is better. I know this is difficult. The smell will test your patience. But cutting too soon releases steam and leaves you with a gummy interior. Respect the process.
1 serving (about 90g)
Culinary guides, cultural storytelling, and the editorial depth that makes cooking meaningful.
Discover Culinary ExplorerChef Juliette
Pâte à brioche ordinaire teaches enriched dough properly: wake the leaven, build strength before the last egg, then work in pliable butter by stages and let one long fermentation do its quiet work.

Chef Juliette
Ordinary brioche takes one exact measure of butter and a patient rise in the mould, becoming so light and silken that it can cradle fruit without losing its tender crumb.

Chef Juliette
Pâte à brioche ordinaire, butter-rich yet firm, teaches the useful side of brioche: slow fermentation, disciplined mixing, and a dough that rolls cleanly for lining, wrapping, and every sturdy pastry job.

Chef Thomas
A proper British bloomer, slashed deep and baked until the cuts open wide and the crust turns deep, glossy gold. The kind of loaf that makes the rest of the day feel deliberate.