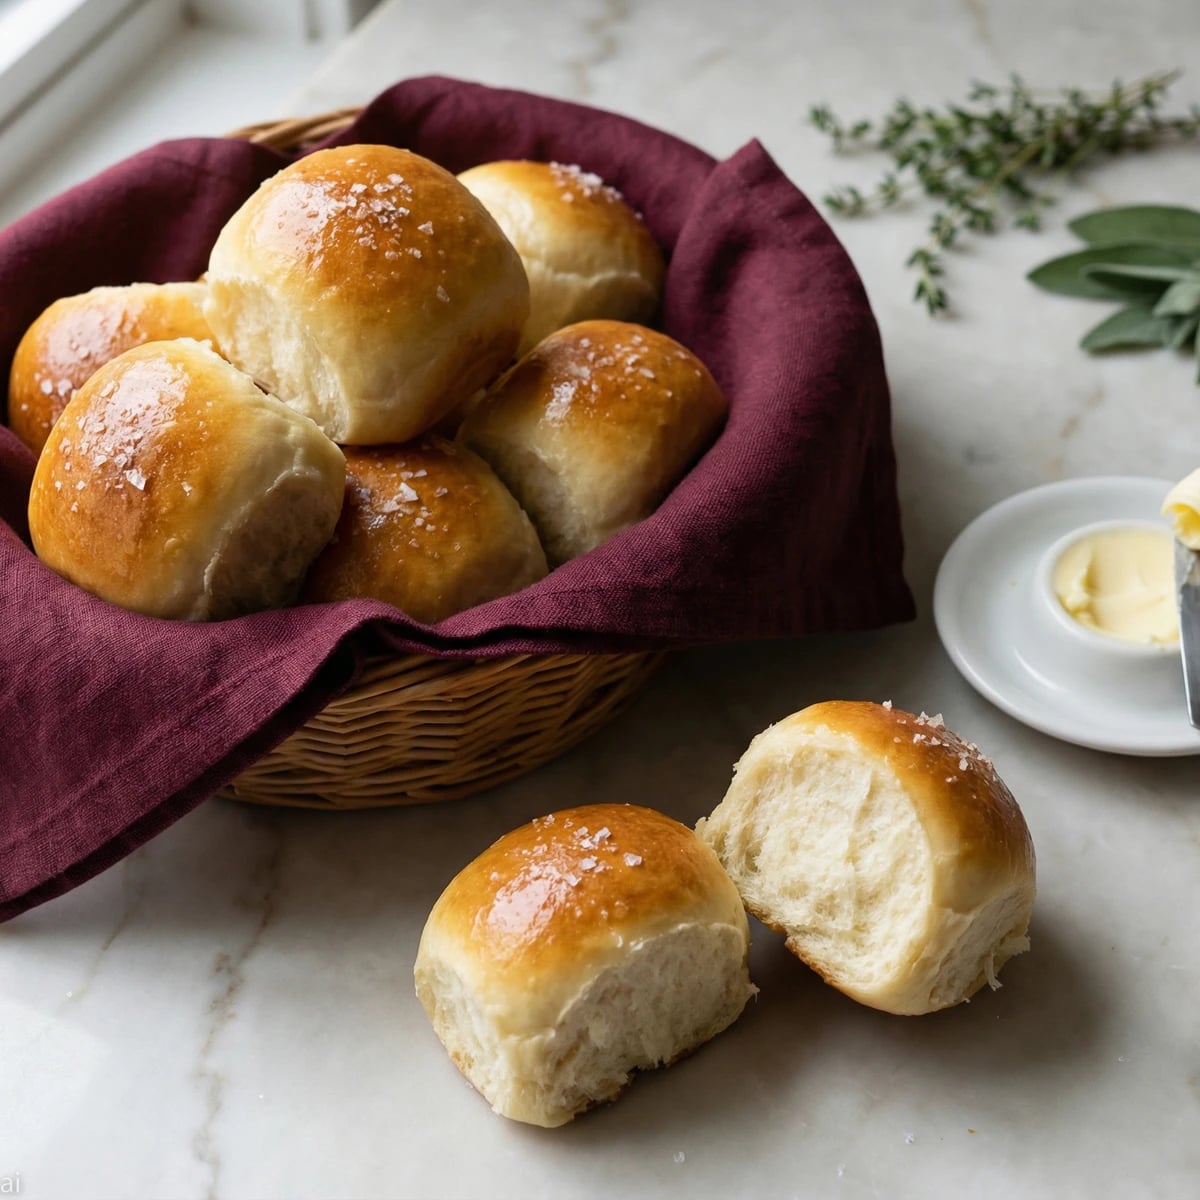
The iconic folded dinner roll from Boston's Parker House Hotel, with a pillowy interior and burnished butter-brushed crust that has graced American tables since 1870.
Breads
New England
Thanksgiving
30 min
Active Time
18 min cook•3 hr 30 min total
Yield24 rolls
These rolls were born in the kitchen of Boston's Parker House Hotel sometime around 1870, though the exact origin remains pleasantly murky. Legend credits an irritated baker who folded his dough in haste and created something better than intention could have managed. What matters is what they became: the quintessential American dinner roll.
The signature fold isn't merely aesthetic. It creates a natural hinge that opens to receive butter, a pocket that catches gravy, a shape that pulls apart into two perfect halves. The dough itself is enriched with milk, butter, and just enough sugar to encourage browning without sweetness. This is a bread designed for the table, not the breadbox.
I've made these rolls for Thanksgiving gatherings of eight and gatherings of forty. The recipe scales beautifully. More importantly, the dough forgives the distracted cook who has a turkey to attend to. You can mix it the day before, shape it the morning of, and bake while the bird rests. The timing aligns with the holiday as if by design.
Master this recipe and you'll never buy dinner rolls again. These are the rolls that make guests ask for your secret. The secret is that there is no secret. Just good butter, patient rising, and the confidence to brush on one more coat of melted gold before they hit the table.
The technique, the tradition, and the story behind every dish.
Pour the warm milk into a large mixing bowl. The temperature matters here: too hot kills the yeast, too cool leaves it dormant. It should feel like comfortable bathwater against your wrist. Sprinkle the yeast and one teaspoon of the sugar over the surface. Let it sit undisturbed for 8 to 10 minutes. You're looking for a foamy, slightly puffy surface that smells pleasantly of bread. If nothing happens, your yeast is dead. Start over with fresh.
Test milk temperature on the inside of your wrist. It should feel neutral to slightly warm, never hot.
2
Build the dough
Add the remaining sugar, the eggs, and the softened butter to the yeast mixture. Whisk until the butter breaks into smaller pieces and everything combines loosely. It won't be smooth, and that's fine. Add the flour and salt, then stir with a wooden spoon until a shaggy mass forms. The dough will look rough and slightly sticky. This is correct.
3
Knead until supple
Turn the dough onto a lightly floured surface. Knead for 8 to 10 minutes, adding flour sparingly only if the dough sticks aggressively to your hands. You want a dough that's soft and slightly tacky, not stiff or dry. Push with the heel of your hand, fold, rotate, repeat. The dough is ready when it feels smooth and springs back slowly when poked. It should pass the windowpane test: a small piece stretched thin enough to see light through without tearing.
Resist the urge to add too much flour. A slightly sticky dough produces the softest rolls. Wet your hands instead of flouring them if sticking becomes a problem.
4
First rise
Shape the dough into a ball and place it in a lightly greased bowl, turning once to coat all sides. Cover tightly with plastic wrap or a damp kitchen towel. Set in a warm, draft-free spot until doubled in size, about 1 1/2 to 2 hours. The top of your refrigerator works well. So does an oven with just the light on. Don't rush this. The flavor develops during fermentation.
5
Portion the dough
Punch down the risen dough to release the gas. Turn it onto a clean surface and divide into 24 equal pieces. A kitchen scale helps here: the total dough weighs roughly 32 ounces, so you're aiming for pieces just over an ounce each. Uniformity matters for even baking. Cover the portions loosely with plastic while you work to prevent drying.
6
Shape the rolls
Working with one piece at a time, roll it into a smooth ball by cupping your hand over the dough and moving in tight circles against the counter. The friction creates surface tension, which gives structure to the finished roll. Using a thin rolling pin or dowel, roll each ball into an oval about 4 inches long and 3 inches wide. The center should be slightly thinner than the edges. Brush the entire surface with melted butter. Fold the oval in half so the top edge sits just shy of the bottom edge, about a quarter inch back. Press gently along the fold to seal. The offset creates the classic Parker House profile.
7
Arrange and proof
Place the shaped rolls in two buttered 9x13-inch baking pans, spacing them about half an inch apart. They should nearly touch but not crowd. As they proof and bake, they'll grow into each other, creating soft sides and pull-apart character. Cover loosely with plastic wrap and let rise until puffy and nearly doubled, 45 minutes to 1 hour. When you press a roll gently with your fingertip, the indentation should fill back slowly.
8
Bake until golden
Heat your oven to 375°F during the final 20 minutes of proofing. Remove the plastic and brush the tops of the rolls generously with more melted butter. Bake for 15 to 18 minutes, rotating the pans halfway through. The rolls are done when deeply golden on top and an instant-read thermometer inserted into the center reads 190°F. The kitchen will smell like everything good about autumn.
For extra browning, move the pans to the top rack for the final 3 minutes of baking.
9
Finish and serve
Remove from the oven and immediately brush with one final coat of melted butter. Sprinkle with flaky sea salt if desired. Let rest in the pan for 5 minutes, then transfer to a cloth-lined basket or serving platter. Serve warm. These rolls are at their absolute peak within 30 minutes of leaving the oven, though they remain excellent at room temperature for several hours.
Chef Tips
•Use European-style butter with higher fat content if you can find it. The flavor difference in a bread this simple is noticeable.
•For deeper flavor, let the dough rise overnight in the refrigerator after the first rise. Cold fermentation develops complexity. Bring to room temperature before shaping.
•The folding technique is traditional, but if you're short on time, simply shape into rounds and pack them snugly in the pan. They'll taste the same, just without the distinctive crease.
•Leftover rolls make exceptional turkey sandwiches the next day. Split them, add a smear of mayonnaise, pile with turkey and stuffing, and press briefly in a hot skillet.
•These freeze beautifully. Cool completely, wrap tightly in plastic then foil, and freeze for up to 2 months. Reheat in a 325°F oven for 10 minutes directly from frozen.
Advance Preparation
•The dough can be made through the first rise, then refrigerated overnight. The slow, cold rise develops deeper flavor. Remove from refrigerator 2 hours before shaping to allow the dough to warm.
•Rolls can be shaped and arranged in pans, then covered tightly and refrigerated for up to 18 hours before the final proof. Remove from refrigerator and let rise at room temperature for 1 1/2 to 2 hours before baking.
•For same-day preparation, start the dough 4 hours before you plan to serve. This allows time for both rises and cooling.
•Baked rolls can be stored in an airtight container at room temperature for up to 2 days. Reheat wrapped in foil at 300°F for 8 minutes to restore softness.
•For large gatherings, double the recipe and bake in shifts, keeping the second batch covered while the first bakes.
Frequently Asked Questions
Nutrition Information
1 roll (about 45g)
Calories
145 calories
Total Fat
7 g
Saturated Fat
4 g
Trans Fat
Unsaturated Fat
3 g
Cholesterol
31 mg
Sodium
154 mg
Total Carbohydrates
17 g
Dietary Fiber
0 g
Sugars
3 g
Protein
3 g
Where cooking meets culture.
Culinary guides, cultural storytelling, and the editorial depth that makes cooking meaningful.