
Chef Juliana
Ambrosia Baiana
You think curdled milk means you ruined dessert. Good. Tonight you'll do it on purpose, with lemon, yolks, cravo, and sugar, until the pot turns into golden gruminhos.
A cooking platform built around craft, culture, and the stories behind what we eat.
Created by
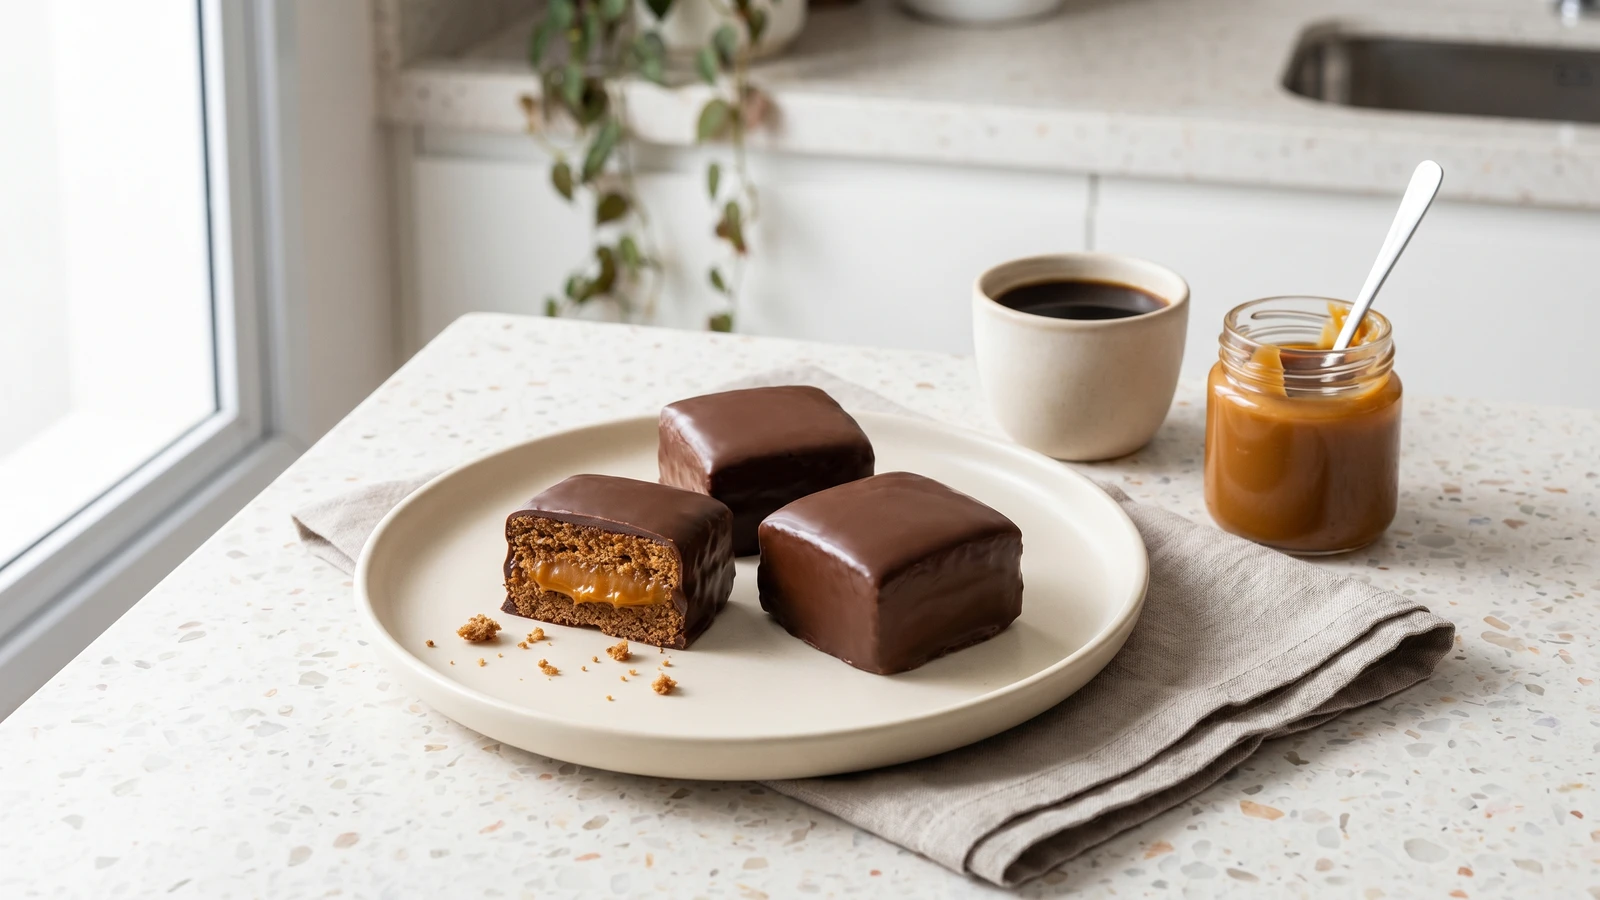
You think a chocolate-dipped cake is where baking becomes drama. It isn't. Measure, mix, bake, fill, dip, wait. That's the whole caminho, and the next-day bite pays you back.
You, with that quiet isso não é pra mim already forming before the bowl comes out, listen to me: this is not the place where baking becomes a secret society. Cozinhar não é dom, é um aprendizado. You can measure flour in a cup, warm milk without boiling it, stir honey until it loosens, and bake until the center springs back. That's cooking. Ordinary literacy, with chocolate on its fingers.
I like a sweet that knows where it lives. It comes after the pê-efe, after rice, beans, meat or egg, and something green, the plate that solves dinner and keeps a country itself. Comida de verdade doesn't mean a joyless table. It means you know what went into the thing you are eating: honey, milk, cocoa, spice, doce de leite, real chocolate, and not a packet pretending to have a grandmother.
The method is kind, if you let it be. Whisk the dry ingredients so no bitter lump of cocoa or baking soda ambushes you. Warm the milk just enough to dissolve honey and sugar, because hot milk scrambles eggs and boiled honey loses its perfume. Cool the cake before you split it, because warm cake tears like gossip. Then fill, dip, and wait a full day. Annoying. Correct.
By tomorrow the crumb will soften, the doce de leite will settle, and the chocolate will stop being a coat and become part of the bite. Receitas que funcionam are not magic. They are written clearly enough for a tired person to follow and proud enough to put on a festa table.
Brazilian pão de mel descends from European honey-and-spice breads, the same family as gingerbread and German Lebkuchen, but by the late twentieth century it had become a home-sale sweet, wrapped one by one for school fairs, office trays, and birthday tables. The Brazilian turn is the filling and the chocolate bath: doce de leite in the middle, chocolate outside, a cake built to keep well and travel without falling apart. The practical debate is coating, real chocolate tastes better but asks for tempering, while compound coating sets easily and tastes waxier.
Quantity
as needed
for greasing the pan
Quantity
1 3/4 cups
Quantity
1/4 cup
Quantity
1 teaspoon
Quantity
1/2 teaspoon
Quantity
1 teaspoon
Quantity
1/4 teaspoon
Quantity
1/4 teaspoon
Quantity
1/2 teaspoon
Quantity
1 cup
Quantity
1/2 cup
Quantity
1/2 cup
Quantity
1/3 cup
Quantity
2 large
at room temperature
Quantity
1 teaspoon
Quantity
1 1/2 cups
Quantity
3 cups, about 500g
chopped and divided
| Ingredient | Quantity |
|---|---|
| butter or oilfor greasing the pan | as needed |
| all-purpose flour | 1 3/4 cups |
| unsweetened cocoa powder | 1/4 cup |
| baking powder | 1 teaspoon |
| baking soda | 1/2 teaspoon |
| ground cinnamon | 1 teaspoon |
| ground cloves | 1/4 teaspoon |
| ground nutmeg | 1/4 teaspoon |
| fine salt | 1/2 teaspoon |
| whole milk | 1 cup |
| honey | 1/2 cup |
| packed brown sugar | 1/2 cup |
| neutral oil | 1/3 cup |
| eggsat room temperature | 2 large |
| vanilla extract | 1 teaspoon |
| thick doce de leite | 1 1/2 cups |
| semisweet or milk chocolatechopped and divided | 3 cups, about 500g |
Heat the oven to 180°C (350°F). Grease an 8-inch square pan and line it with parchment, leaving two sides hanging over like handles. This cake is soft once filled, and parchment gives you a clean lift instead of an excavation project.
In a large bowl, whisk the flour, cocoa powder, baking powder, baking soda, cinnamon, cloves, nutmeg, and salt until the color looks even. Break up any cocoa lumps with the whisk. A hidden lump of cocoa tastes bitter, and a pocket of baking soda gives you a strange yellow bite. A gente prevents the problem now.
Put the milk, honey, brown sugar, and oil in a small saucepan over low heat. Stir just until the honey and sugar dissolve and the mixture feels warm, not hot, about 3 minutes. Don't boil it. Boiling dulls the honey, and hot liquid will scramble the eggs before they ever reach the cake.
Let the warm milk mixture sit for 5 minutes, then whisk in the eggs and vanilla. Pour the wet mixture into the dry ingredients and whisk only until you no longer see dry flour. The batter should be smooth and pourable. Stop there. Keep beating and the flour toughens, and then you have a stubborn little cake pretending your arm did something useful.
Pour the batter into the pan and smooth the top. Bake for 23 to 28 minutes, until the center springs back when touched and a toothpick comes out with a few moist crumbs. Pull it then. A dry pão de mel can still be rescued by doce de leite, but let's not make the filling do charity work.
Cool the cake in the pan for 15 minutes, then lift it out and cool completely on a rack. Use a long serrated knife to split it horizontally into two thin layers. Spread the doce de leite evenly over the bottom layer, put the top back on, and press gently. Chill for 30 minutes so the filling firms up and stays where you put it.
Trim the edges if you want neat pieces, then cut the filled cake into 16 squares. Wipe the knife between cuts. Clean edges are not fuss, they're practical: crumbs in the chocolate make dipping messy, and messy dipping turns one simple job into a small argument.
Set aside 1 cup of the chopped chocolate. Melt the remaining 2 cups in a heatproof bowl over a small pot of barely simmering water, making sure the bowl does not touch the water. Stir until melted, then take the bowl off the heat and stir in the reserved chocolate until glossy and slightly thickened. This is the beginner's tempering: the unmelted chocolate cools the melted chocolate so it sets with a better finish. Keep water out of the bowl, because one splash can seize the whole thing into a grainy paste.
Drop one square into the chocolate, turn it gently with a fork, lift it out, and tap the fork on the bowl so the extra chocolate falls back. Set it on parchment and repeat. If the chocolate gets too thick, warm it over the pot for a few seconds and stir. Thin, even coating gives you chocolate in every bite without burying the cake.
Let the coated squares set completely, then store them covered and wait 24 hours before serving. Yes, you can eat one now. The cook's tax exists. But tomorrow the honey will soften the crumb, the spice will round out, and the chocolate and doce de leite will taste like one thing instead of three separate decisions.
1 serving (about 95g)
Culinary guides, cultural storytelling, and the editorial depth that makes cooking meaningful.
Discover Culinary ExplorerChef Juliana
You think curdled milk means you ruined dessert. Good. Tonight you'll do it on purpose, with lemon, yolks, cravo, and sugar, until the pot turns into golden gruminhos.

Chef Juliana
You are not ruining the milk. You're curdling it on purpose, slowly, until sugar, eggs, cinnamon, and patience turn cheap ingredients into dessert.

Chef Juliana
You think curdled milk means failure. Not here. Milk, yolks, sugar, and lemon cook into golden curds in amber whey, a Minas sweet where the ponto teaches the whole recipe.

Chef Juliana
You already trust rice for dinner. Trust it for dessert: cook it gently with milk, coconut, and canela until each grain turns soft, creamy, and impossible to blame on lack of talent.