
Chef Ally
Beignets with Powdered Sugar
Pillowy squares of yeasted dough, fried until golden and hollow inside, then buried beneath a mountain of powdered sugar. Simple enough for a Sunday morning, celebratory enough for any occasion worth marking.
A cooking platform built around craft, culture, and the stories behind what we eat.
Created by Chef Remy
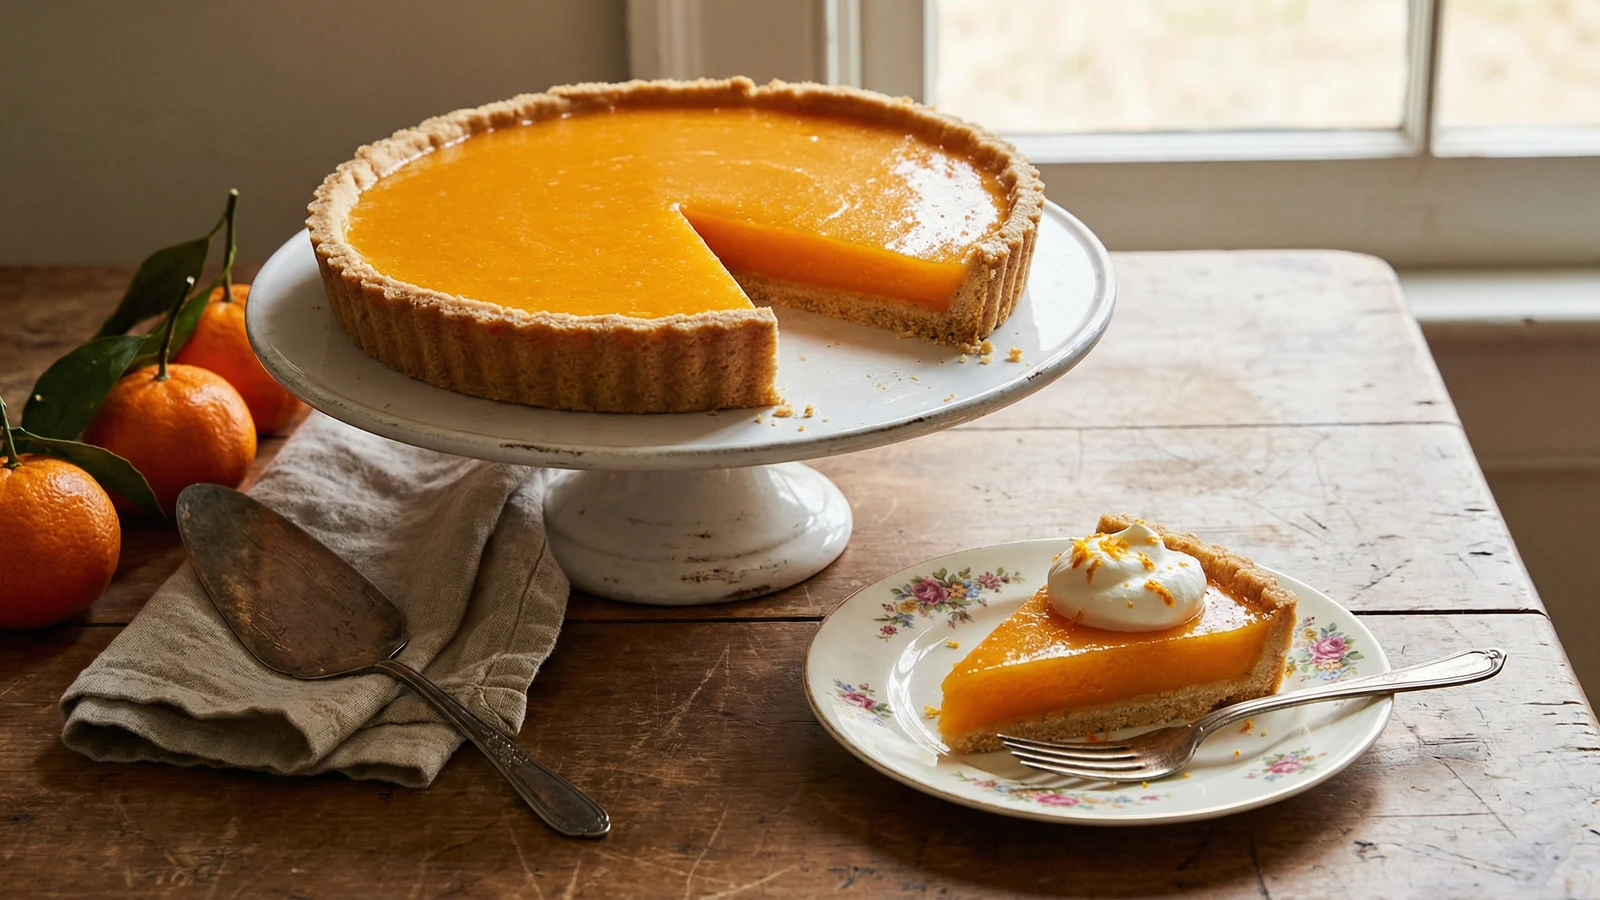
Silky citrus curd kissed by Louisiana sunshine, cradled in a buttery shortbread shell that shatters at first bite, topped with clouds of fresh cream and the bright perfume of satsuma zest.
Satsuma season in Louisiana is a short window of pure magic. From late October through December, these little orange jewels hang heavy on trees across the Gulf Coast, their thin skins practically bursting with juice sweeter than any orange you have ever tasted. My grandmother Evangeline had a satsuma tree in her backyard in Lafayette Parish, and every winter she made this tart for Christmas dinner. The whole house smelled like citrus and butter for days.
The secret to a proper citrus curd is patience. You are cooking eggs, and eggs do not forgive rushing. Too much heat and you have scrambled eggs in lemon juice. Too little attention and the curd never thickens. You stand at that stove, stirring constantly, watching the transformation happen slowly. When the curd coats the back of your spoon and holds a line when you draw your finger through it, that is when you know.
The shortbread crust here is not your standard pie dough. This is pure butter and flour, pressed into the pan rather than rolled. It bakes up tender and crumbly, almost like a cookie, the perfect foundation for that silky curd. At Lagniappe, we serve this tart every December when the satsumas come in, and people drive across town for a slice. That is the power of good citrus, honestly handled.
Quantity
1 1/2 cups (190g)
Quantity
1/2 cup (60g)
Quantity
1/4 teaspoon
Quantity
10 tablespoons (140g)
cut into small cubes
Quantity
1
Quantity
1 teaspoon
Quantity
8-10 (about 1 cup juice, 2 tablespoons zest)
Quantity
3/4 cup (150g)
Quantity
4
Quantity
2
Quantity
1/4 teaspoon
Quantity
8 tablespoons (115g)
cut into pieces, softened
Quantity
1 cup
Quantity
2 tablespoons
Quantity
1/2 teaspoon
Quantity
for garnish
| Ingredient | Quantity |
|---|---|
| all-purpose flour | 1 1/2 cups (190g) |
| powdered sugar (for crust) | 1/2 cup (60g) |
| fine sea salt (for crust) | 1/4 teaspoon |
| cold unsalted butter (for crust)cut into small cubes | 10 tablespoons (140g) |
| large egg yolk (for crust) | 1 |
| pure vanilla extract (for crust) | 1 teaspoon |
| Louisiana satsumas | 8-10 (about 1 cup juice, 2 tablespoons zest) |
| granulated sugar | 3/4 cup (150g) |
| large eggs (for curd) | 4 |
| large egg yolks (for curd) | 2 |
| fine sea salt (for curd) | 1/4 teaspoon |
| unsalted butter (for curd)cut into pieces, softened | 8 tablespoons (115g) |
| cold heavy whipping cream | 1 cup |
| powdered sugar (for cream) | 2 tablespoons |
| pure vanilla extract (for cream) | 1/2 teaspoon |
| fresh satsuma zest | for garnish |
Combine flour, powdered sugar, and salt in a food processor. Pulse twice to mix. Add the cold butter cubes and pulse in short bursts until the mixture looks like coarse sand with some pea-sized pieces remaining, about fifteen pulses. Add the egg yolk and vanilla, then pulse until the dough just begins to clump together. It will look shaggy, not smooth. That is exactly right.
Turn the dough out into a 9-inch tart pan with a removable bottom. Using your fingers and the heel of your hand, press the dough evenly across the bottom and up the sides of the pan. The sides should be about 1/4-inch thick, the bottom slightly thinner. Take your time here. Uneven thickness means uneven baking. Prick the bottom all over with a fork, about twenty times. This prevents the crust from puffing up in the oven.
Refrigerate the tart shell for at least 30 minutes, or up to overnight. Cold dough holds its shape during baking. Warm dough slumps and shrinks. This is not optional, it is physics. While the crust chills, preheat your oven to 350°F.
Line the chilled crust with parchment paper and fill with pie weights or dried beans. Bake for 20 minutes until the edges look set and pale gold. Remove the weights and parchment carefully. Return to the oven for another 10 to 12 minutes until the entire crust is golden brown and smells like butter cookies. Set aside to cool completely while you make the curd.
Zest the satsumas before juicing them. You need two tablespoons of fine zest. Use a microplane and work in one direction, rotating the fruit to avoid the bitter white pith. Then halve and juice the satsumas through a fine-mesh strainer to catch seeds and pulp. One cup of fresh juice is your target, usually eight to ten satsumas depending on their size and juiciness.
In a medium heavy-bottomed saucepan, whisk together the satsuma juice, zest, granulated sugar, whole eggs, egg yolks, and salt until completely smooth. No streaks of yolk should remain. Set the pan over medium-low heat. Now the real work begins.
Stir the mixture constantly with a wooden spoon or heatproof spatula, scraping the bottom and sides of the pan with every stroke. The curd will seem thin and watery for several minutes. Do not panic. Around the 8 to 10 minute mark, it will begin to thicken. Watch for the moment when the curd coats the back of your spoon and holds a clear line when you draw your finger through it. That is when you pull it from the heat. The temperature should reach 170°F if you are checking with a thermometer.
Remove the pan from heat and immediately add the softened butter pieces, one or two at a time, whisking until each addition melts and disappears before adding more. The butter makes the curd silky and rich, adding body and shine. Strain the finished curd through a fine-mesh strainer into a clean bowl to catch any bits of cooked egg or zest. Press it through with your spatula.
Pour the warm curd into the cooled tart shell, spreading it evenly with an offset spatula or the back of a spoon. The curd should come just to the top of the crust, not over it. Press a piece of plastic wrap directly onto the surface of the curd to prevent a skin from forming. Refrigerate for at least 2 hours, or overnight, until the curd is completely set and firm to the touch.
When ready to serve, pour the cold heavy cream into a chilled bowl. Add the powdered sugar and vanilla. Beat with a whisk or electric mixer until soft peaks form. The cream should hold its shape but still look pillowy and inviting, not stiff or grainy. You can do this up to two hours ahead and keep it refrigerated.
Remove the outer ring of the tart pan by setting the pan on a wide can or jar and letting the ring fall away. Transfer the tart to a serving plate. Dollop generous spoonfuls of whipped cream in the center, or pipe it if you are feeling fancy. Finish with fresh satsuma zest grated directly over the top. Slice with a sharp knife dipped in hot water and wiped clean between cuts.
1 serving (about 140g)
Culinary guides, cultural storytelling, and the editorial depth that makes cooking meaningful.
Discover Culinary ExplorerChef Ally
Pillowy squares of yeasted dough, fried until golden and hollow inside, then buried beneath a mountain of powdered sugar. Simple enough for a Sunday morning, celebratory enough for any occasion worth marking.

Chef Remy
Sandy, crumbly shortbread rounds perfumed with deeply nutty brown butter and studded with toasted Louisiana pecans, finished with a whisper of flaky salt that makes every bite sing.

Chef Remy
Tender, fluffy buttermilk biscuits with golden tops and soft centers, split warm from the oven and flooded with dark, earthy Louisiana cane syrup, the way four generations of bayou families have started their mornings.

Chef Remy
Soft, golden yeast rolls cradling spicy Cajun boudin in every bite, where Czech-Texan baking tradition meets Louisiana sausage-making, proving that good cooks have always borrowed from their neighbors.