Culinary Explorer

A cooking platform built around craft, culture, and the stories behind what we eat.
Discover Culinary Explorer
Classic Cinnamon Rolls

Classic Cinnamon Rolls

Created by

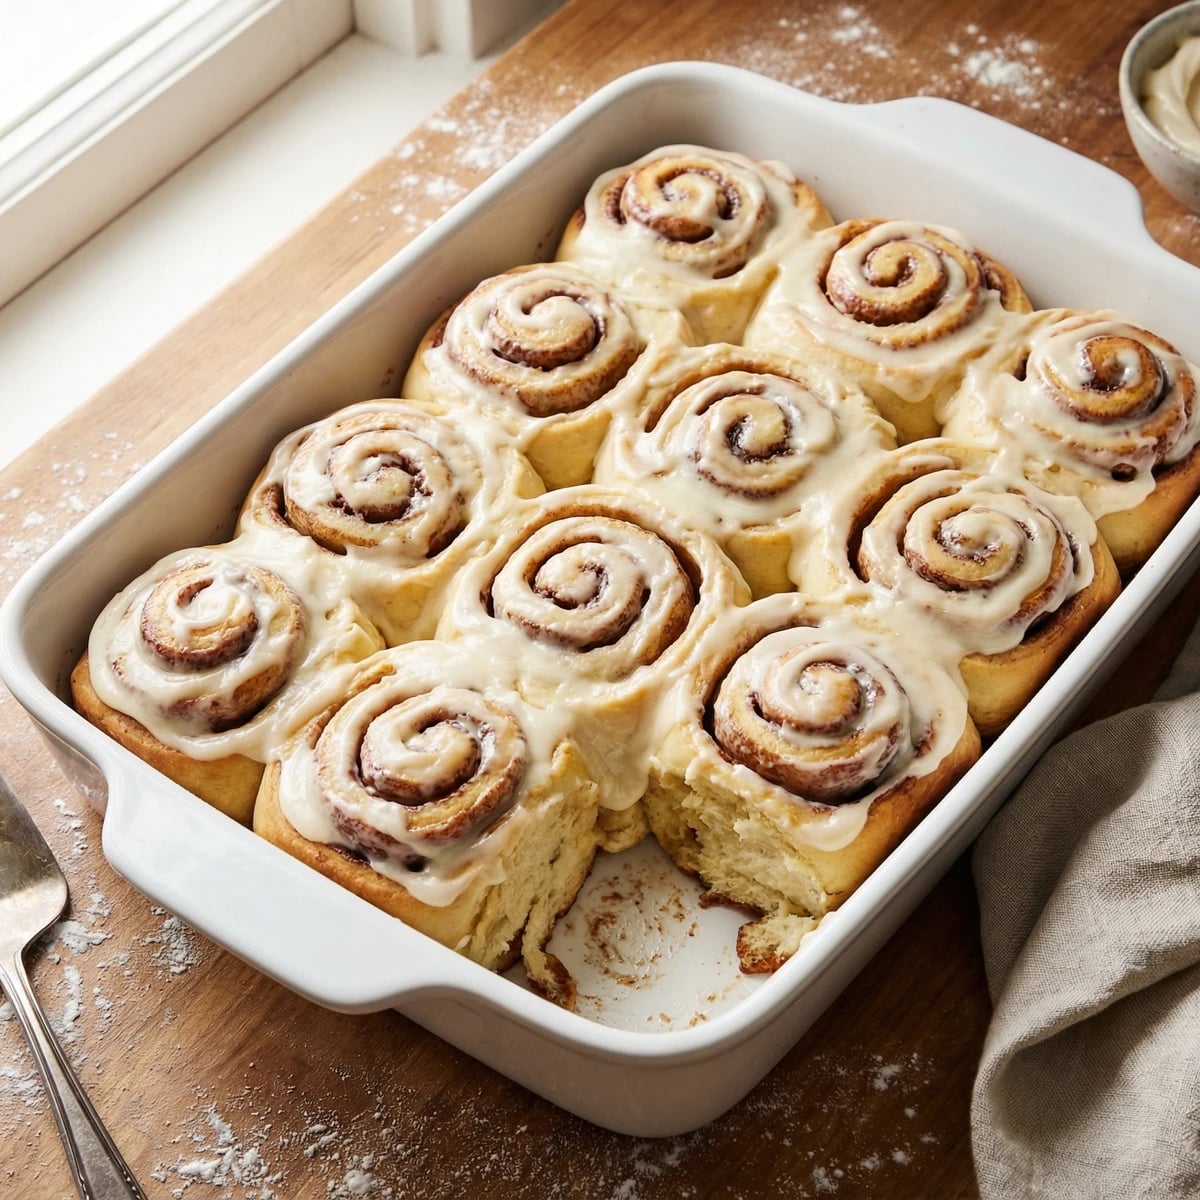
Pillowy yeasted buns swirled with butter and cinnamon sugar, baked until golden and gooey, then crowned with tangy cream cheese frosting. This is weekend baking at its most satisfying.

Breads
American
Holiday
Birthday
45 min
Active Time
25 min cook3 hr 30 min total
Yield12 rolls

The cinnamon roll holds a peculiar place in American baking. It arrived with Scandinavian immigrants who settled the upper Midwest, adapted through generations of church basement potlucks and small-town bakeries, and eventually became something we claim as our own. The version you'll make here honors that tradition while teaching you the fundamentals of enriched dough.

Enriched doughs intimidate people. They shouldn't. Yes, you're asking flour and yeast to accommodate butter, eggs, and sugar. The dough will feel different than a lean bread dough. Stickier. Softer. More forgiving, actually. The fat inhibits gluten development just enough that you can't overwork it. Take your time. Trust the process.

I've taught this recipe to nervous bakers who swore they couldn't make bread. Every one of them pulled golden, spiraled rolls from their ovens and wondered why they'd waited so long to try. The smell alone is worth the effort. Cinnamon and butter and yeast mingling in a warm kitchen on a Saturday morning. That's what home baking should be.

The cream cheese frosting is non-negotiable. Some prefer a simple glaze. They're wrong. The tang cuts through all that sweetness and butter, creating balance where excess would otherwise reign. Spread it while the rolls are still warm. Watch it pool into the crevices. Serve immediately, or as close to immediately as your household allows.

The technique, the tradition, and the story behind every dish.

Discover Culinary Explorer

Ingredients

all-purpose flour

Quantity

500g (4 cups)

plus more for dusting

granulated sugar

Quantity

75g (6 tablespoons)

instant yeast

Quantity

7g (2¼ teaspoons)

fine sea salt

Quantity

6g (1 teaspoon)

whole milk

Quantity

240ml (1 cup)

warmed to 110°F

large egg

Quantity

1

room temperature

large egg yolk

Quantity

1

room temperature

unsalted butter for dough

Quantity

85g (6 tablespoons)

softened

unsalted butter for filling

Quantity

115g (8 tablespoons)

very soft

dark brown sugar

Quantity

200g (1 cup packed)

ground cinnamon

Quantity

2 tablespoons

fine sea salt for filling

Quantity

¼ teaspoon

cream cheese

Quantity

225g (8 oz)

softened

unsalted butter for frosting

Quantity

60g (4 tablespoons)

softened

powdered sugar

Quantity

180g (1½ cups)

sifted

pure vanilla extract

Quantity

1 teaspoon

fine sea salt for frosting

Quantity

pinch

Equipment Needed

  • Stand mixer with dough hook (or strong arms and patience)
  • Rolling pin
  • 9 by 13 inch baking pan
  • Instant-read thermometer
  • Offset spatula
  • Bench scraper

Instructions

  1. 1

    Activate the yeast

    Warm your milk to 110°F. It should feel like comfortable bathwater on your wrist. In a large mixing bowl or the bowl of a stand mixer, whisk together the warm milk, sugar, and yeast. Let it stand for five minutes. You're looking for a foamy cap to form on the surface, proof that your yeast is alive and hungry. If nothing happens, your yeast is dead or your milk was too hot. Start again with fresh yeast.

    Instant yeast is more forgiving than active dry, but it still dies above 120°F. Use a thermometer until you learn what 110°F feels like.
  2. 2

    Build the dough

    Add the egg, egg yolk, and salt to the yeast mixture. Whisk to combine. Add the flour all at once and stir with a wooden spoon or dough hook on low speed until a shaggy mass forms. No dry flour should remain, but the dough will look rough and unpromising. This is correct. Let it rest for 10 minutes. This autolyse period allows the flour to hydrate fully, making the next step easier.

    Weighing your flour matters here. A cup scooped from the bag can contain 30% more flour than one spooned and leveled, which will produce a dense, dry roll.
  3. 3

    Incorporate the butter

    With the mixer running on medium-low (or by hand with a wooden spoon and considerable effort), add the softened butter one tablespoon at a time. Wait until each addition disappears before adding the next. The dough will look greasy and broken at first. Keep mixing. After 8 to 10 minutes, it will transform into a smooth, elastic, slightly tacky ball that pulls cleanly from the sides of the bowl. It should pass the windowpane test: stretch a small piece thin enough to see light through without tearing.

  4. 4

    First rise

    Form the dough into a ball and place it in a lightly greased bowl. Cover tightly with plastic wrap. Set it somewhere warm, around 75°F, and let it rise until doubled in size. This takes 1 to 1½ hours depending on your kitchen's temperature. The dough is ready when you poke it with a floured finger and the indentation fills back slowly, about halfway. If it springs back immediately, give it more time. If it doesn't spring back at all, you've overproofed.

    No warm spot? Turn your oven on for exactly 1 minute, then turn it off. Place the covered bowl inside with the light on. That ambient warmth is perfect.
  5. 5

    Prepare the filling

    While the dough rises, combine the dark brown sugar, cinnamon, and salt in a small bowl. Mash with a fork to break up any sugar lumps. The filling should be uniform and fragrant. Have your very soft butter ready. It needs to spread like mayonnaise. If you can't smear it easily across your palm, it's too cold.

  6. 6

    Roll the dough

    Punch down the risen dough and turn it onto a lightly floured surface. Roll it into a rectangle approximately 18 by 14 inches, with the long side facing you. The dough will resist and spring back. Let it rest for a minute or two when it fights you, then continue. Aim for even thickness throughout. Thin spots will tear when you roll. Thick spots will produce uneven baking.

  7. 7

    Fill and roll

    Spread the soft butter evenly over the dough, leaving a half-inch border along the far long edge. That bare strip will help seal your roll. Sprinkle the cinnamon sugar mixture over the butter, pressing it gently so it adheres. Starting from the long edge closest to you, roll the dough into a tight log. Keep consistent tension but don't squeeze so hard that filling oozes out. When you reach the bare edge, pinch the seam firmly to seal.

    An offset spatula spreads butter more evenly than a knife. Work from the center outward to avoid tearing the dough.
  8. 8

    Cut the rolls

    Using a sharp knife or unflavored dental floss (slide it under the log, cross the ends over the top, and pull to slice cleanly), cut the log into 12 equal pieces. Each roll should be about 1½ inches thick. Place them cut-side up in a greased 9 by 13 inch baking pan, leaving about half an inch between each roll. They'll grow into each other during proofing, which is what you want. Those soft, pull-apart sides are part of the charm.

  9. 9

    Second rise

    Cover the pan with plastic wrap and let the rolls rise in a warm spot until puffy and nearly doubled, about 45 minutes to 1 hour. The rolls should look pillowy and have grown together. When you gently press one with a floured fingertip, the indentation should spring back slowly. Preheat your oven to 375°F during the last 15 minutes of proofing.

  10. 10

    Bake

    Remove the plastic wrap and bake until the rolls are golden brown on top and the internal temperature reaches 190°F, about 22 to 28 minutes. The edges should be deeply golden, the centers slightly paler. If they're browning too quickly, tent loosely with foil for the last 10 minutes. The kitchen will smell extraordinary. Try to be patient.

  11. 11

    Make the frosting

    While the rolls bake, beat the softened cream cheese and butter together until completely smooth, about 2 minutes. Scrape down the bowl. Add the sifted powdered sugar, vanilla, and salt. Beat on low until combined, then increase to medium-high and whip until light and fluffy, another 2 minutes. The frosting should be spreadable but hold its shape.

  12. 12

    Frost and serve

    Let the rolls cool in the pan for 10 minutes. No longer. You want them warm when the frosting hits. Spread the cream cheese frosting generously over the top, letting it melt slightly into the crevices and pool between the rolls. Serve immediately. These are best eaten within hours of baking, pulled apart at the table by eager hands. The center roll is the prize.

Chef Tips

  • Dark brown sugar matters here. Its higher molasses content creates a more complex, almost caramel flavor in the filling. Light brown sugar works but tastes thinner.
  • If your kitchen is cold, proof the dough in your oven with just the light on. That small bulb generates enough warmth to keep yeast happy.
  • For cleaner slices, refrigerate the filled log for 15 minutes before cutting. The butter firms slightly and the rolls hold their spiral shape better.
  • Room temperature ingredients aren't optional with enriched doughs. Cold eggs or butter will shock the yeast and produce dense, tough rolls.
  • Save one roll unfrosted to test doneness next time. You'll learn exactly what properly baked looks like in your particular oven.

Advance Preparation

  • For overnight rolls, complete through step 8, cover the pan tightly with plastic wrap, and refrigerate for up to 18 hours. Remove from the refrigerator 1 to 1½ hours before baking to allow the rolls to come to room temperature and complete their second rise.
  • Unbaked rolls can be frozen after cutting: freeze on a sheet pan until solid, then transfer to a freezer bag for up to 1 month. Thaw overnight in the refrigerator, then proof at room temperature before baking.
  • Frosting can be made up to 3 days ahead and refrigerated. Bring to room temperature and re-whip briefly before using.

Frequently Asked Questions

Nutrition Information

1 roll (about 190g)

Calories
625 calories
Total Fat
34 g
Saturated Fat
21 g
Trans Fat
1 g
Unsaturated Fat
11 g
Cholesterol
71 mg
Sodium
275 mg
Total Carbohydrates
69 g
Dietary Fiber
2 g
Sugars
22 g
Protein
8 g

Note: Chef personas and recipes are created with AI assistance. Cook with care: follow safe food-handling practices, check doneness with a thermometer when needed, and adapt for allergies and your kitchen.

Where cooking meets culture.

Culinary guides, cultural storytelling, and the editorial depth that makes cooking meaningful.

Discover Culinary Explorer

More from The Bread Baker's Handbook

Browse the full collection