Culinary Explorer

A cooking platform built around craft, culture, and the stories behind what we eat.
Discover Culinary Explorer
Classic Banana Nut Bread

Classic Banana Nut Bread

Created by

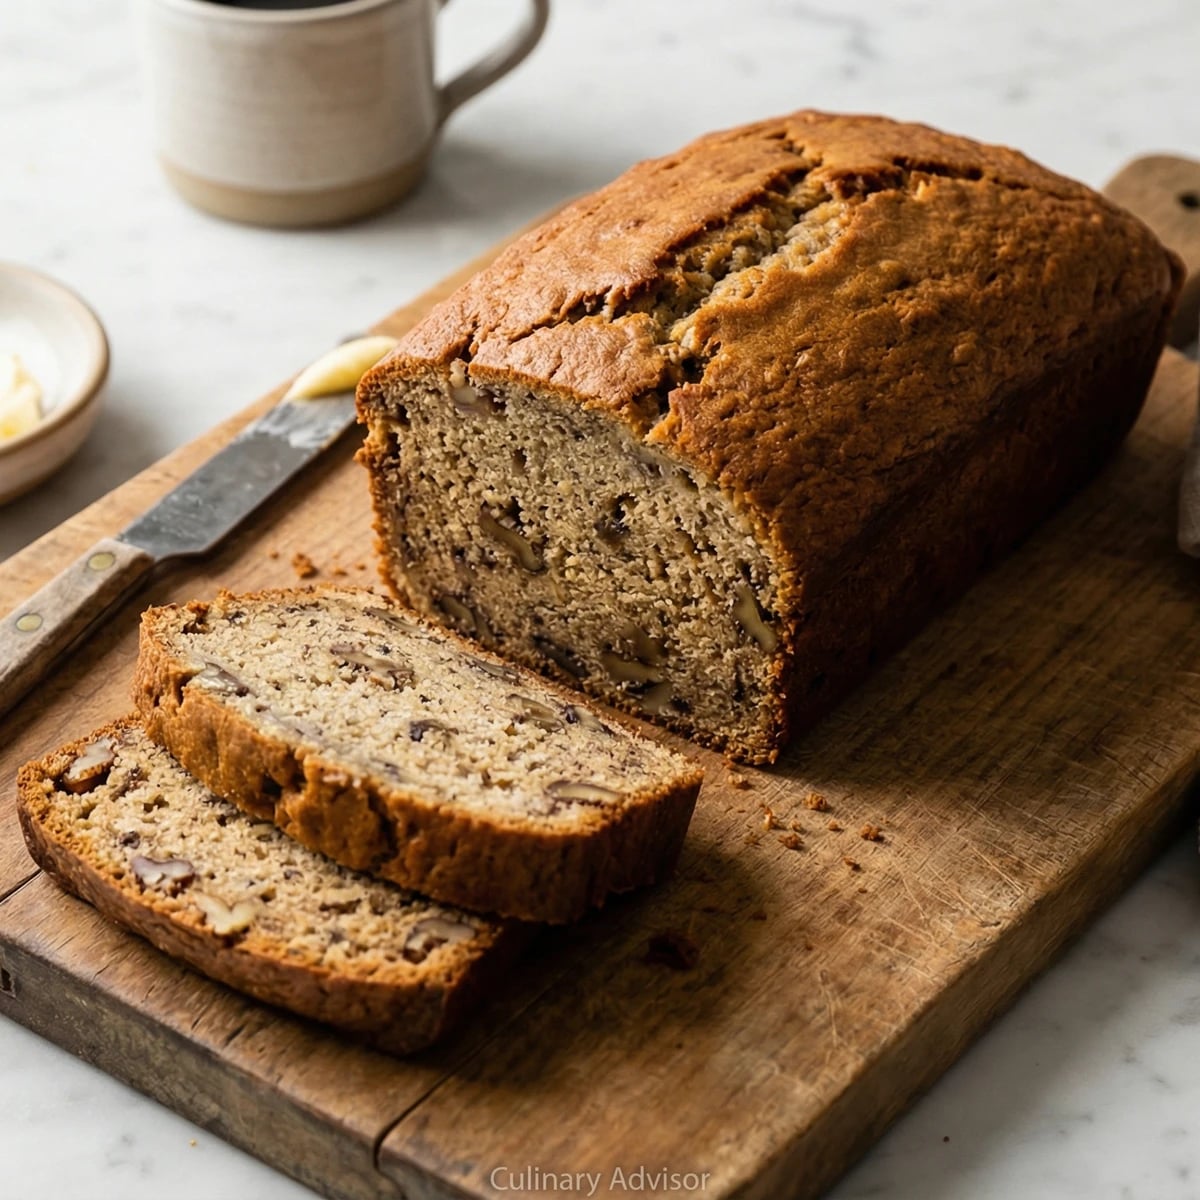
A tender, fragrant loaf studded with toasted walnuts and sweetened by bananas so ripe they've turned nearly black, baked until the crust cracks golden and the kitchen smells like Sunday morning.

Breads
American
Make Ahead
Comfort Food
Freezer Friendly
20 min
Active Time
1 hr cook1 hr 20 min total
Yield1 loaf (10 slices)

Every American kitchen has a version of this bread, usually scrawled on a flour-dusted index card in someone's grandmother's handwriting. The recipe travels through generations not because it impresses dinner guests, but because it transforms fruit that belongs in the compost into something worth waking up early to slice.

The secret lives in patience. You need bananas so ripe they embarrass you, skins gone completely black, flesh soft enough to mash with a fork. Grocery store bananas with a hint of green won't do. Those yield bread that tastes like cake mix and disappointment. Proper banana bread requires fruit that has crossed over into territory most people consider garbage. That's where the sugar concentrates, where the banana flavor deepens into something almost caramelized.

I've watched students try to rush this bread with yellow bananas and extra sugar. It never works. The chemistry demands those overripe specimens. So buy your bananas a week early, let them blacken on the counter, and trust that the uglier they look, the better your bread will taste. This is one of those rare instances where neglect improves the outcome.

The technique, the tradition, and the story behind every dish.

Discover Culinary Explorer

Ingredients

walnut halves

Quantity

1 cup (115g)

very ripe bananas

Quantity

3 large (about 1 1/4 cups mashed)

unsalted butter

Quantity

1/3 cup (75g)

melted and cooled

granulated sugar

Quantity

3/4 cup (150g)

large egg

Quantity

1

at room temperature

pure vanilla extract

Quantity

1 teaspoon

all-purpose flour

Quantity

1 1/2 cups (190g)

baking soda

Quantity

1 teaspoon

fine sea salt

Quantity

1/2 teaspoon

ground cinnamon

Quantity

1/2 teaspoon

sour cream or plain yogurt

Quantity

1/4 cup (60g)

Equipment Needed

  • 9x5-inch loaf pan
  • Rimmed baking sheet for toasting nuts
  • Wire cooling rack
  • Wooden skewer or cake tester

Instructions

  1. 1

    Toast the walnuts

    Position a rack in the center of your oven and preheat to 350°F. Spread walnut halves on a rimmed baking sheet and toast for 8 to 10 minutes, stirring once halfway through, until fragrant and a shade darker. You'll smell them before you see the color change. Let cool, then chop roughly into irregular pieces. Some should be large enough to identify, others almost crumbled.

    Raw walnuts taste flat and slightly bitter. Toasting transforms them, releasing oils and deepening their flavor. This step is not optional.
  2. 2

    Prepare the pan

    Grease a 9x5-inch loaf pan with butter, then dust with flour, tapping out the excess. Alternatively, line the bottom and long sides with a strip of parchment paper, leaving overhangs for easy removal. The bread will stick without proper preparation.

  3. 3

    Mash the bananas

    Peel the blackened bananas into a large mixing bowl. They should practically slide from their skins. Mash thoroughly with a fork until mostly smooth with a few small lumps remaining. Those lumps become pockets of intense banana flavor in the finished bread. You want about 1 1/4 cups of mashed fruit.

    If your bananas aren't black and collapsing, the bread will lack depth. Freeze overripe bananas when you have them, thaw completely, and drain off excess liquid before mashing.
  4. 4

    Combine wet ingredients

    Pour the melted butter into the mashed bananas and stir to combine. Add the sugar and mix until incorporated. The mixture will look slightly glossy. Beat in the egg and vanilla until smooth, then stir in the sour cream. This dairy addition keeps the bread moist for days.

  5. 5

    Mix dry ingredients

    In a separate bowl, whisk together the flour, baking soda, salt, and cinnamon. This ensures the leavening distributes evenly. A pocket of baking soda ruins a slice.

  6. 6

    Combine wet and dry

    Add the dry ingredients to the banana mixture in two additions, folding gently with a rubber spatula after each. Stop the moment you no longer see dry flour streaks. The batter should look thick and slightly lumpy. Overmixing develops gluten and produces a tough, dense loaf. Fold in the toasted walnuts, reserving a small handful for topping if desired.

    Quick breads forgive many sins but not overmixing. Treat the batter like it owes you money and you'll be disappointed. Treat it gently and it rewards you.
  7. 7

    Fill pan and top

    Scrape the batter into the prepared pan, smoothing the top with your spatula. The batter will mound slightly in the center. Scatter reserved walnuts along the top if using, pressing them gently into the surface. They'll toast further during baking and create an attractive crust.

  8. 8

    Bake until done

    Bake for 55 to 65 minutes, until the top is deeply golden and cracked down the center, and a wooden skewer inserted into the thickest part comes out with just a few moist crumbs clinging. The crack is traditional, a sign the bread rose properly. If the top browns too quickly, tent loosely with foil for the final 15 minutes.

    Every oven lies. Start checking at 50 minutes. The bread is done when the internal temperature reaches 200°F and the skewer test passes.
  9. 9

    Cool properly

    Let the bread rest in the pan for 15 minutes. This allows the structure to set. Run a thin knife around the edges if needed, then turn out onto a wire rack to cool completely, at least one hour. Slicing too soon compresses the tender crumb and releases steam that should stay inside. Patience. The bread improves as it cools.

Chef Tips

  • Freeze overripe bananas in their peels whenever you have them. They'll turn completely black and liquify slightly when thawed. Drain off the excess liquid before mashing, or your bread will be gummy.
  • For deeper flavor, brown the butter before adding it to the bananas. Let it cool to lukewarm first. The nutty notes complement the walnuts beautifully.
  • A tablespoon of dark rum or bourbon stirred into the batter adds warmth without making the bread taste boozy. Your grandmother probably did this and never told anyone.
  • The bread tastes better the second day. The flavors meld and the crumb becomes more tender. Wrap tightly and store at room temperature.

Advance Preparation

  • Banana bread keeps, tightly wrapped, at room temperature for up to 4 days. The flavor peaks on day two.
  • Wrapped in plastic and then foil, the bread freezes beautifully for up to 3 months. Thaw overnight at room temperature before slicing.
  • Overripe bananas can be frozen for up to 6 months. Thaw completely and drain before using.

Frequently Asked Questions

Nutrition Information

1 serving (about 100g)

Calories
405 calories
Total Fat
15 g
Saturated Fat
5 g
Trans Fat
0 g
Unsaturated Fat
10 g
Cholesterol
22 mg
Sodium
125 mg
Total Carbohydrates
38 g
Dietary Fiber
1 g
Sugars
22 g
Protein
5 g

Note: Chef personas and recipes are created with AI assistance. Cook with care: follow safe food-handling practices, check doneness with a thermometer when needed, and adapt for allergies and your kitchen.

Where cooking meets culture.

Culinary guides, cultural storytelling, and the editorial depth that makes cooking meaningful.

Discover Culinary Explorer

More from Breakfast at Grandma's

Browse the full collection