Culinary Explorer

A cooking platform built around craft, culture, and the stories behind what we eat.
Discover Culinary Explorer
Trekornbrod (Danish Three-Grain Bread)

Trekornbrod (Danish Three-Grain Bread)

Created by Chef Freja

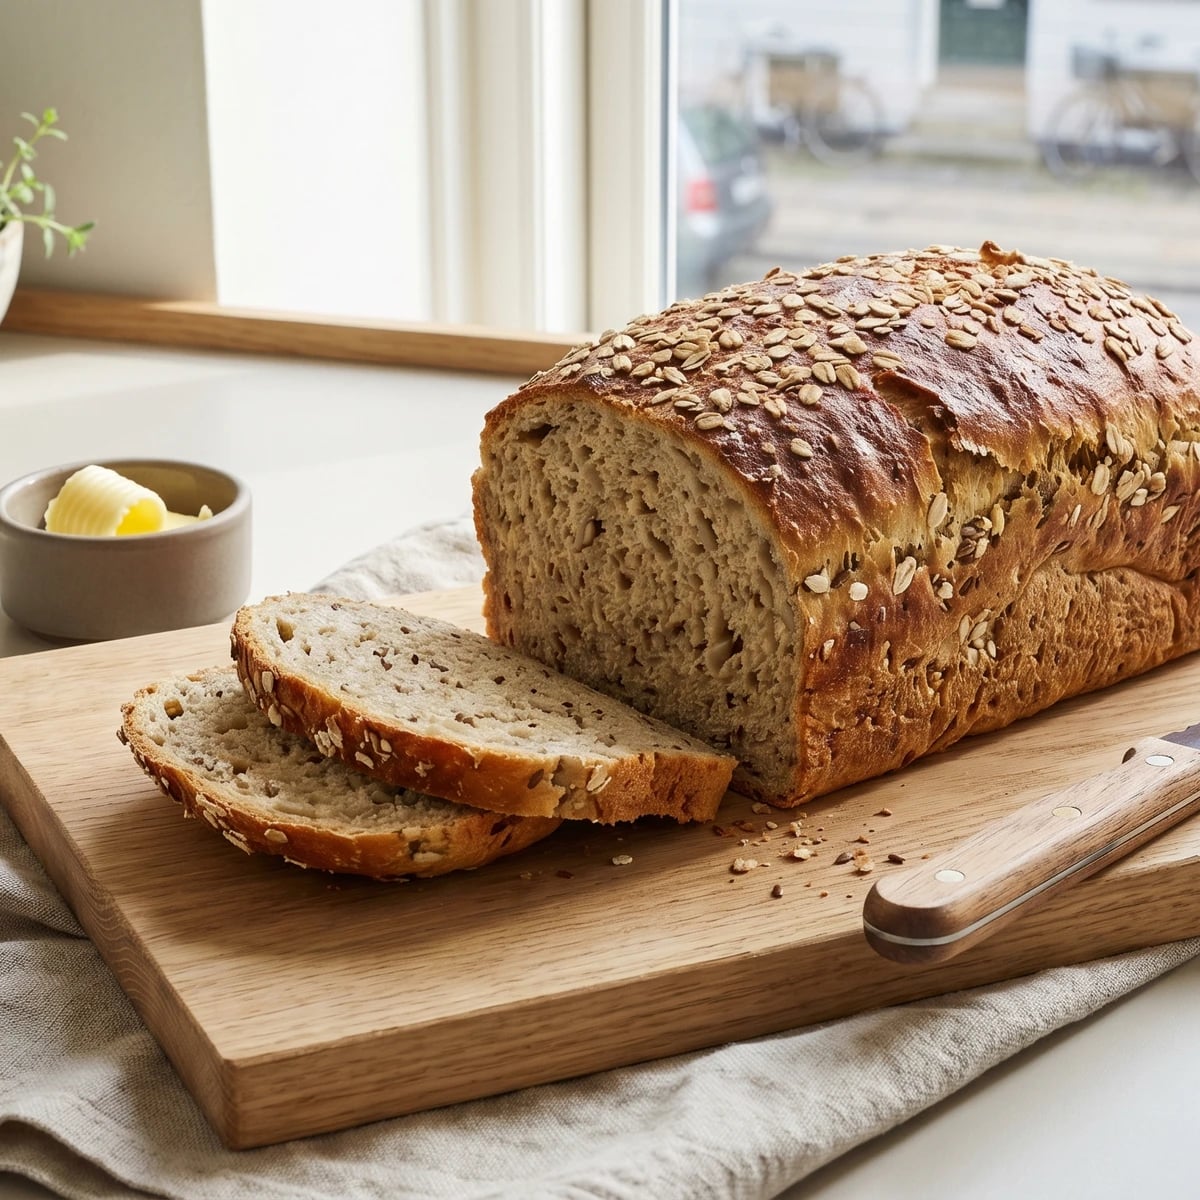
A three-grain Danish loaf of wheat, rye, and oats, seeded with sunflower and linseed. The bread that sits on the counter all week, ready for the morning madpakke and the evening soup bowl.

Breads
Danish
Weeknight
Meal Prep
Comfort Food
25 min
Active Time
45 min cook3 hr total
Yield1 loaf (about 12 slices)

Every Danish kitchen has a bread that isn't rugbrod. Rugbrod is the foundation, dark and dense and essential, but beside it on the counter there's usually something else: a lighter loaf, golden-crusted, studded with seeds, the bread you reach for when you're packing a lunch or slicing something thick to go alongside soup on a Tuesday night. In many homes, that bread is trekornbrod.

Three grains. Wheat for structure, rye for depth, oats for softness. The combination gives you a loaf that holds together when you slice it thin for the madpakke, the packed lunch that every Dane carries to work or school. It has enough character to stand next to strong cheese or smoked fish without disappearing, but it's mild enough that it doesn't compete. It's everyday bread, and everyday bread is what keeps a household running.

The technique is simpler than you might expect. You soak the oats first so they soften into the dough rather than drying it out, then you knead everything together and let time do most of the work. Two rises, one bake. The seeds go into the dough itself, so every slice carries them through. I want you to watch for two things: the moment the dough develops elasticity during kneading, which tells you the wheat gluten is doing its job, and the hollow sound when you tap the bottom of the finished loaf. Those two signals are your confidence markers. When you hear that knock, you'll know it's right.

Denmark's bread tradition has always been dominated by rye, the hardy grain that thrived in the country's cool climate and sandy soils when wheat could not. Mixed-grain breads emerged as wheat became more affordable in the 19th century, offering households a way to bridge the gap between the dense, dark rugbrod and the white franskbrod that arrived via French and German baking influence. Trekornbrod, combining the traditional rye with wheat and oats, reflects a pragmatic Danish instinct: use what the land gives you, blend the grains for balance, and bake a loaf that serves every meal from morning to evening without pretension.

The technique, the tradition, and the story behind every dish.

Discover Culinary Explorer

Ingredients

strong white bread flour

Quantity

350g, plus extra for dusting

dark rye flour

Quantity

150g

rolled oats

Quantity

80g, plus 2 tablespoons for topping

instant dry yeast

Quantity

7g

fine sea salt

Quantity

2 teaspoons

dark Danish syrup (mork sirup) or dark honey

Quantity

1 tablespoon

unsalted butter

Quantity

30g

softened

water

Quantity

320ml

lukewarm

sunflower seeds

Quantity

50g

whole linseeds

Quantity

30g

Equipment Needed

  • Loaf pan, 24cm by 13cm
  • Wire cooling rack
  • Stand mixer with dough hook (optional)
  • Bench scraper

Instructions

  1. 1

    Soak the oats

    Place the 80g of rolled oats in a small bowl and pour over 100ml of the lukewarm water. Stir once and leave them for ten minutes while you measure everything else. The oats need to soften and absorb the water before they go into the dough. Dry oats steal moisture from the flour during the rise, and you end up with a crumbly loaf instead of a tender one. Soaked oats give the bread its softness.

    The oats should look swollen and porridge-like when they're ready. If they've absorbed all the water and look dry, add a splash more. They need to be wet.
  2. 2

    Combine the dry ingredients

    In a large bowl, whisk together the bread flour, dark rye flour, yeast, and salt. Add the sunflower seeds and linseeds and toss them through the flour so they're evenly distributed. Seeds that clump together create uneven pockets in the bread. You want them scattered through every slice.

  3. 3

    Bring the dough together

    Make a well in the centre of the flour. Add the soaked oats with any remaining liquid, the rest of the lukewarm water, the syrup, and the softened butter. Stir with a wooden spoon until the mixture comes together into a rough, shaggy mass. It will look messy. That's right. The rye makes it stickier than a pure wheat dough, and the oats give it a loose, porridge-like quality at this stage. Don't worry. It comes together.

    The dark syrup does two things: it gives the bread a faint malty sweetness that rounds out the rye, and it deepens the color of the crust. If you can't find Danish mork sirup, dark honey or even treacle in a small amount works.
  4. 4

    Knead the dough

    Turn the dough out onto a lightly floured surface and knead for eight to ten minutes. This dough will never feel silky the way a white bread dough does. The rye flour and oats give it a slightly rough, grainy texture, and the seeds make it bumpy under your hands. What you're looking for is elasticity: pull a small piece and it should stretch before it tears. That means the wheat gluten has developed enough to hold the loaf together during the rise. If you're using a stand mixer, six minutes on medium speed with the dough hook.

    Keep the flour dusting light. Too much extra flour on the surface makes the bread dry. A slightly sticky dough is what you want. Use a bench scraper if it clings to the counter.
  5. 5

    First rise

    Shape the dough into a rough ball and place it in a lightly oiled bowl. Cover with a damp cloth and leave it somewhere warm for one hour to one hour and a half, until it has roughly doubled in size. The rye and oats slow the rise compared to a pure wheat dough, so give it the time it needs. The flavor develops here. A rushed rise gives you volume but not taste.

    If your kitchen is cold, put the bowl near a warm oven or in a cupboard above the stove. Dough likes consistent warmth, not heat. Around 24 to 26 degrees is the range you're after.
  6. 6

    Shape the loaf

    Tip the risen dough onto a lightly floured surface and press it gently into a rough rectangle with your hands. Don't punch it down aggressively. You want to release the large gas bubbles but keep the smaller ones. Those small bubbles give the bread its open, tender crumb. Fold the rectangle in thirds like a letter, then roll it towards you into a tight log shape that fits your loaf pan. Tuck the ends underneath and place it seam-side down in a greased loaf pan.

    The tighter you roll the log, the more even the crumb will be. A loose roll gives you large holes near the top and a dense bottom. Steady, even pressure as you roll.
  7. 7

    Second rise and finish

    Brush the top of the loaf lightly with water and scatter the remaining two tablespoons of rolled oats over the surface. Press them in gently so they stick. Cover the pan with the damp cloth again and let the dough rise for forty-five minutes to one hour. It should rise just above the rim of the pan. Not dramatically. This is a modest bread. It rises with restraint, and that's part of its character.

  8. 8

    Bake the bread

    Heat the oven to 190C. Place the loaf on the middle shelf and bake for forty to forty-five minutes. The bread is done when the top is a deep, burnished brown and a tap on the bottom of the turned-out loaf sounds hollow, a clear knock, not a dull thud. If it sounds dull, put it back in the oven directly on the shelf without the pan for five more minutes. The crust should be firm but not hard. It will soften slightly as the bread cools.

    Place a small roasting tin of water on the bottom shelf of the oven when you start the bake. The steam keeps the crust from setting too quickly and gives you a better rise in the first ten minutes.
  9. 9

    Cool completely

    Turn the bread out of the pan and let it cool on a wire rack for at least one hour before slicing. This is the hardest part, and it matters. The crumb is still setting as the bread cools. If you cut into it too early, the inside will be gummy and the slices will compress under the knife. Patience now gives you clean, even slices later. The joy of waiting applies here more than anywhere.

Chef Tips

  • Dark rye flour gives this bread its character. Don't substitute light rye. The coarse, stone-ground kind has the flavor and the color that make the loaf taste like it belongs on a Danish table.
  • Mork sirup, the dark Danish beet syrup, adds a malty depth you won't get from honey. Look for it in Scandinavian shops or online. If you can't find it, dark honey is the closest substitute, but it's worth seeking out the real thing.
  • This bread improves on day two. The crumb tightens, the flavors settle, and it slices more cleanly. Bake it the day before you need it if you can.
  • For the madpakke: slice trekornbrod thinly, spread with butter, and top with aged cheese, liver pate,or whatever cold cuts you have. Wrap it tight. It holds better than most breads through a morning in a bag.

Advance Preparation

  • The dough can be made the evening before. After the first rise, shape it, place it in the loaf pan, cover tightly, and refrigerate overnight. In the morning, bring it to room temperature for thirty to forty minutes, then bake as directed.
  • The finished loaf keeps well for four to five days wrapped in a clean cloth or in a bread box. It also freezes beautifully: slice first, then freeze. You can pull individual slices straight from the freezer and toast them.

Frequently Asked Questions

Nutrition Information

1 serving (about 80g)

Calories
240 calories
Total Fat
7 g
Saturated Fat
2 g
Trans Fat
0 g
Unsaturated Fat
5 g
Cholesterol
5 mg
Sodium
330 mg
Total Carbohydrates
38 g
Dietary Fiber
4 g
Sugars
2 g
Protein
8 g

Note: Chef personas and recipes are created with AI assistance. Cook with care: follow safe food-handling practices, check doneness with a thermometer when needed, and adapt for allergies and your kitchen.

Where cooking meets culture.

Culinary guides, cultural storytelling, and the editorial depth that makes cooking meaningful.

Discover Culinary Explorer

More from Danish Breads & Rugbrod

Browse the full collection