
Chef Joost
Beschuit met Muisjes
The airy Dutch rusk sold in rolls of thirteen, twice baked until crisp, then buttered and crowned with sugared aniseed for the birth of a child.
A cooking platform built around craft, culture, and the stories behind what we eat.
Created by
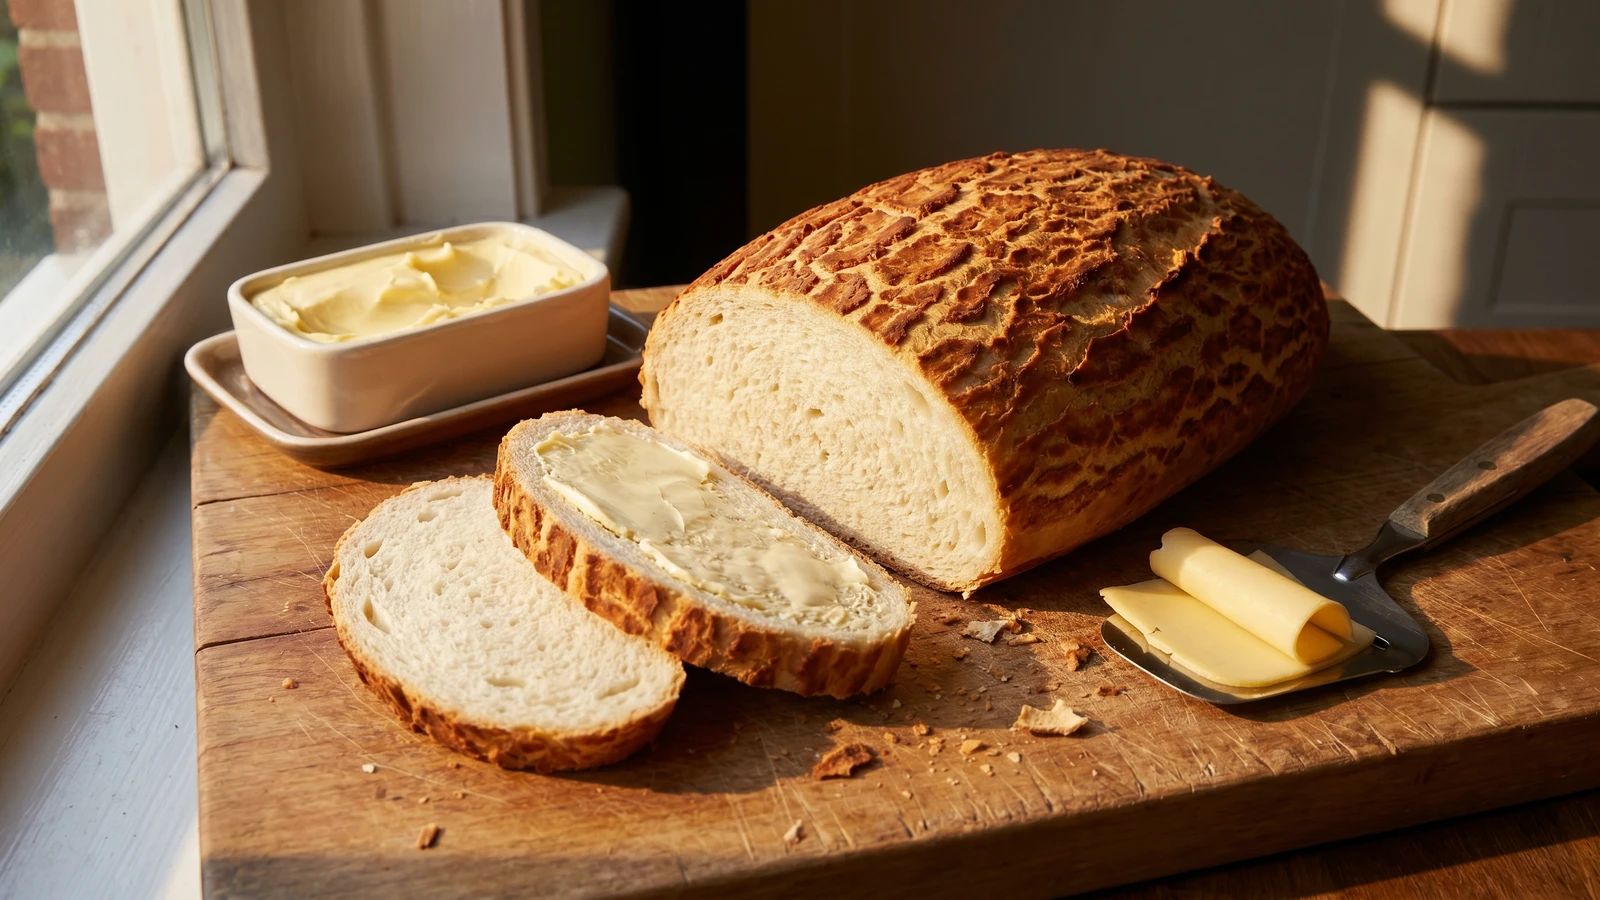
The loaf wears its story on its back: a plain Dutch sandwich bread made memorable by rice-flour paste, cracking into a golden hide as the dough rises beneath it.
Every Dutch bakery counter has one loaf that looks as if it escaped from the zoo and settled into lunchboxes. Tijgerbrood, tiger bread, is ordinary white bread wearing an impossible coat: crisp, mottled, and a little theatrical for a country that claims to dislike showing off. I first met it not as history but as a school sandwich, the crust flaking onto the table while the soft crumb held cheese, hagelslag, or whatever the day allowed. That is where many serious food histories begin. Crumbs on a sleeve.
The name already tells you what the baker wanted you to see: tijger, tiger, and brood, bread. A British child once famously objected that the pattern looked more like a giraffe, and the child was not wrong, but the Dutch are stubborn about breakfast animals for obvious reasons. But let me tell you a secret: the cleverness is not in the bread dough. It is in the rice-flour paste painted over it, a little imported flour on a very Dutch loaf, with no gluten to stretch as the bread rises. The paste dries, sets, and splits; underneath, the loaf keeps swelling, and the crust becomes that gold cracked hide.
Hou het altijd simpel, always keep it simple. Make a good soft white dough, give it time to rise, and keep the tiger paste thick enough to sit on the surface rather than run down the sides. That is the whole method. The loaf is not festive, not rare, not tied to a saint's day or a tide. Its season is the weekday: sliced for broodtrommels, bread boxes, toasted the next morning, and too often eaten with butter while you are pretending to wait for lunch.
Tijgerbrood is widely treated as a Dutch bakery invention, though the exact shop and date are not documented; the style rests on a baker's rice-flour topping rather than on a special bread dough. The loaf travelled under other names: in the San Francisco Bay Area it became Dutch Crunch, and in 2011 Sainsbury's in Britain renamed its version giraffe bread after a letter from three-year-old Lily Robinson. Its useful lesson is technical as much as historical: because rice flour has no gluten, the coating dries and cracks while the wheat loaf expands, making the pattern on purpose rather than by accident.
Quantity
500g
plus extra for shaping
Quantity
7g
Quantity
20g
Quantity
10g
Quantity
275ml
Quantity
50ml
Quantity
30g
softened
Quantity
100g
Quantity
5g
Quantity
10g
Quantity
3g
Quantity
15ml
Quantity
110ml
plus a spoonful if needed
| Ingredient | Quantity |
|---|---|
| strong white bread flourplus extra for shaping | 500g |
| instant yeast | 7g |
| sugar | 20g |
| fine sea salt | 10g |
| lukewarm water | 275ml |
| lukewarm milk | 50ml |
| unsalted buttersoftened | 30g |
| white rice flour | 100g |
| instant yeast for the topping | 5g |
| sugar for the topping | 10g |
| fine sea salt for the topping | 3g |
| neutral oil | 15ml |
| lukewarm water for the toppingplus a spoonful if needed | 110ml |
Put the bread flour, yeast, sugar, and salt in a large bowl. Add the lukewarm water, milk, and softened butter, then mix until you have a rough dough. Knead for ten minutes by hand, or seven minutes in a stand mixer, until the dough is smooth, elastic, and only slightly tacky. It should cling to your hand and then let go. That is enough drama for a weekday loaf.
Shape the dough into a ball, return it to the bowl, cover, and let it rise for about one hour, or until doubled. A cool kitchen may ask for another twenty minutes. Bread is not late; it is simply honest about the weather.
While the dough rises, stir the rice flour, topping yeast, topping sugar, topping salt, neutral oil, and lukewarm water into a thick paste. It should spread like full yogurt, not pour like milk. Let it stand for twenty minutes until it looks slightly bubbly and alive. Rice flour varies, so add a teaspoon of water if it is stiff enough to tear the dough, or a spoonful of rice flour if it runs.
Turn the risen dough onto a lightly floured surface, press it gently into a rectangle, then roll it into a tight oval loaf. Pinch the seam closed and set it seam-side down on a parchment-lined baking tray. Cover loosely and let it prove for forty-five to sixty minutes, until puffy and almost doubled.
Heat the oven to 220C, or 200C fan. Brush or spoon the tiger paste generously over the top and sides of the loaf, leaving the bottom bare. The layer should be thick enough that you cannot see the dough beneath it. Let the coated loaf sit for five to ten minutes while the oven finishes heating; the paste begins to dry, and that small wait helps the crackle form.
Bake for ten minutes at 220C, then lower the oven to 200C, or 180C fan, and bake for another twenty to twenty-five minutes. The crust should be deep gold with darker islands between pale cracks, and the loaf should sound hollow when tapped underneath. Do not add a pan of water to the oven; the paste needs dry heat so it cracks instead of softening.
Move the loaf to a wire rack and let it cool for at least forty-five minutes before slicing. Cut too soon and the soft crumb turns gummy under the knife. Wait, and you get the proper contrast: crisp tiger coat, tender white bread, one more reason the Dutch lunchbox was never as plain as people said.
1 serving (about 80g)
Culinary guides, cultural storytelling, and the editorial depth that makes cooking meaningful.
Discover Culinary ExplorerChef Joost
The airy Dutch rusk sold in rolls of thirteen, twice baked until crisp, then buttered and crowned with sugared aniseed for the birth of a child.

Chef Joost
The Dutch square loaf baked under a lid, with a quiet crumb, a disciplined crust, and exactly the right shape for the tosti pan.

Chef Joost
Before bread came from a packet of yeast, it came from yesterday: flour, water, salt, and a living desem starter carrying one loaf into the next.

Chef Joost
A round raisin bread for Driekoningen, Three Kings' Day, with a hidden bean, a star in the crust, and one ordinary eater crowned king for a day.