
Chef Juliana
Amalá de Xangô
You don't need mystery for this pot. You need okra, dendê, onion, dried shrimp, and the patience to stir until the quiabo gives up its own caldo.
A cooking platform built around craft, culture, and the stories behind what we eat.
Created by
You don't need Belém in your passport to learn the bowl: real tucupi, jambu if you can get it, dried shrimp, goma, and the discipline to refuse fake yellow sauce.
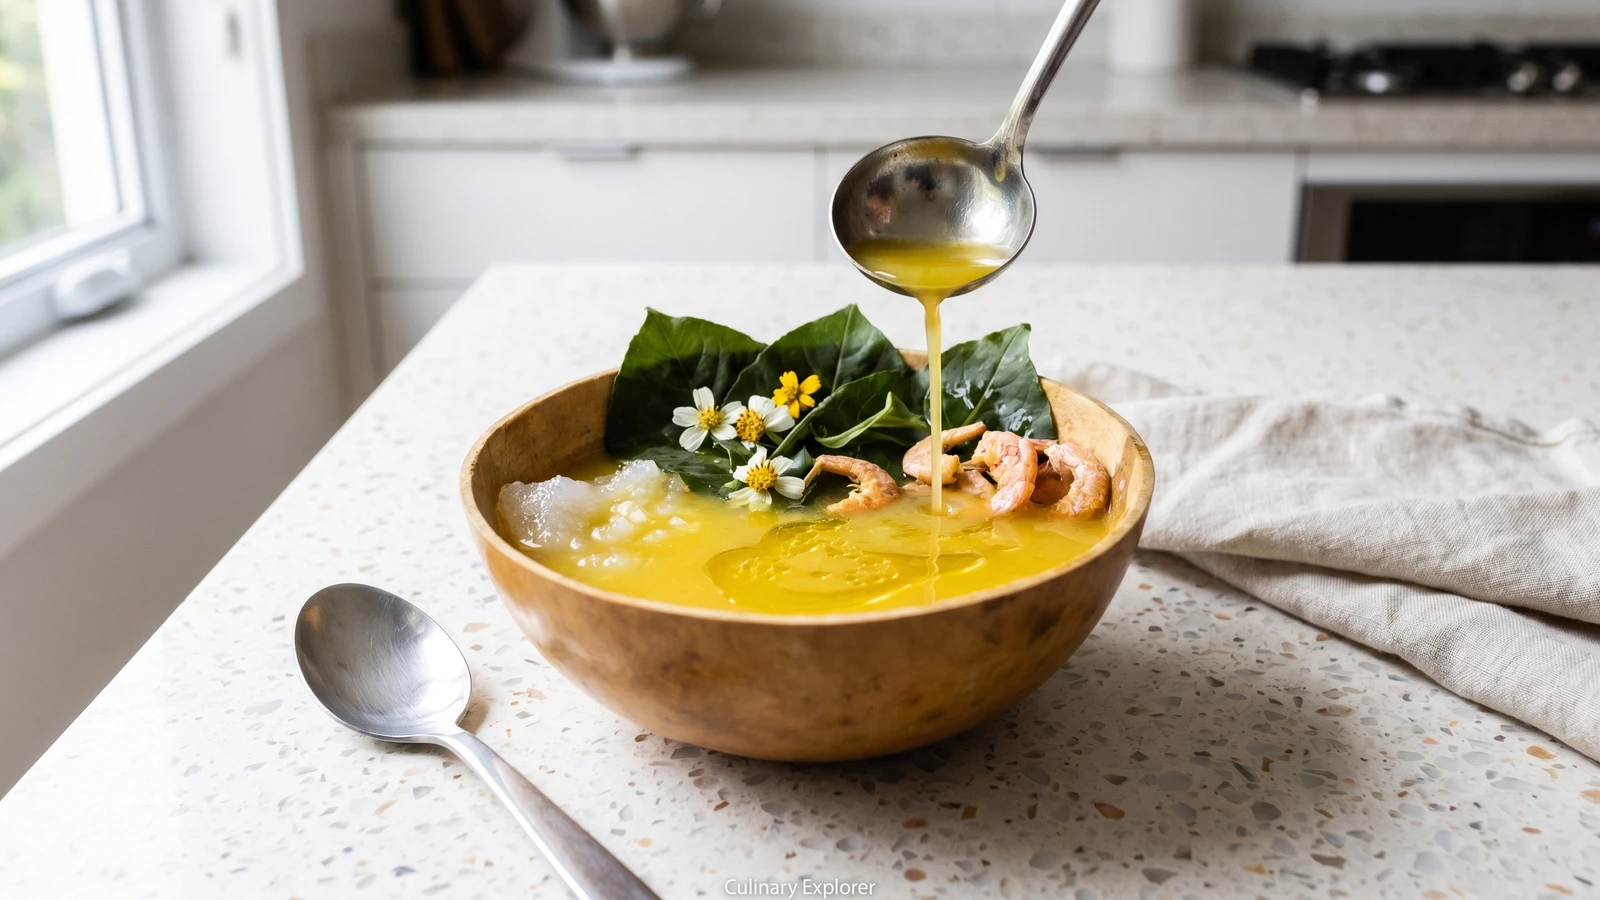
You might look at a cuia full of yellow broth, jambu, dried shrimp, and that little mound of goma and hear the old line: isso não é pra mim. Good. We can work with that. I learned cooking late enough to ruin onions with full adult confidence, so I have no patience for the idea that a regional bowl is a secret door only the chosen can open.
This belongs to Pará and Amazonas cooks, especially the tacacazeiras who have fed people standing at the sidewalk in the late afternoon, and I do not own that tradition. What I can do is teach a home version with respect and clear measures. The method is not magic. You season real bottled tucupi, make a glossy goma, soften the jambu if you have it, and assemble the cuia while everything is still hot.
Anota aí: tucupi is non-negotiable. Real bottled tucupi, from a producer who has already done the proper long boil that makes mandioca brava safe, is the only honest starting point. Molho amarelo from the shelf is not tucupi. It is color wearing a costume, and a gente is making comida de verdade.
Tacacá does not sit on a flat pê-efe like rice, beans, fish or meat, and something green, but it carries the same Brazilian intelligence: mandioca for body, shrimp from the region, jambu for green bite, broth that feeds instead of showing off. Cook it once and the mystery falls apart. Not because it is simple-minded. Because receitas que funcionam make the cook brave.
Tacacá is one of the signature street foods of Pará, especially Belém, and it is also part of foodways in Amazonas and other northern states. Its base comes from Indigenous Amazonian manioc processing: tucupi is the fermented yellow juice pressed from mandioca brava, made safe only after proper boiling, while goma is the settled starch from the same root. The urban habit of drinking it from a cuia in the late afternoon is carried by tacacazeiras, women vendors whose stands made the bowl part of the daily rhythm of northern cities.
Quantity
6 cups (about 1.5 liters)
from a trusted producer, already properly processed; not molho amarelo
Quantity
1 tablespoon
Quantity
1/2 medium
finely chopped
Quantity
3 cloves
minced
Quantity
1/4 cup
chopped; this is culantro, not salad chicory
Quantity
1 tablespoon
chopped
Quantity
1
left whole or slit
Quantity
1 cup (about 80 g)
rinsed and soaked 20 minutes
Quantity
2 cups
rinsed; use when available, do not replace with another green
Quantity
1/2 cup
Quantity
3 cups
for the goma
Quantity
1/2 teaspoon, divided, plus more to taste
| Ingredient | Quantity |
|---|---|
| real bottled tucupifrom a trusted producer, already properly processed; not molho amarelo | 6 cups (about 1.5 liters) |
| neutral oil | 1 tablespoon |
| onionfinely chopped | 1/2 medium |
| garlicminced | 3 cloves |
| chicória-do-pará (culantro)chopped; this is culantro, not salad chicory | 1/4 cup |
| alfavaca (optional)chopped | 1 tablespoon |
| pimenta-de-cheiro (optional)left whole or slit | 1 |
| dried salted shrimprinsed and soaked 20 minutes | 1 cup (about 80 g) |
| jambu leaves, tender stems, and flowers (optional)rinsed; use when available, do not replace with another green | 2 cups |
| tapioca starch (polvilho doce) | 1/2 cup |
| cold waterfor the goma | 3 cups |
| fine salt | 1/2 teaspoon, divided, plus more to taste |
Read the bottle before you light the stove. It should be real tucupi made from mandioca juice, from a producer you trust, already fermented and boiled or pasteurized. If the label says molho amarelo, seasoning sauce, or gives you color and flavoring instead of tucupi, stop here. Tucupi starts as juice from mandioca brava, and the long boil that drives off cyanogenic compounds is the safety step. For this home recipe, bottled tucupi is the only honest starting point.
Put the dried shrimp in a sieve and rinse until the water no longer runs dusty. Cover with warm water for 20 minutes, then drain and taste one small piece. It should be salty in a good way, not so sharp it takes over your mouth. If it is still brutal, soak 10 more minutes and drain again. This is dessalgar, and it keeps the tucupi from turning into brine before you have a chance to season it.
Whisk the tapioca starch, cold water, and 1/4 teaspoon of the salt in a small saucepan while the pan is still off the heat. When there are no dry lumps, set it over medium-low heat and stir constantly until the cloudy liquid turns glossy, translucent, and thick enough to fall from the spoon in slow ribbons, 5 to 7 minutes. Cold first, heat second. Starch thrown straight into hot liquid makes pellets, and a gente is making goma, not wallpaper paste.
If you have jambu, bring a pot of water to a boil and drop in the leaves, tender stems, and flowers for 1 to 2 minutes, just until the leaves darken and the stems bend instead of snapping. Drain well and set aside. This quick murchar softens the chew and keeps the green alive. If you do not have jambu, skip this step and say the cost out loud: you lose the numbing tremble on the tongue. Do not fake it with spinach. Spinach is spinach, coitada, and it has done nothing wrong.
Warm the oil in a heavy pot over medium heat. Add the onion and refogar until it goes soft and see-through, about 4 minutes. Add the garlic for 1 minute, just until it smells sweet, then stir in the chicória-do-pará and alfavaca if using. The leaves should darken and perfume the oil. This is the base that gives the tucupi somewhere to stand. Burn the garlic and the bitterness follows you through the whole bowl, so stay there and stir.
Pour the bottled tucupi into the refogado, scraping the bottom of the pot so the onion and herbs join the broth. Add the pimenta-de-cheiro if using. Bring to a full boil, then lower to a lively simmer and cook uncovered for 30 minutes. The tucupi should stay luminous yellow, smell sharp and herbal, and taste rounded instead of raw and thin. This second boil builds flavor and respects the ingredient. It is not permission to use unsafe raw tucupi at home.
Add the drained shrimp to the simmering tucupi and cook for 5 minutes, until they plump a little and season the broth. Add the blanched jambu for the final 2 minutes, just to warm it through and make it glossy. Taste only now, after the shrimp has given up its salt, then add the remaining 1/4 teaspoon salt only if the broth asks for it. Salt too early and you will spend the rest of the pot trying to fix your own impatience.
Spoon 3 to 4 tablespoons of warm goma into the bottom of each cuia or small deep bowl. Lift in a small tangle of jambu and a few shrimp, then ladle over 1 to 1 1/4 cups of hot tucupi. The goma should sit silky at the bottom and loosen as you eat, thickening each spoonful. Serve right away. Tacacá waits badly: goma sets, shrimp toughen, and jambu loses its spark. Slurp it. Belém did not build this for shy sipping.
1 serving (about 590g)
Culinary guides, cultural storytelling, and the editorial depth that makes cooking meaningful.
Discover Culinary ExplorerChef Juliana
You don't need mystery for this pot. You need okra, dendê, onion, dried shrimp, and the patience to stir until the quiabo gives up its own caldo.

Chef Juliana
You think a Polish hunter's stew is not for your kitchen. Wrong. Brown meat properly, build a real refogado, simmer cabbage low, and tomorrow's lunch is already better.
Chef Juliana
Whole fish in a pot looks like a test. It isn't. Build the refogado, layer the filhote, let tucupi do its work, and the Círio table starts making sense.
Chef Juliana
You don't need river wisdom in your bones to cook tambaqui well. You need real tucupi, a calm simmer, and the sense to let the fish stay whole until it gives.