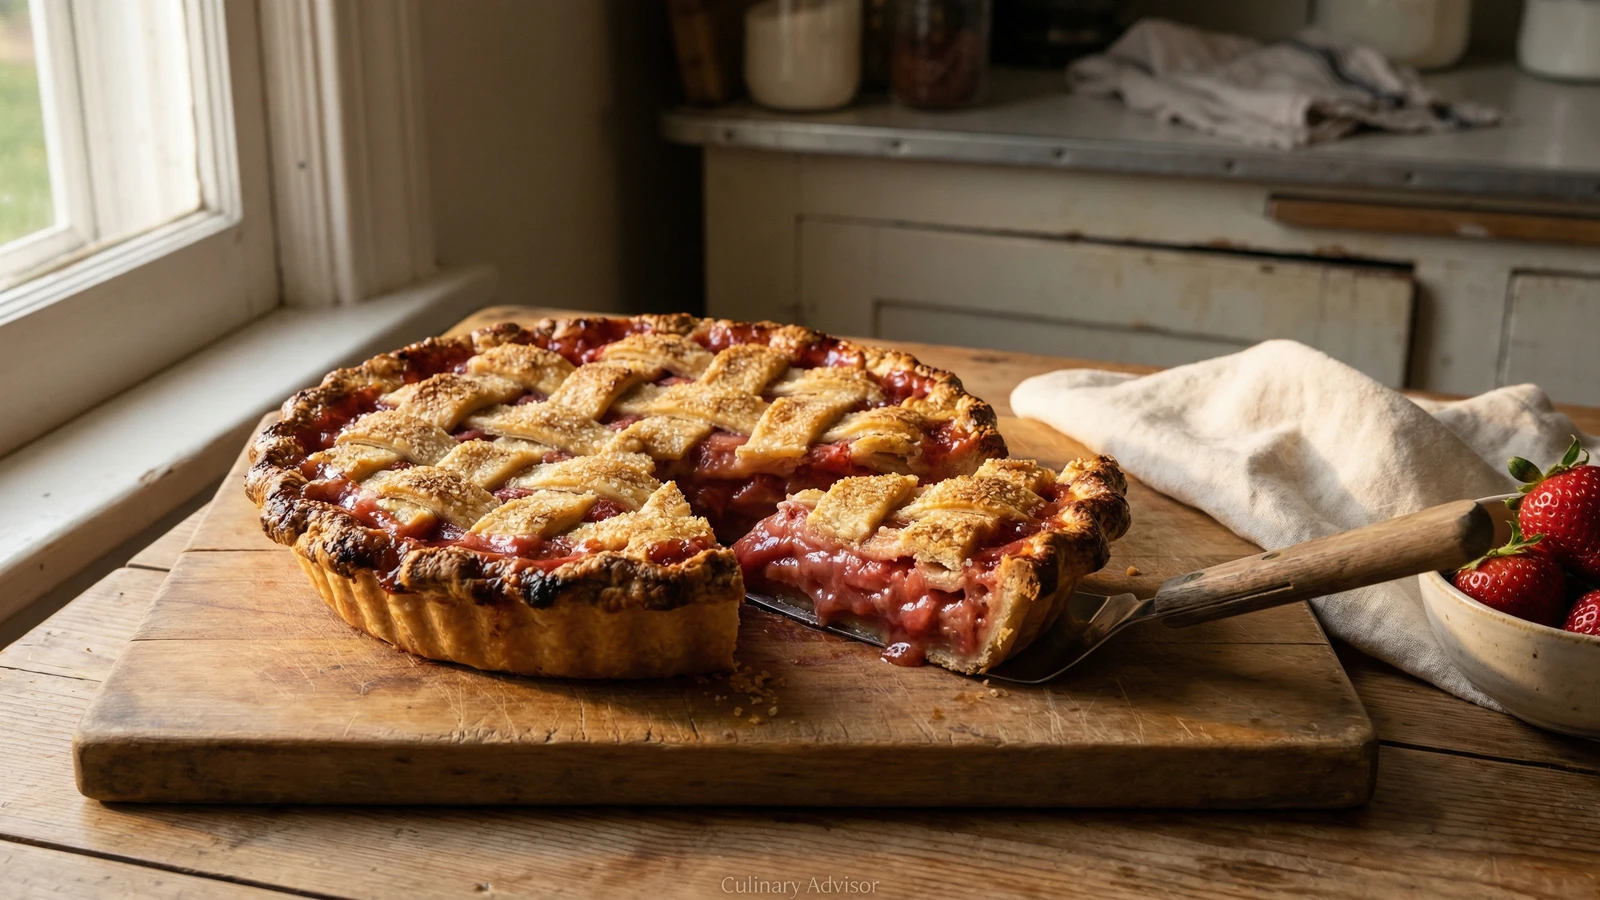
A golden double-crust pie filled with the first rhubarb of spring and strawberries at their sweetest, the filling turning jammy and rose-pink as it bubbles, the kind of pie that people remember for years.
Pastries & Cookies
American
Easter
Mothers Day
Potluck
45 min
Active Time
1 hr cook•1 hr 45 min total
Yield8 servings
Rhubarb and strawberries arrive together in May, and they belong together in this pie. The rhubarb brings tartness and depth, a vegetable playing the role of fruit. The strawberries bring sweetness and fragrance. Neither is quite complete without the other.
Seek out rhubarb with firm, rosy stalks from a farmer who pulled them that morning. The leaves are toxic, so they should already be trimmed, but the cut ends should look fresh, not dried out. Strawberries should smell like strawberries the moment you approach the stand. If you cannot smell them, they will not taste like much either.
This pie asks very little of you beyond patience. Make a proper butter crust. Let it rest. Let the filling macerate. Let the pie cool. The waiting is part of the recipe. What you get in return is a slice of spring that tastes exactly like what it is: good fruit, good butter, a little sugar, and someone's time and care.
The technique, the tradition, and the story behind every dish.
Whisk together the flour, one tablespoon sugar, and one teaspoon salt in a large bowl. Add the cold butter cubes and work them into the flour using your fingertips or a pastry blender, pressing and flattening each piece until the mixture looks like coarse meal with some larger, pea-sized bits remaining. These irregular butter pieces are what create flaky layers.
Good butter is the soul of pie crust. Seek out butter from grass-fed cows if you can find it. The flavor difference is real.
2
Bring the dough together
Drizzle six tablespoons of ice water over the flour mixture. Use a fork to gently toss and combine, adding more water one tablespoon at a time until the dough just holds together when you squeeze a handful. It should look shaggy, not smooth. Turn the dough onto your work surface and gather it into a mound. Divide in half, shape each portion into a flat disk about one inch thick, wrap tightly in plastic, and refrigerate for at least one hour.
3
Prepare the filling
Toss the rhubarb pieces and quartered strawberries together in a large bowl. Add the sugar, cornstarch, lemon juice, and salt. Mix gently with your hands, feeling the fruit, letting it begin to release its juices. The mixture will look dry at first but will turn glossy and pink as it sits. Let it macerate while you roll the crust, at least fifteen minutes.
Taste a piece of raw rhubarb before you begin. If it is exceptionally tart, you may want another tablespoon or two of sugar. If your strawberries are deeply sweet, you can use a bit less.
4
Roll the bottom crust
Remove one disk of dough from the refrigerator. Let it soften for five minutes if it cracks when you press it. On a lightly floured surface, roll the dough from the center outward, turning it a quarter turn after each pass, until you have a circle about twelve inches across and an eighth of an inch thick. Transfer to a nine-inch pie dish, easing it into the corners without stretching. Let the excess hang over the edge. Return to the refrigerator.
5
Roll the top crust
Roll the second disk of dough to the same thickness and size. You can leave it whole for a traditional top crust, or cut it into strips for a lattice. If making a lattice, cut strips about three quarters of an inch wide. Place the rolled dough or strips on a parchment-lined baking sheet and refrigerate until firm, about fifteen minutes.
6
Fill and assemble
Position a rack in the lower third of your oven and preheat to 425 degrees. Pour the fruit filling into the chilled bottom crust, mounding it slightly in the center. The juices will have pooled at the bottom of the bowl. Pour those in too. Lay the top crust over the filling and trim the edges to leave a one-inch overhang. Fold the overhang under itself and crimp with a fork or your fingers. If using a solid top, cut several slits to let steam escape.
A lattice top is traditional but not required. A solid crust with decorative vents is just as honest.
7
Apply egg wash
Whisk together the egg and cream in a small bowl. Brush this mixture gently over the entire top crust, getting into the edges of the lattice or crimped border. Sprinkle generously with turbinado sugar. The coarse crystals will catch the light and shatter when you cut into the pie.
8
Bake until golden and bubbling
Place the pie on a rimmed baking sheet to catch drips. Bake at 425 degrees for twenty minutes, then reduce heat to 375 degrees and continue baking for forty to fifty minutes more. The crust should be deeply golden, and the filling should bubble thickly through the vents or lattice. If the edges brown too quickly, cover them loosely with foil.
Bubbling is everything. If the juices are not bubbling thickly, the filling will be runny. Be patient.
9
Cool completely before slicing
Transfer the pie to a wire rack and let it cool for at least three hours, preferably four. This is the hardest part. The filling needs time to set, and cutting too soon means pink juice running across your plate instead of staying where it belongs. The pie is still wonderful slightly warm, but it must rest first.
Chef Tips
•The best rhubarb is slender and firm, not thick and woody. If your stalks are wider than an inch, slice them lengthwise before cutting into pieces.
•Frozen rhubarb works when fresh is unavailable. Do not thaw it first. Toss it frozen with the other filling ingredients and add five minutes to the baking time.
•A pie like this does not need whipped cream, but it does not refuse it either. Barely sweetened, with a drop of vanilla, lets the fruit remain the point.
•Your pie crust scraps can be gathered, re-rolled once, cut into shapes, brushed with butter, sprinkled with cinnamon sugar, and baked for children to eat while the pie cools.
Advance Preparation
•Pie dough can be made up to three days ahead and refrigerated, or frozen for up to two months. Thaw overnight in the refrigerator before rolling.
•The assembled, unbaked pie can be frozen solid, then wrapped tightly and stored for up to two months. Bake directly from frozen, adding fifteen to twenty minutes to the total time.
•Once baked, the pie keeps at room temperature for two days, loosely covered. After that, refrigerate and bring to room temperature before serving.
Frequently Asked Questions
Nutrition Information
1 serving (about 185g)
Calories
495 calories
Total Fat
25 g
Saturated Fat
15 g
Trans Fat
0 g
Unsaturated Fat
10 g
Cholesterol
87 mg
Sodium
365 mg
Total Carbohydrates
64 g
Dietary Fiber
3 g
Sugars
27 g
Protein
6 g
Where cooking meets culture.
Culinary guides, cultural storytelling, and the editorial depth that makes cooking meaningful.