Culinary Explorer

A cooking platform built around craft, culture, and the stories behind what we eat.
Discover Culinary Explorer
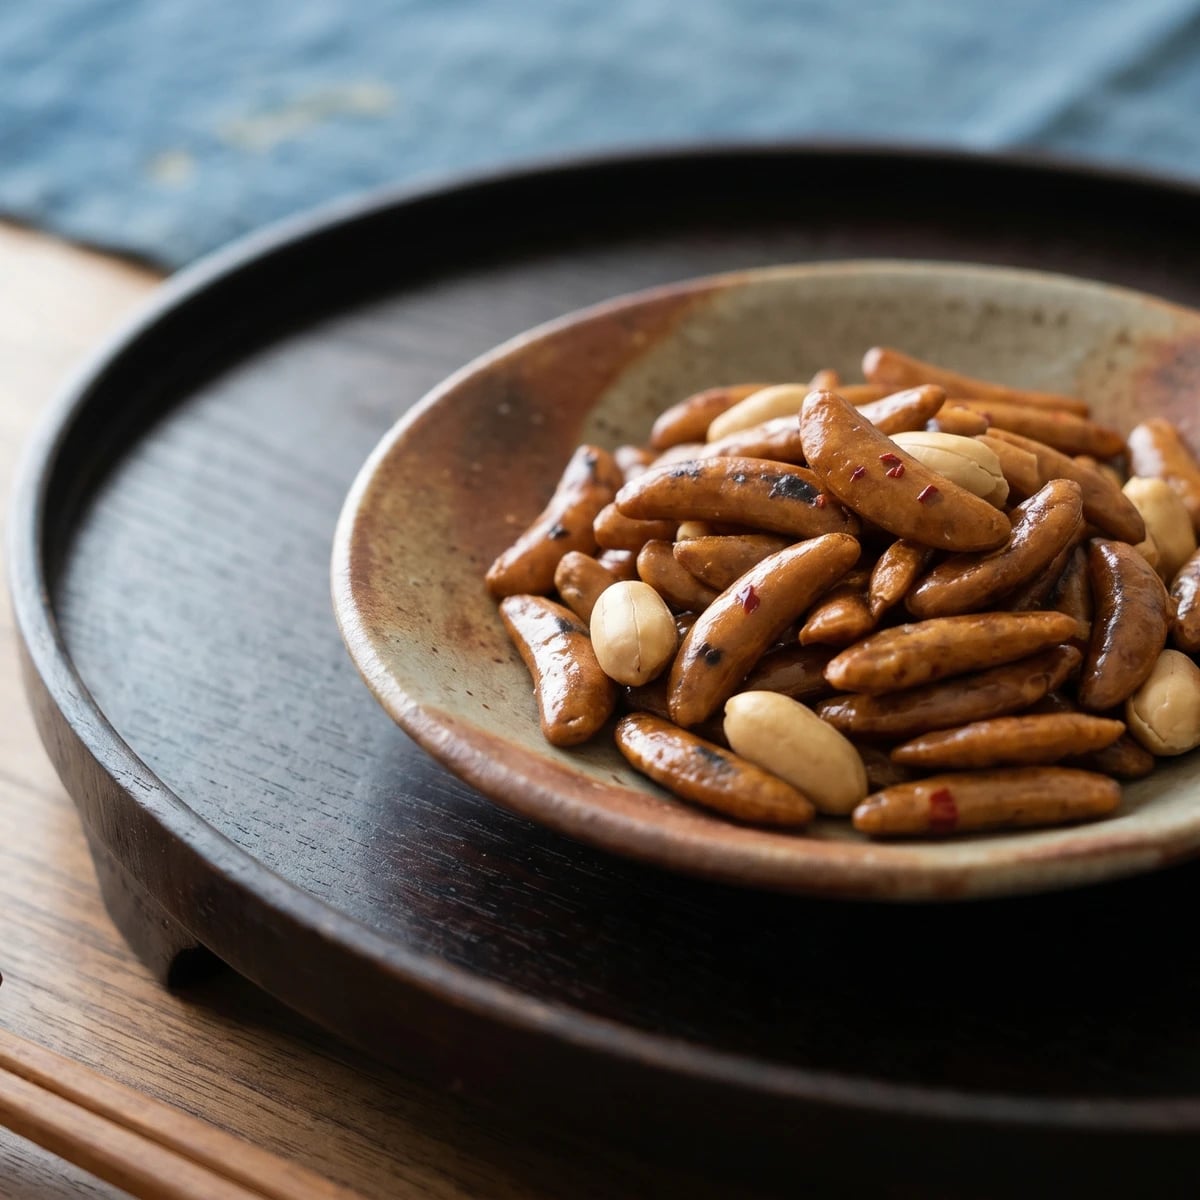
Soy-Chili Rice Crackers (柿の種, Kaki no Tane)

Soy-Chili Rice Crackers (柿の種, Kaki no Tane)

Created by

Kaki no tane is not a factory secret. It is rice dough, patience in the drying, and a soy-chili glaze that clings because the cracker is properly crisp first.

Pastries & Cookies
Japanese
Make Ahead
Comfort Food
Game Day
35 min
Active Time
45 min cook3 hr 20 min total
YieldAbout 120 small crackers

Kaki no tane looks like something only a maker with machines should attempt: tiny crescents, each one crisp, lacquered with shoyu, and carrying just enough red pepper to wake the mouth. The shape is fussy, yes. The method is not. Rice flour, water, heat, drying, then a glaze.

The one detail that decides it is the drying. If the little rice pieces go into the oven still damp inside, they bake hard instead of crisp and the glaze turns them leathery. Dry them until they feel firm and pale before roasting, and they puff slightly, take the sauce cleanly, and keep their snap. This is where patience does the work your hands can't hurry.

We eat these more like otsumami, a small salty thing beside a drink, than like a sweet cookie. The flavor is simple: shoyu, a little sugar, and chili pepper, nothing hidden. Peanuts often join them now, and that's a good companion, but the honmono here is the crescent rice cracker itself. Make them small, leave them room on the tray, and don't apologize if they aren't identical. The famous shape began with an accident, which is useful comfort for the home cook.

Kaki no tane is strongly associated with Naniwa-ya Seika in Nagaoka, Niigata, where the crescent cracker was commercialized in 1924. The usual origin story says a worker accidentally stepped on and bent a metal cutting mold, producing a curved shape that resembled the seed of a persimmon, kaki no tane in Japanese. The later pairing with peanuts became known as kaki-pi, but the original specialty is the soy-and-chili rice cracker.

The technique, the tradition, and the story behind every dish.

Discover Culinary Explorer

Ingredients

shiratamako or mochiko (glutinous rice flour)

Quantity

160g

joshinko (regular Japanese rice flour)

Quantity

40g

plus more for dusting

fine sea salt

Quantity

1/4 teaspoon

warm water

Quantity

150ml

plus 1 to 2 teaspoons if needed

shoyu (Japanese soy sauce)

Quantity

2 tablespoons

mirin

Quantity

1 tablespoon

sugar

Quantity

1 teaspoon

ichimi tōgarashi (ground Japanese red chili pepper)

Quantity

1/2 to 1 teaspoon

neutral oil

Quantity

1 teaspoon

for the tray

roasted unsalted peanuts (optional)

Quantity

80g

for serving as kaki-pi

Equipment Needed

  • Steamer basket or bamboo seiro, with a heatproof plate
  • Rolling pin
  • Parchment paper
  • Small oval cutter, or a clean improvised crescent cutter
  • Rimmed baking tray

Instructions

  1. 1

    Make the dough

    Mix the shiratamako, joshinko, and salt in a bowl. Add the warm water little by little, rubbing the flour between your fingers until the dough comes together like soft earlobe, a Japanese kitchen test that is less poetic than it sounds and more useful than it ought to be. The dough should hold without cracking; if it crumbles, add water by the teaspoon.

    The glutinous rice flour gives chew before drying and crispness after roasting. The small amount of regular rice flour keeps the finished cracker from becoming too tough.
  2. 2

    Steam until elastic

    Press the dough into a shallow puck on a lightly oiled heatproof plate. Steam over active but steady water for 18 to 20 minutes, until the dough turns slightly translucent and feels elastic when pressed. It needs this steam before shaping because raw rice flour cracks and bakes sandy; steamed dough becomes one smooth sheet.

  3. 3

    Knead and roll

    Let the dough cool just until you can handle it, then knead it for 2 minutes on a board dusted lightly with joshinko. Roll it between parchment sheets to about 3mm thick. Keep it thin and even, because thick centers stay hard while thin edges burn.

  4. 4

    Cut the crescents

    Cut small crescent shapes about 3cm long, using a tiny oval cutter, a bent strip of clean cardboard wrapped in foil, or a knife and patience. Set them on a parchment-lined tray with space between them. They don't need to match perfectly. The old mold didn't behave either.

  5. 5

    Dry the pieces

    Leave the cut pieces uncovered at room temperature for 2 hours, or dry them in a 90C oven for 35 to 45 minutes, turning once. They should feel firm, pale, and dry on the surface, not cool or damp to the touch. This drying is the first secret: dry rice dough roasts crisp, damp rice dough sulks.

    If you have time, the room-temperature dry is gentler. If the kitchen is humid, use the low oven and give the pieces enough space so moisture can leave.
  6. 6

    Roast until crisp

    Raise the oven to 180C. Bake the dried pieces for 12 to 16 minutes, turning or shaking the tray once, until they are lightly golden at the edges and crisp when cooled for a minute. Don't wait for deep color now, because the shoyu glaze will darken them later.

  7. 7

    Make the glaze

    While the crackers roast, warm the shoyu, mirin, sugar, and ichimi tōgarashi in a small pan just until the sugar dissolves. Taste it. It should be salty first, faintly sweet, and warm with pepper rather than harsh. Boiling it hard drives off the mirin's softness and makes the glaze taste flat.

  8. 8

    Glaze and finish

    Tip the hot crackers into a bowl, drizzle over the glaze, and toss quickly until each piece is barely coated. Spread them back onto the tray and bake at 150C for 8 to 10 minutes, until dry to the touch and glossy in patches. Cool completely before eating; the final crispness arrives as the glaze sets.

  9. 9

    Serve simply

    Serve the crackers on their own, or mix with roasted peanuts for kaki-pi. Keep the portion restrained, a small mound rather than a heap. These are salty little things, meant to be picked up one by one.

Chef Tips

  • Use Japanese rice flours if you can. Shiratamako gives the cleanest texture, while mochiko works as a sensible stand-in. Ordinary wheat flour makes a different snack entirely.
  • Don't rush the drying step. If one test piece bends or feels cool inside, the batch needs more time. Crispness is built before the glaze ever touches the cracker.
  • Ichimi tōgarashi is straight ground red chili. Shichimi tōgarashi has citrus peel, sesame, and other seasonings, pleasant but not the plain Nagaoka profile.
  • If you add peanuts, use roasted unsalted ones. The crackers bring enough salt, and salted peanuts make the bowl noisy in the wrong way.

Advance Preparation

  • The cut rice pieces can be dried overnight at room temperature, loosely covered with a clean cloth. Roast and glaze them the next day.
  • Finished kaki no tane keeps 1 week in an airtight tin with a small packet of food-safe desiccant if you have one. If they soften, refresh them for 5 minutes in a 140C oven and cool completely.

Frequently Asked Questions

Nutrition Information

1 serving (about 43g)

Calories
175 calories
Total Fat
5 g
Saturated Fat
1 g
Trans Fat
0 g
Unsaturated Fat
4 g
Cholesterol
0 mg
Sodium
420 mg
Total Carbohydrates
28 g
Dietary Fiber
1 g
Sugars
2 g
Protein
5 g

Note: Chef personas and recipes are created with AI assistance. Cook with care: follow safe food-handling practices, check doneness with a thermometer when needed, and adapt for allergies and your kitchen.

Where cooking meets culture.

Culinary guides, cultural storytelling, and the editorial depth that makes cooking meaningful.

Discover Culinary Explorer

More from Senbei & Arare: Japanese Rice Crackers

Browse the full collection