
Chef Lupita
Acambaritas de Acámbaro
Guanajuato's daily bread from Acámbaro, a small glazed roll built on pata, enriched with manteca de cerdo, and baked until the top shines lightly for merienda.
A cooking platform built around craft, culture, and the stories behind what we eat.
Created by
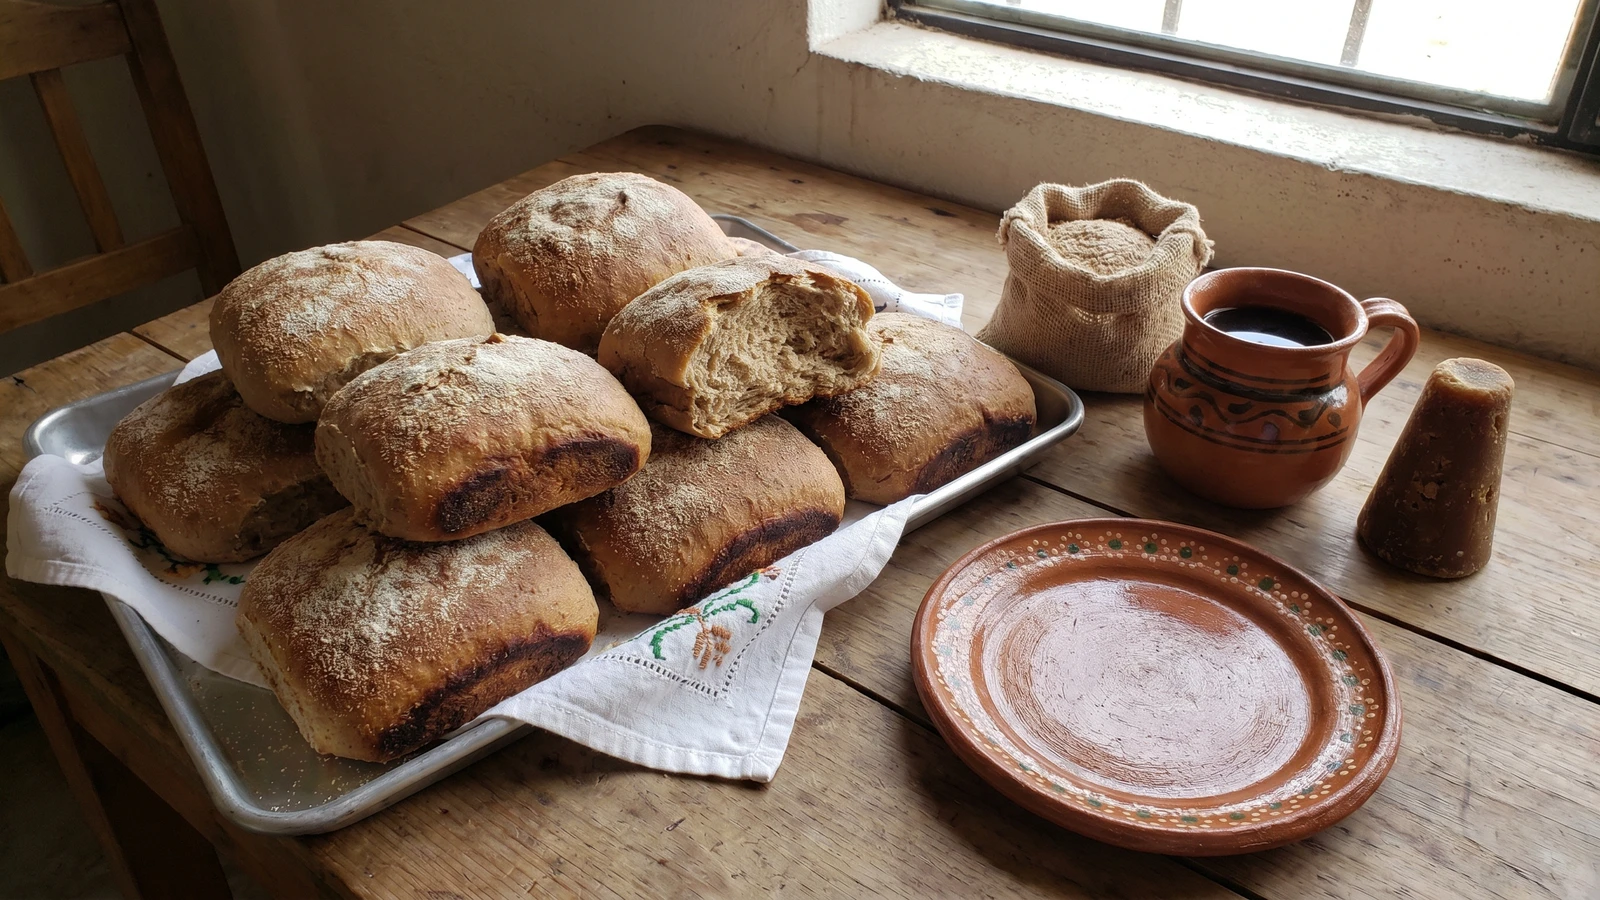
San Luis Potosí's secular semita is a firm bran roll from rancho panadería, made with wheat bran, piloncillo, and manteca de cerdo, never confused with Puebla's cemita.
San Luis Potosí, especially the Altiplano and the ranch towns north of the capital, is where this semita lives. Not Puebla's cemita. Not a bolillo with bran thrown in. This is pan de rancho: wheat flour, salvado de trigo, manteca de cerdo, a little piloncillo, and a dry oven that leaves a firm crust and a crumb meant to last.
The ingredient that tells the truth is the salvado. In the Altiplano potosino, wheat passed through hacienda mills and nothing useful was treated like waste. Bran gave body, flavor, and keeping power. The women baking for merienda knew how to make bread that could sit wrapped in a servilleta and still be worth eating the next morning with frijoles de olla or café de olla.
Rub the manteca into the flour and bran before the water goes in. That is the hand of the recipe. It shortens the crumb and gives the semita its sandy, satisfying bite. If you want a shiny open crumb, make bolillos. If you want semitas potosinas, keep the dough firm and the oven dry. Cada estado, su propia cocina.
The word semita is tied to the Spanish acemite, a coarse wheat bread or bran flour category that traveled to New Spain with colonial wheat culture. In San Luis Potosí, the dry Altiplano and hacienda economy favored breads that kept well for rancho travel and merienda, so wheat bran and manteca de cerdo mattered more than the airy crust of a bolillo. This potosina version belongs to the secular bakery table, distinct from conventual cemitas and from Puebla's sesame-topped cemita poblana.
Quantity
1 cup, plus 2 tablespoons
extra bran reserved for dusting
Quantity
2 tablespoons
Quantity
1 cup
Quantity
4 cups, plus more for dusting
Quantity
2 1/4 teaspoons
Quantity
2 teaspoons
Quantity
1/3 cup, plus more for greasing
room temperature
Quantity
1/2 cup, plus 2 to 4 tablespoons more if needed
| Ingredient | Quantity |
|---|---|
| wheat bran (salvado de trigo)extra bran reserved for dusting | 1 cup, plus 2 tablespoons |
| grated piloncillo | 2 tablespoons |
| hot water | 1 cup |
| unbleached bread flour or high-protein all-purpose flour | 4 cups, plus more for dusting |
| instant yeast | 2 1/4 teaspoons |
| fine sea salt | 2 teaspoons |
| rendered pork lard (manteca de cerdo)room temperature | 1/3 cup, plus more for greasing |
| warm water | 1/2 cup, plus 2 to 4 tablespoons more if needed |
Stir the wheat bran and grated piloncillo together in a large bowl. Pour in the hot water and mix until the piloncillo dissolves. Let it sit for 15 to 20 minutes, until the bran has absorbed the water and the mixture is warm, not hot. Bran steals moisture from dough if you don't make it drink first. This is why dry bread goes from firm to dusty.
In a separate wide bowl, whisk the flour, instant yeast, and salt. Add the manteca de cerdo in small pieces and rub it into the flour with your fingers until the mixture looks like damp sand and holds together when pinched. La manteca es el sabor. Vegetable shortening gives you fat without memory. This bread needs the lard.
Add the soaked bran mixture to the flour base. Pour in the 1/2 cup warm water and mix with your hand until a rough dough forms. If dry flour remains at the bottom of the bowl, add more warm water one tablespoon at a time. The dough should be firm and tan, speckled with bran, slightly tacky but not loose. Do not chase softness. This is semita, not telera.
Turn the dough onto an unfloured counter and knead for 12 to 15 minutes. Push it away with the heel of your hand, fold it back, turn, and repeat. This is sobar, the working of the dough. It will not become silky like white bread because the bran interrupts the gluten. It should become elastic enough to spring back slowly when pressed.
Grease a bowl lightly with manteca. Place the dough inside, turn it once to coat, cover with a clean cotton servilleta, and let it rise in a warm corner for 75 to 90 minutes. It should look puffy and alive, but it may not fully double. Bran and lard slow the rise. No me vengas con atajos. Give the dough its time.
Dust two baking sheets with a little flour and wheat bran. Divide the dough into 12 equal pieces, about 70 to 75 grams each if you are using a scale. Shape each piece into a tight round, then flatten it gently into a low disk about 3 inches wide. The semita should sit squat and sturdy, not tall like a dinner roll.
Set the disks on the prepared sheets with space between them. Dust the tops lightly with flour and bran. Cover and let proof for 35 to 45 minutes, until the dough looks swollen and a finger pressed gently into the side leaves a slow mark. Cut one shallow slash across the top of each semita. Do not cut deep. You are marking the bread, not opening it like a bolillo.
Heat the oven to 425F with a heavy baking sheet or baking stone inside. Slide the semitas onto the hot surface or place the baking sheets directly in the oven. Bake for 10 minutes, then lower the oven to 375F and bake 12 to 15 minutes more, until the tops are matte tan-brown, the bottoms are darker, and the rolls sound hollow when tapped. Do not add a water pan. A semita wants a dry oven.
Move the semitas to a rack and let them cool at least 30 minutes before tearing one open. The crumb finishes setting as it cools. Serve with café de olla, frijoles de olla, queso fresco, or a little piloncillo if that is how your table eats merienda. Wrapped in a cotton servilleta, they keep better than bolillos. That is part of the point.
1 serving (about 80g)
Culinary guides, cultural storytelling, and the editorial depth that makes cooking meaningful.
Discover Culinary ExplorerChef Lupita
Guanajuato's daily bread from Acámbaro, a small glazed roll built on pata, enriched with manteca de cerdo, and baked until the top shines lightly for merienda.

Chef Lupita
Michoacan's Tinguindin aguacatas are flat, leaf-scored sweet breads made with harina de trigo, piloncillo, anise, and manteca de cerdo, shaped by hand for the wood oven.

Chef Lupita
From Ajijic on Lake Chapala, Pan Tachihual is a lightly sweet wedding loaf built with harina de trigo, harina de maiz, piloncillo, manteca, anise, and the old Guadalajara pata.

Chef Lupita
Comitán's pan de yema shaped into little pigs, birds, and rabbits, a Chiapas bakery bread rich with egg yolks, manteca de cerdo, and anís, baked golden on hoja de plátano.