Culinary Explorer

A cooking platform built around craft, culture, and the stories behind what we eat.
Discover Culinary Explorer
Pickled Walnuts

Pickled Walnuts

Created by Chef Thomas

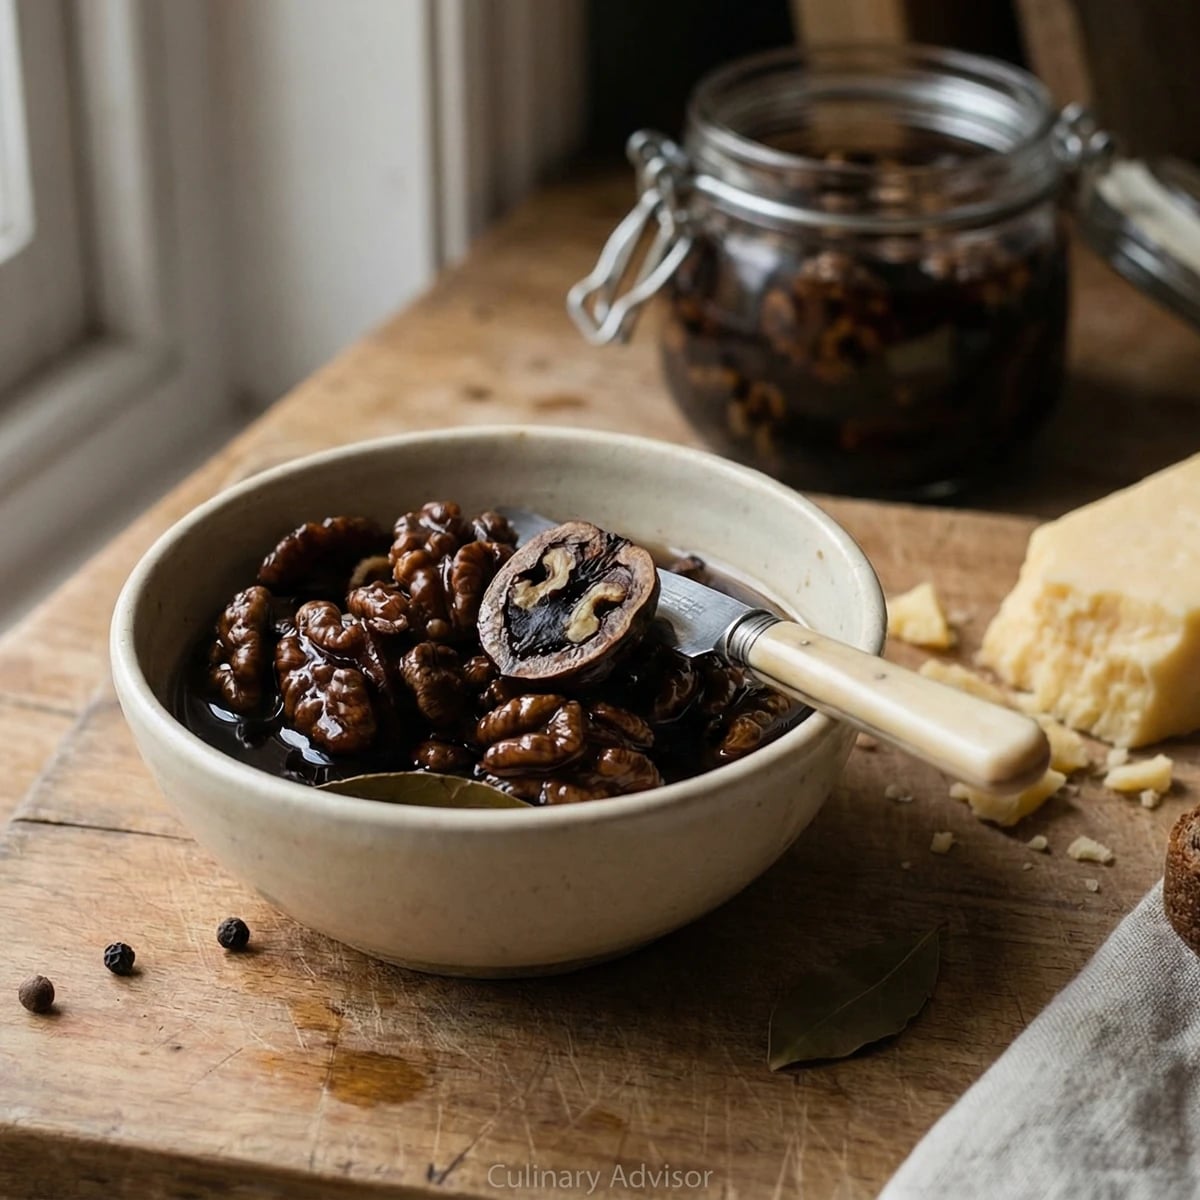
Green walnuts picked in midsummer and turned, slowly and patiently, into the inky, spiced jewels that belong on a winter cheeseboard beside a wedge of strong cheddar and a glass of port.

Sauces & Condiments
British
Make Ahead
Special Occasion
45 min
Active Time
15 min cookPT1H plus two weeks brining and two months maturing total
Yield2 large jars (about 1.5kg)

This is a June job. The whole thing turns on it. Green walnuts have to be picked before the shell hardens inside, which gives you a window of about a fortnight in early summer and not a day longer. Push a needle through one. If it goes through cleanly, you're in time. If it doesn't, you've missed it for the year and there's nothing to be done except mark the calendar for next June.

I walk past a walnut tree on my way to the market. Most of the year I don't think about it, but in early June I start watching. The nuts come on like green plums, fuzzy and soft, and there's a brief moment when they're exactly right. I pick a kilogram, no more, because that's all the brining bucket will hold, and because pickled walnuts are not something you eat by the handful. They're for cheese in November. They're for cold ham at Boxing Day lunch. A small jar lasts a long time.

The process is unhurried and a bit alchemical. Two weeks in salt water to draw out the bitterness. A day in the sun to blacken. Then a hot bath of spiced malt vinegar and dark sugar, and into the cupboard for two months at the very least. There's no shortcut. A pickled walnut hurried is a pickled walnut wasted.

I wrote the dates in the notebook the first year I made these: "Picked 18 June. Jarred 4 July. Open 4 September." I still write them down every time. There's something satisfying about a recipe that asks you to think six months ahead, to set something aside for a self you haven't met yet, the one who'll be standing at the cheese cupboard on a dark evening looking for something to make the cheddar sing.

The technique, the tradition, and the story behind every dish.

Discover Culinary Explorer

Ingredients

green walnuts

Quantity

1kg

picked in June before the shell hardens

fine sea salt

Quantity

500g, plus more for the second brine

cold water

Quantity

to cover

good malt vinegar

Quantity

1 litre

dark muscovado sugar

Quantity

300g

black peppercorns

Quantity

2 tablespoons

whole allspice berries

Quantity

1 tablespoon

yellow mustard seeds

Quantity

1 tablespoon

whole cloves

Quantity

10

dried bay leaves

Quantity

2

fresh ginger

Quantity

a thumb

sliced

cinnamon stick

Quantity

1

broken in half

Equipment Needed

  • Large ceramic crock or food-grade plastic bucket
  • Plate and weight for keeping walnuts submerged
  • Long darning needle or thin metal skewer
  • Rubber gloves
  • Stainless steel saucepan (never aluminium for vinegar)
  • Sterilised glass jars with vinegar-proof lids

Instructions

  1. 1

    Pick at the right moment

    Pick the walnuts in mid to late June, before St Swithin's Day if you can manage it. Push a darning needle through one. If it slides through cleanly, shell and all, they're ready. If it meets any resistance in the middle, you're already too late and the shell is forming. There's no negotiating this. The window is about a fortnight in early summer and then it's gone for the year.

    Wear rubber gloves from this point onwards and don't borrow your good ones. Green walnuts stain everything they touch a deep, indelible brown. Your fingertips will look like a smoker's for a fortnight if you forget.
  2. 2

    Prick all over

    Prick each walnut deeply, half a dozen times or more, with a long needle or a thin skewer. The juice will run dark and sticky. This is the bitter tannin that you're about to brine out, and the holes give it somewhere to go. Don't rush this. A walnut that hasn't been properly pricked will stay bitter no matter how long you brine it.

  3. 3

    Make the first brine

    Dissolve 250g of the salt in enough cold water to cover the walnuts generously. A large ceramic crock or a deep plastic bucket is what you want, nothing metal. Tip the walnuts in, weight them down with a plate so they stay submerged, and leave them somewhere cool for a week. Stir them once a day with a wooden spoon. The brine will turn the colour of strong tea.

  4. 4

    Brine again

    After a week, drain the walnuts and discard the dark brine. Make a fresh batch with the remaining salt and cold water, return the walnuts to it, and weight them down again. Another week. Same routine, a stir once a day. By the end, the bitterness will have leached out and the walnuts will be ready to take on the spice.

  5. 5

    Dry and blacken

    Drain the walnuts and spread them out in a single layer on a tray lined with paper. Leave them somewhere bright and airy, ideally in direct sunlight, for a day or two. They will turn from green-brown to deep, glossy black as they oxidise. This is the moment that makes pickled walnuts what they are. Turn them once or twice so they blacken evenly.

  6. 6

    Make the spiced vinegar

    Pour the vinegar into a stainless steel pan and add the muscovado sugar, peppercorns, allspice, mustard seeds, cloves, bay, ginger and cinnamon. Bring it slowly to the boil, stirring until the sugar has dissolved. The kitchen will smell of Christmas cake and a Victorian larder all at once. Let it bubble gently for ten minutes, then take it off the heat.

    Open a window. Boiling spiced vinegar is pungent stuff and it lingers in soft furnishings for hours. Worth knowing before you start.
  7. 7

    Pack the jars

    Pack the blackened walnuts into clean, sterilised jars, not too tightly. Pour the hot spiced vinegar over them, spices and all, making sure the walnuts are completely covered. Tap the jars gently on the counter to release any trapped air. Seal with vinegar-proof lids, the kind with a plastic coating, never bare metal.

  8. 8

    Wait

    This is the hard part. Put the jars in a cool, dark cupboard and forget about them for at least two months. Three is better. Six is better still. The walnuts need time to soften, to drink in the spice, to lose their last sharp edges and become the deep, savoury, almost meaty thing they're meant to be. Open the first jar in October or November, when the cheeseboard starts to feel like the point of dinner.

Chef Tips

  • Wear gloves and an apron you don't care about. Green walnut juice is the most determined stain in any kitchen and it doesn't wash out of anything. I learned this the hard way and the tea towel is still in the rag bag as proof.
  • Use proper malt vinegar, the dark, brown, slightly treacly kind. Wine vinegar is too thin and clean for this. Pickled walnuts want something with a bit of weight to them, something that tastes of an old-fashioned pantry.
  • Serve them with strong, mature cheddar or a wedge of stilton, cold roast beef, a slice of game pie, or chopped through a winter salad of bitter leaves. They are wasted on anything delicate. They want strong company.
  • The vinegar in the jar is worth keeping after the walnuts are gone. A spoonful in a gravy for venison, or stirred through a beef stew, gives the kind of dark, savoury depth that takes years to learn how to fake.

Advance Preparation

  • The whole project is an exercise in advance preparation. From picking to the first jar opened, allow at least ten weeks, and more if you can bear it.
  • Sealed jars keep in a cool, dark cupboard for at least a year, often two. The walnuts deepen and soften with age.
  • Once opened, store the jar in the fridge and use within three months. Keep the walnuts submerged in their vinegar at all times.

Frequently Asked Questions

Nutrition Information

1 serving (about 30g)

Calories
30 calories
Total Fat
1 g
Saturated Fat
0 g
Trans Fat
0 g
Unsaturated Fat
1 g
Cholesterol
0 mg
Sodium
350 mg
Total Carbohydrates
7 g
Dietary Fiber
1 g
Sugars
5 g
Protein
0 g

Note: Chef personas and recipes are created with AI assistance. Cook with care: follow safe food-handling practices, check doneness with a thermometer when needed, and adapt for allergies and your kitchen.

Where cooking meets culture.

Culinary guides, cultural storytelling, and the editorial depth that makes cooking meaningful.

Discover Culinary Explorer

More from British Preserves, Pickles & Chutneys

Browse the full collection