Culinary Explorer

A cooking platform built around craft, culture, and the stories behind what we eat.
Discover Culinary Explorer
Peanut Butter Oatmeal Cookies

Peanut Butter Oatmeal Cookies

Created by

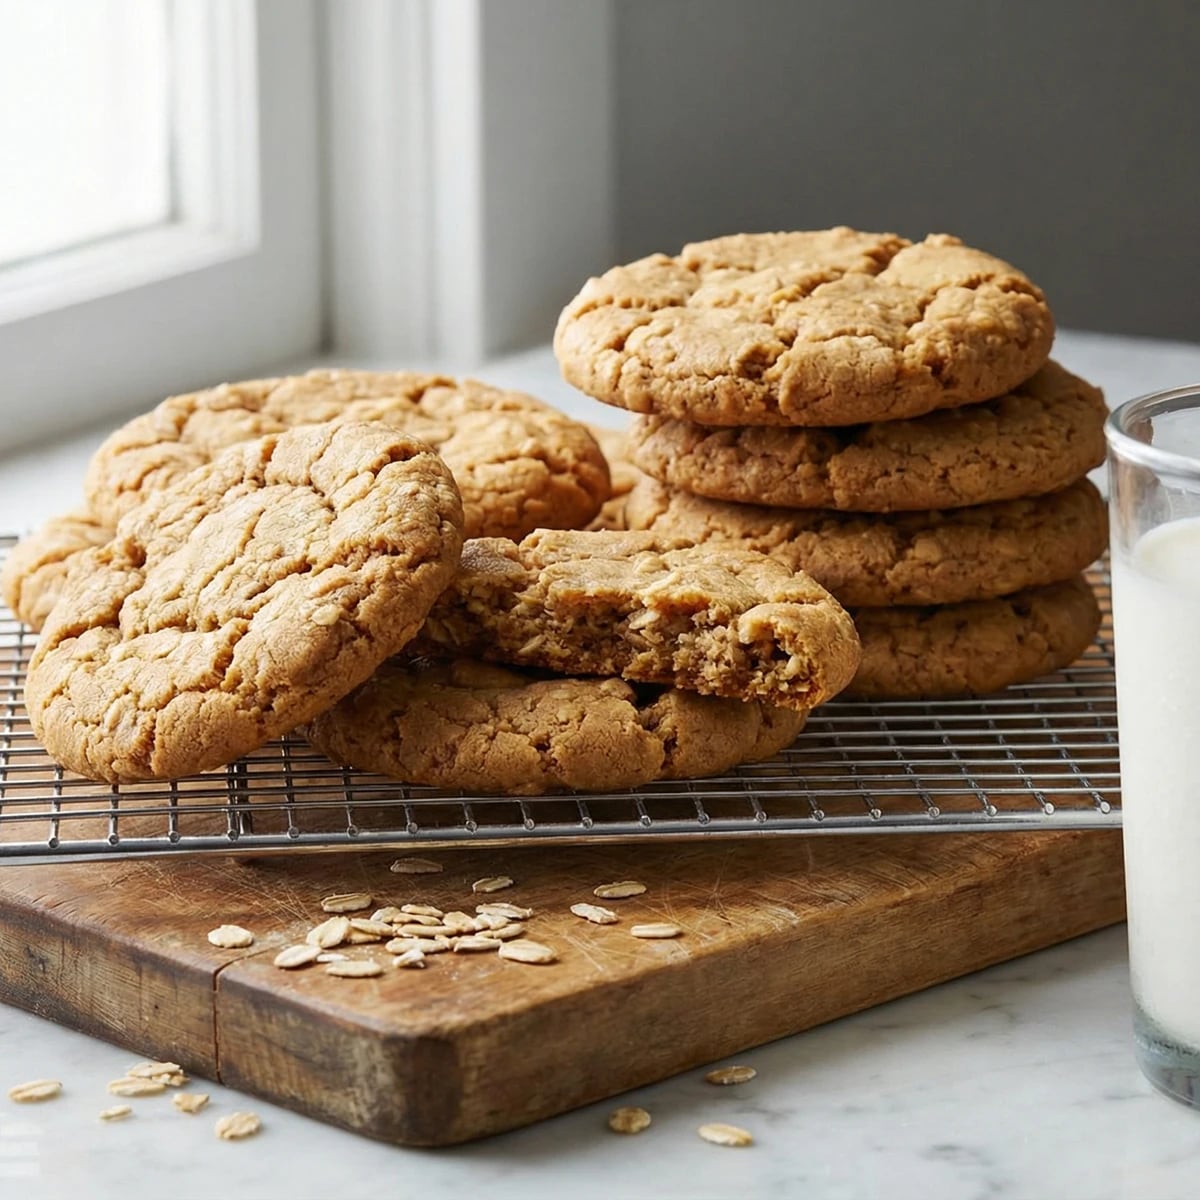
Thick, chewy cookies where creamy peanut butter meets hearty oats, delivering that perfect balance of tender centers and lightly crisp edges that disappear from the cooling rack faster than you can bake them.

Pastries & Cookies
American
Make Ahead
Batch Cooking
20 min
Active Time
36 min cook1 hr total
Yield36 cookies

Two American cookie traditions meet in this recipe, and the marriage is a happy one. Peanut butter cookies arrived in American kitchens around 1916, when George Washington Carver's research put the humble legume on the national stage. Oatmeal cookies predate them by decades, brought by Scottish and Irish immigrants who understood that oats make everything more satisfying. Combining them was inevitable.

What makes this version work is balance. The peanut butter provides richness and that unmistakable roasted flavor children and adults alike find irresistible. The oats contribute chew and substance, turning what could be a too-sweet snack into something that feels almost wholesome. Brown sugar keeps everything soft. A generous pinch of salt wakes up every flavor.

I've watched generations of home bakers turn out these cookies for school lunches, bake sales, and late-night cravings. The recipe forgives imprecision. It rewards experimentation. Add chocolate chips if you must. Throw in some raisins if that's your preference. The foundation is solid enough to handle your creativity.

These cookies freeze beautifully, which makes them ideal for batch baking. Bake a double recipe, freeze half the dough balls, and you're never more than fifteen minutes from warm cookies. That's the kind of practical magic every kitchen needs.

The technique, the tradition, and the story behind every dish.

Discover Culinary Explorer

Ingredients

unsalted butter, softened

Quantity

1 cup (2 sticks)

creamy peanut butter

Quantity

1 cup

light brown sugar

Quantity

1 cup

packed

granulated sugar

Quantity

1/2 cup

large eggs, room temperature

Quantity

2

pure vanilla extract

Quantity

2 teaspoons

all-purpose flour

Quantity

1 1/2 cups

baking soda

Quantity

1 teaspoon

fine sea salt

Quantity

1 teaspoon

old-fashioned rolled oats

Quantity

3 cups

Equipment Needed

  • Stand mixer with paddle attachment (or hand mixer)
  • Cookie scoop or tablespoon measure
  • Rimmed baking sheets
  • Parchment paper
  • Wire cooling rack

Instructions

  1. 1

    Cream the fats and sugars

    In the bowl of a stand mixer fitted with the paddle attachment, beat the softened butter and peanut butter together on medium speed until completely smooth, about 1 minute. Add both sugars and continue beating until the mixture turns light and fluffy, another 3 to 4 minutes. Scrape down the bowl halfway through. You're looking for a color shift from deep tan to pale beige, and the texture should be almost airy. This aeration is what gives the cookies their tender crumb.

    Properly softened butter should give slightly when pressed but hold its shape. If it's greasy or melted at the edges, refrigerate for 10 minutes before proceeding.
  2. 2

    Add eggs and vanilla

    Add the eggs one at a time, beating well after each addition until fully incorporated. The mixture may look slightly curdled after the first egg. This is normal. It will smooth out. Add the vanilla and beat for another 30 seconds. The batter should now look glossy and uniform.

  3. 3

    Combine dry ingredients

    In a separate bowl, whisk together the flour, baking soda, and salt. This takes thirty seconds and ensures even distribution of the leavening. Uneven baking soda means some cookies puff properly while others stay flat. Don't skip this step.

  4. 4

    Build the dough

    With the mixer on low speed, gradually add the flour mixture to the butter mixture. Mix just until the flour disappears, no more than 15 seconds of active mixing. Overworking develops gluten, which makes cookies tough rather than tender. Add the oats all at once and mix on low until just combined. The dough will be thick and chunky. That's exactly right.

  5. 5

    Chill the dough

    Cover the bowl with plastic wrap and refrigerate for at least 30 minutes, or up to 3 days. Cold dough spreads less in the oven, giving you thicker cookies with chewier centers. This rest also allows the oats to hydrate slightly, which improves texture.

    If you're in a hurry, portion the dough onto sheet pans and freeze for 15 minutes instead. The smaller portions chill faster.
  6. 6

    Prepare for baking

    Position racks in the upper and lower thirds of your oven and preheat to 350°F. Line two baking sheets with parchment paper. Parchment ensures even browning and easy release. Silicone mats work too, though cookies baked on parchment develop slightly crispier bottoms.

  7. 7

    Portion the dough

    Using a medium cookie scoop or two tablespoons, portion rounded balls of dough onto the prepared sheets. Leave 2 inches between each ball to allow for spreading. These cookies grow. Press each ball down gently with your palm to about 3/4-inch thickness. This ensures even baking and that classic crackled top.

  8. 8

    Bake to golden perfection

    Bake for 10 to 12 minutes, rotating the pans from top to bottom and front to back at the halfway point. The cookies are done when the edges turn golden brown but the centers still look slightly underdone and puffy. They will set as they cool. Pulling them out when they look perfectly done means overbaked cookies by the time they reach room temperature.

    For extra-chewy cookies, pull them at 10 minutes when centers still look pale. For cookies with more crunch, let them go the full 12.
  9. 9

    Cool properly

    Let cookies rest on the baking sheet for 5 minutes. They're too fragile to move immediately. Then transfer to a wire rack to cool completely. The bottom will crisp as residual heat escapes and the sugars set. Eat one warm if you must, understanding it will be softer and more fragile than its fully cooled counterpart. Sometimes that's exactly what you want.

Chef Tips

  • Use a commercial peanut butter like Skippy or Jif for best results. Natural peanut butters with oil separation produce cookies that spread too thin and have a greasier texture. Save the artisanal stuff for toast.
  • For a deeper, more complex flavor, try using half dark brown sugar instead of all light. The extra molasses adds a faint bitterness that complements the peanut butter beautifully.
  • These cookies pair remarkably well with cold milk, obviously, but also with vanilla ice cream sandwiched between two of them. Wrap tightly in plastic and freeze for an hour before eating.
  • Salt is not optional here. It transforms these from merely sweet to genuinely delicious. If you're using salted butter, reduce the added salt to half a teaspoon.

Advance Preparation

  • Dough can be refrigerated for up to 3 days before baking. The flavor actually improves as the oats hydrate and the sugars dissolve more fully.
  • Portioned dough balls freeze beautifully for up to 3 months. Freeze on a sheet pan until solid, then transfer to a zip-top bag. Bake directly from frozen, adding 2 minutes to the baking time.
  • Baked cookies keep in an airtight container at room temperature for up to 1 week. Add a slice of bread to the container to keep them soft. The cookies absorb moisture from the bread.
  • Baked cookies can be frozen for up to 2 months. Thaw at room temperature or warm briefly in a 300°F oven to refresh.

Frequently Asked Questions

Nutrition Information

1 cookie (about 38g)

Calories
135 calories
Total Fat
4 g
Saturated Fat
1 g
Trans Fat
0 g
Unsaturated Fat
3 g
Cholesterol
8 mg
Sodium
100 mg
Total Carbohydrates
14 g
Dietary Fiber
1 g
Sugars
6 g
Protein
2 g

Note: Chef personas and recipes are created with AI assistance. Cook with care: follow safe food-handling practices, check doneness with a thermometer when needed, and adapt for allergies and your kitchen.

Where cooking meets culture.

Culinary guides, cultural storytelling, and the editorial depth that makes cooking meaningful.

Discover Culinary Explorer

More from The Great American Cookie Collection

Browse the full collection