Culinary Explorer

A cooking platform built around craft, culture, and the stories behind what we eat.
Discover Culinary Explorer
Pappardelle

Pappardelle

Created by

The wide ribbons of Tuscan hills, cut from golden sfoglia to cradle the bold ragùs of wild game. Two to three centimeters across, no more, no less. Width with purpose.

Main Dishes
Italian, Tuscan
Dinner Party
Special Occasion
45 min
Active Time
3 min cook48 min total
Yield4 servings (about 1 pound fresh pasta)

Pappardelle are the widest of the ribbon pastas, and they exist for a reason. These broad noodles were created to carry the substantial ragùs of Tuscany: wild boar braised until it surrenders, hare simmered with wine and herbs, duck cooked slowly with tomatoes and sage. A narrow noodle would be overwhelmed. Pappardelle stands up to these sauces as an equal partner.

The dough is the same as any fresh egg pasta from central Italy: flour and eggs, worked together until smooth and elastic. The skill is in the rolling and the cutting. The sfoglia must be thin enough to cook quickly but sturdy enough to hold the sauce without tearing. Too thick and the pasta is leaden. Too thin and it falls apart under the weight of braised meat.

A hand-crank pasta machine transforms this from an expert skill into a learnable one. The sfogline of Bologna roll by hand with a meter-long rolling pin, standing at a low table, working the dough in circular motions until it becomes nearly transparent. You can achieve excellent results with a machine. What matters is the final thickness and the feel of the dough in your hands. The rest is practice.

Pappardelle take their name from the Tuscan verb 'pappare,' meaning to gobble or eat with great enthusiasm. The pasta appears in cookbooks from the Renaissance period, always paired with game from the Tuscan countryside. Unlike the filled pastas of Emilia-Romagna, pappardelle required no special skill to shape, only the ability to roll dough thin and cut it wide.

The technique, the tradition, and the story behind every dish.

Discover Culinary Explorer

Ingredients

tipo 00 flour

Quantity

300g (about 2 1/3 cups)

plus more for dusting

large eggs

Quantity

3

at room temperature

extra virgin olive oil

Quantity

1 tablespoon

fine sea salt

Quantity

1/2 teaspoon

semolina flour

Quantity

for dusting

Equipment Needed

  • Large wooden board or clean work surface
  • Fork for mixing
  • Hand-crank pasta machine (strongly recommended)
  • Sharp chef's knife or fluted pastry wheel
  • Plastic wrap
  • Kitchen towels or sheet pans for drying

Instructions

  1. 1

    Form the well

    Pour the flour onto a large wooden board or clean work surface. Shape it into a mound and make a well in the center with steep sides, like a volcano. The well must be wide enough to hold the eggs without them escaping. Crack the eggs directly into the center. Add the olive oil and salt to the eggs.

    A wooden surface is traditional because it provides slight texture for the dough to grip. A clean countertop works, but avoid cold marble for mixing, which chills the eggs.
  2. 2

    Incorporate the flour

    Using a fork, beat the eggs gently in the center of the well, keeping the motion small at first. Begin drawing flour from the inner walls of the well into the eggs, little by little. Continue beating and incorporating flour until the mixture becomes too thick to work with a fork. This takes patience. If you rush and break the walls, the eggs run everywhere. Start again if this happens.

  3. 3

    Knead the dough

    When the dough becomes shaggy and holds together, set the fork aside. Use your hands to bring the dough together, incorporating the remaining flour. Begin kneading: push the dough away from you with the heel of your hand, fold it back over itself, rotate a quarter turn, and repeat. Knead for 8 to 10 minutes. The dough will transform from rough and sticky to smooth and elastic.

    The dough should feel like your earlobe when pressed, soft but with resistance. If it remains sticky after several minutes, add flour one tablespoon at a time. If it cracks and refuses to come together, wet your hands slightly and continue kneading.
  4. 4

    Test the gluten

    Perform the windowpane test to check if the dough is ready. Pinch off a small piece and stretch it gently between your fingers. If you can stretch it thin enough to see light through without it tearing, the gluten is properly developed. If it tears immediately, knead for another 3 minutes and test again.

  5. 5

    Rest the dough

    Shape the dough into a ball and wrap it tightly in plastic film. Let it rest at room temperature for at least 30 minutes, up to one hour. This rest is essential. The gluten relaxes, making the dough easier to roll. Dough that has not rested springs back constantly and frustrates you. Dough that has rested yields to the rolling pin.

    The dough will darken slightly as it rests. This is oxidation and is normal. The color returns to pale gold when rolled.
  6. 6

    Divide and roll

    Cut the rested dough into four equal pieces. Work with one piece at a time, keeping the others wrapped. Flatten the piece with your hands into an oval roughly the width of your pasta machine. Set the machine to its widest setting. Pass the dough through. Fold it in thirds like a letter, flatten again, and pass through once more. This lamination builds strength. Repeat three times.

    If you are rolling by hand: use a long rolling pin, roll from the center outward, rotate the dough frequently, and dust with flour as needed. The sfoglia should be thin enough to read a newspaper through. This takes practice and muscle memory that no written instruction can fully convey.
  7. 7

    Thin the sheets

    Now begin thinning. Pass the dough through progressively narrower settings without folding, dusting with flour if it sticks. For pappardelle, stop at the second-to-last setting on most machines. The sheet should be thin enough to see the shadow of your hand through it, but sturdy enough to hold its shape when lifted. About 1.5mm thick. Too thin and it tears under sauce; too thick and it is chewy and heavy.

  8. 8

    Dry the sheets briefly

    Lay the pasta sheets on a floured surface or clean kitchen towels dusted with semolina. Let them dry for 5 to 10 minutes, until the surface feels like soft leather, no longer tacky but still pliable. If too wet, the noodles stick together when cut. If too dry, they crack and break.

  9. 9

    Cut the pappardelle

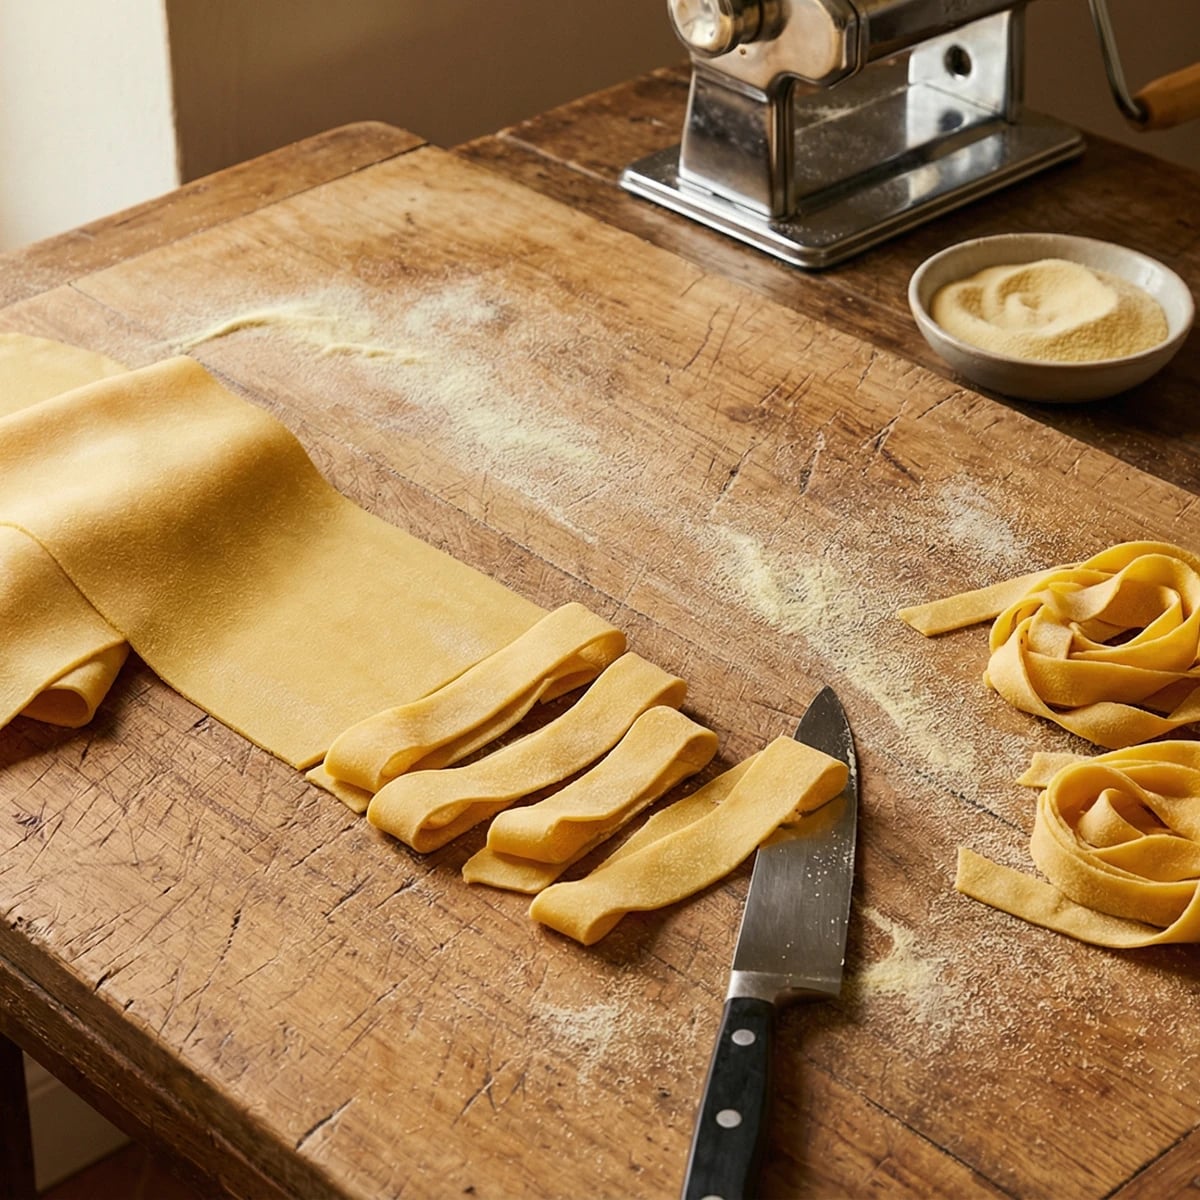
    Dust each sheet lightly with semolina. Roll it loosely into a flat cylinder. Using a sharp knife, cut across the roll into ribbons 2 to 3 centimeters wide. Unroll each ribbon immediately and toss gently with semolina to prevent sticking. The edges will be slightly irregular. This is correct. This is handmade pasta, not extruded plastic.

    Some cooks use a fluted pastry wheel to cut pappardelle, creating wavy edges that catch more sauce. Either straight or fluted is traditional. Choose what pleases you.
  10. 10

    Form nests and store

    Gather small handfuls of cut pappardelle and twirl them into loose nests. Dust generously with semolina. These can rest at room temperature for up to two hours, refrigerated overnight, or frozen immediately. Fresh pappardelle cooks in 2 to 3 minutes in abundant boiling salted water. It is done when it floats and tastes tender with pleasant resistance.

Chef Tips

  • Tipo 00 flour creates the silkiest texture, but you can substitute all-purpose flour. The result will be slightly less delicate, still good. Do not use bread flour; the higher protein makes the dough tough and difficult to roll.
  • The ratio is roughly 100 grams of flour per large egg. Adjust if your eggs are small or your flour is dry. The dough should come together without being sticky or crumbly. Experience teaches you to feel this.
  • Pappardelle pairs with robust sauces that have substance to fill those wide ribbons. Wild boar ragù, braised rabbit, duck sauce, the slow-cooked meat ragùs of Tuscany. Do not waste these noodles on a thin, watery sauce. They will swim and look forlorn.
  • Fresh pasta absorbs sauce differently than dried. Toss it vigorously in the pan with the sauce for 30 seconds so they become one thing. Serve immediately. Fresh pasta waits for no one.

Advance Preparation

  • The dough can be made up to 24 hours ahead, wrapped tightly in plastic, and refrigerated. Bring to room temperature for 30 minutes before rolling.
  • Cut pappardelle can be refrigerated in nests, dusted with semolina, for up to 24 hours. Cook directly from the refrigerator, adding 30 seconds to the cooking time.
  • For longer storage, freeze the nests in a single layer on a sheet pan until solid, then transfer to a freezer bag. They keep for two months. Cook directly from frozen, adding one minute to the cooking time.

Frequently Asked Questions

Nutrition Information

1 serving (about 170g)

Calories
370 calories
Total Fat
8 g
Saturated Fat
2 g
Trans Fat
0 g
Unsaturated Fat
6 g
Cholesterol
140 mg
Sodium
300 mg
Total Carbohydrates
58 g
Dietary Fiber
2 g
Sugars
0 g
Protein
13 g

Note: Chef personas and recipes are created with AI assistance. Cook with care: follow safe food-handling practices, check doneness with a thermometer when needed, and adapt for allergies and your kitchen.

Where cooking meets culture.

Culinary guides, cultural storytelling, and the editorial depth that makes cooking meaningful.

Discover Culinary Explorer

More from Chef Graziella's Foundational Pastas

Browse the full collection