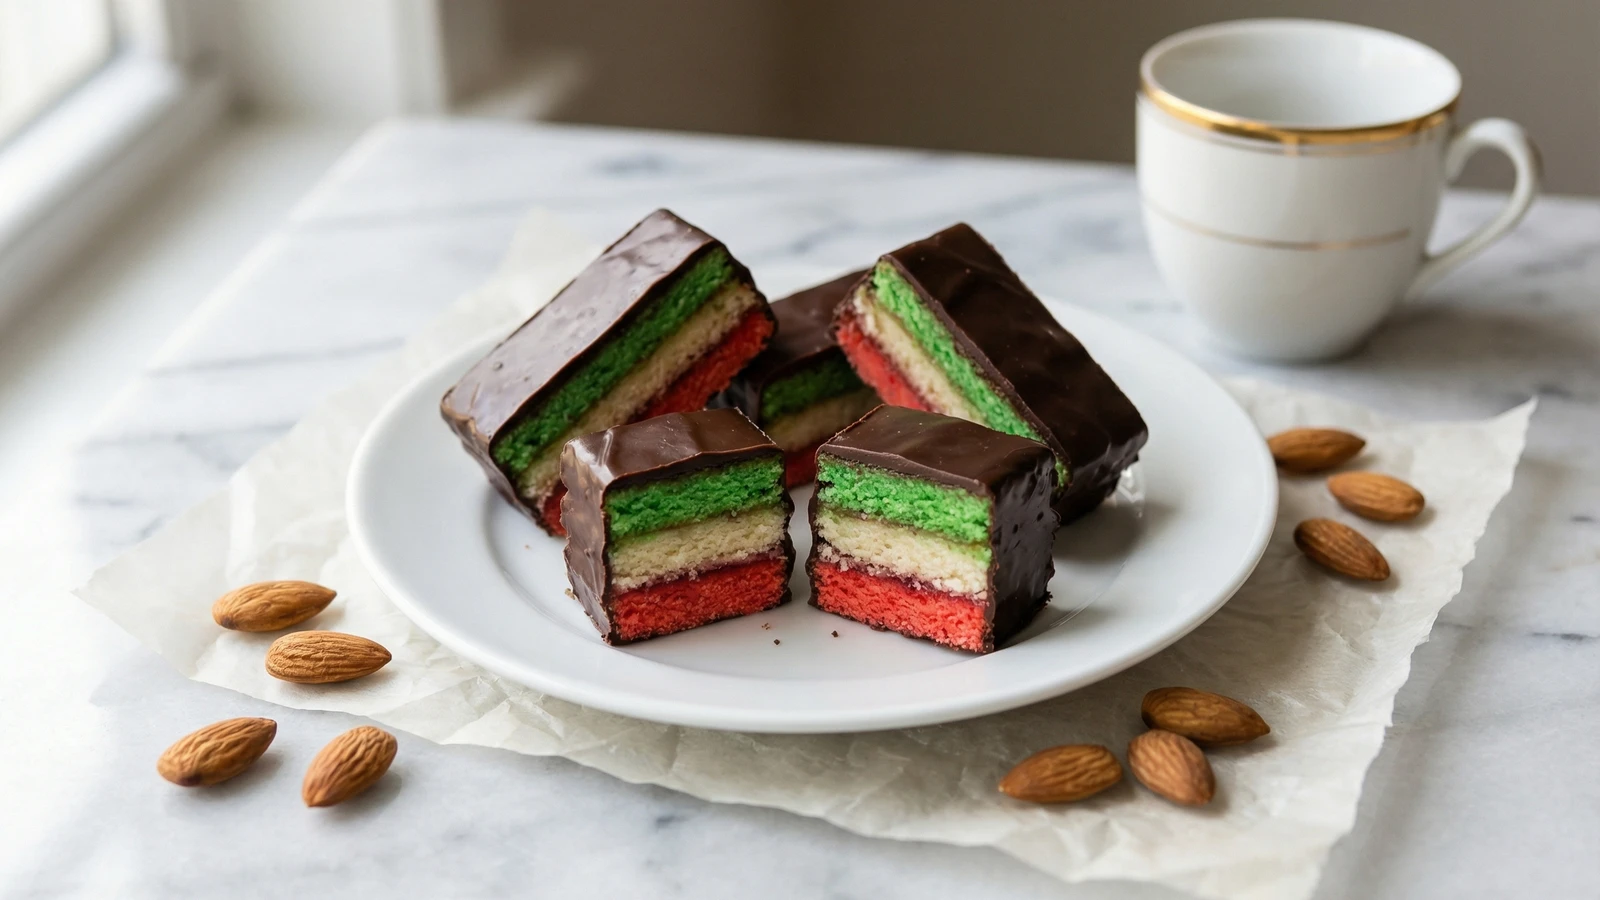
Three delicate almond sponge layers in the colors of the Italian flag, sandwiched with fruity jam and dressed in bittersweet chocolate. These labor-of-love cookies honor generations of Italian-American bakers.
Pastries & Cookies
Italian
Make Ahead
Holiday
1 hr
Active Time
30 min cook•14 hr total
YieldAbout 48 cookies
Walk into any Italian bakery from Boston to Baltimore, and you'll find these tricolor gems arranged in neat rows behind the glass case. They go by many names: rainbow cookies, Venetian cookies, seven-layer cookies, tricolori. What they represent never changes. These are the cookies of immigrants, baked by Sicilians and Neapolitans who missed their homeland and expressed that longing through food.
The irony is that rainbow cookies barely exist in Italy. They're an Italian-American invention, born in New York bakeries in the early twentieth century. Homesick bakers created an edible flag, three layers of almond sponge dyed red, white, and green, held together with jam and wrapped in chocolate. The technique comes from marzipan traditions. The sentiment comes from the heart.
These are not quick cookies. You'll spend an afternoon on them, and they need overnight pressing before you can coat them in chocolate. But the result is worth every minute. When you slice through that chocolate shell and see the perfect stripes, when you taste that almond-scented crumb against the tart jam and bittersweet chocolate, you'll understand why Italian grandmothers have been making these for a hundred years.
I've taught this recipe to students who swore they couldn't bake. They all walked out with a tray of cookies that looked like they came from a professional pasticceria. Follow the steps. Trust the process. You'll be making these every Christmas for the rest of your life.
The technique, the tradition, and the story behind every dish.
•Weights for pressing (heavy cans, cast iron, or books)
Instructions
1
Prepare the pans
Position racks in the upper and lower thirds of your oven and preheat to 350°F. Line three 9x13-inch baking pans with parchment paper, leaving a 2-inch overhang on the long sides. Grease the parchment with butter or cooking spray. If you only have one or two pans, you'll bake in batches. That's fine. The batter waits patiently.
Quarter sheet pans (9x13) work perfectly. If using jelly roll pans (10x15), adjust your baking time down by 2 minutes.
2
Cream almond paste and butter
Break the almond paste into small pieces and drop them into your stand mixer bowl. Add the softened butter. Beat on medium speed until completely smooth, about 4 minutes. Scrape the bowl twice during this process. Any lumps of almond paste now will haunt you later. The mixture should be uniformly creamy with no visible pieces.
3
Add sugar and yolks
Add the sugar to the almond paste mixture and beat on medium-high for 3 minutes until light and fluffy. The color will pale noticeably. Add the egg yolks one at a time, beating well after each addition, then add the almond extract. Scrape down the sides of the bowl.
4
Add flour mixture
Whisk together the flour and salt in a separate bowl. Add to the batter and mix on low speed just until combined. The batter will be quite thick and sticky. This is correct. Remove the bowl from the mixer and set aside.
5
Whip egg whites
In a clean, dry bowl with a clean whisk attachment, beat the egg whites on medium-high speed until stiff peaks form. This takes 3 to 4 minutes. When you lift the whisk, the peaks should stand straight up without drooping. Any trace of fat in the bowl will prevent proper whipping, so make sure everything is spotless.
Wipe your bowl and whisk with a paper towel dampened with white vinegar before whipping. This removes any invisible grease.
6
Fold in egg whites
Add about one-third of the whipped whites to the batter and stir vigorously with a spatula. This sacrifice lightens the batter enough to fold in the rest. Add the remaining whites in two additions, folding gently with a large spatula. Scoop from the bottom of the bowl, turn over the top. Rotate the bowl. Repeat until no white streaks remain. Work efficiently but don't rush. Deflated whites mean dense cookies.
7
Divide and color
Divide the batter equally among three bowls. A kitchen scale helps here: each portion should weigh about 14 ounces. Leave one bowl plain for the white layer. Add red food coloring to the second bowl and mix until evenly tinted. Add green food coloring to the third. The colors will look bold now but will mellow after baking. Don't be timid with the dye.
Gel food coloring gives more vibrant results with less liquid. If using gel, start with 1/2 teaspoon per bowl and adjust.
8
Spread and bake
Spread each colored batter evenly into a prepared pan using an offset spatula. The layers should be quite thin, roughly 1/4 inch. Work the batter into the corners. Bake for 10 to 12 minutes, rotating pans halfway through, until the layers spring back when gently pressed and the edges just begin to turn golden. Watch carefully. Overbaked layers crack when you roll them.
9
Cool the layers
Let the layers cool in the pans for 5 minutes, then use the parchment overhang to lift them onto wire racks. Peel off the parchment while still warm. Cool completely, about 30 minutes. The layers should be pliable, not crisp.
10
Assemble the layers
Place the green layer on a clean sheet of parchment or plastic wrap. Heat the raspberry jam in a small saucepan over low heat until it loosens, about 1 minute. Spread half the jam evenly over the green layer using an offset spatula. Be gentle; the sponge tears easily. Place the white layer on top and press down gently. Spread remaining jam over the white layer. Top with the red layer, pressing to adhere.
Traditional Neapolitan-style puts green on bottom, white in middle, red on top. Some bakers reverse this. Either honors the flag.
11
Press overnight
Wrap the assembled layers tightly in plastic wrap. Place on a baking sheet and top with another baking sheet. Weight with heavy cans, cast iron, or cookbooks. Whatever you have that weighs 5 to 8 pounds. Refrigerate overnight, or at least 8 hours. This pressing compresses the layers, helping them adhere and creating the dense, fudgy texture that distinguishes proper rainbow cookies.
12
Trim the edges
Unwrap the pressed cookie slab and transfer to a cutting board. Using a long, sharp knife, trim approximately 1/4 inch from all four edges to create clean, straight sides. These scraps are the baker's reward. Eat them immediately. No one will know.
13
Coat with chocolate
Line a baking sheet with parchment. Combine the chopped chocolate and shortening in a microwave-safe bowl. Microwave in 30-second intervals, stirring after each, until smooth. The shortening helps the chocolate set with a slight sheen and prevents cracking when you slice. Pour half the chocolate over the top of the cookie slab and spread evenly with an offset spatula. Refrigerate until set, about 15 minutes.
14
Coat the second side
Carefully flip the slab onto the parchment-lined sheet. Rewarm the remaining chocolate if needed (10-second bursts) and spread over what is now the top. Refrigerate until completely set, about 20 minutes.
15
Slice into cookies
Let the chocolate-coated slab sit at room temperature for 5 minutes before cutting. This prevents cracking. Using a sharp knife, cut crosswise into 1-inch strips, then cut each strip into 1.5-inch rectangles. Clean your knife blade between cuts for the cleanest edges. Arrange on a platter and admire your handiwork. You've just made Italian bakery cookies at home.
Chef Tips
•Almond paste and marzipan are not interchangeable. Almond paste contains less sugar and more nuts, giving these cookies their characteristic texture. Look for it in the baking aisle near the pie fillings, or order Solo or Odense brand online.
•The overnight press is not optional. Without proper compression, the layers slide apart when you try to coat them with chocolate. Eight hours minimum. Twelve is better.
•Store finished cookies in single layers between parchment in an airtight container. They keep at room temperature for a week, refrigerated for two weeks, or frozen for three months. Let come to room temperature before serving.
•For gift-giving, package in small bakery boxes lined with wax paper. These travel well and hold their beauty for days.
•Some Italian bakeries use apricot jam instead of raspberry. Both are traditional. Apricot gives a subtler, more floral flavor. Use seedless for either.
Advance Preparation
•Layers can be baked, cooled, and stored wrapped at room temperature for 1 day before assembling.
•After pressing and chocolate coating, the uncut slab keeps refrigerated for up to 5 days. Slice just before serving for freshest presentation.
•Finished cookies freeze beautifully for up to 3 months. Thaw in a single layer at room temperature.
Frequently Asked Questions
Nutrition Information
1 cookie (about 20g)
Calories
140 calories
Total Fat
9 g
Saturated Fat
6 g
Trans Fat
0 g
Unsaturated Fat
3 g
Cholesterol
9 mg
Sodium
4 mg
Total Carbohydrates
11 g
Dietary Fiber
0 g
Sugars
6 g
Protein
2 g
Where cooking meets culture.
Culinary guides, cultural storytelling, and the editorial depth that makes cooking meaningful.