
Chef Freja
Butterdejs-Tarteletskaller
Danish puff pastry tartelet shells folded and chilled in patient layers, baked tall and golden until they shatter at the first bite. The architecture that holds a hundred different fillings.
A cooking platform built around craft, culture, and the stories behind what we eat.
Created by Chef Freja
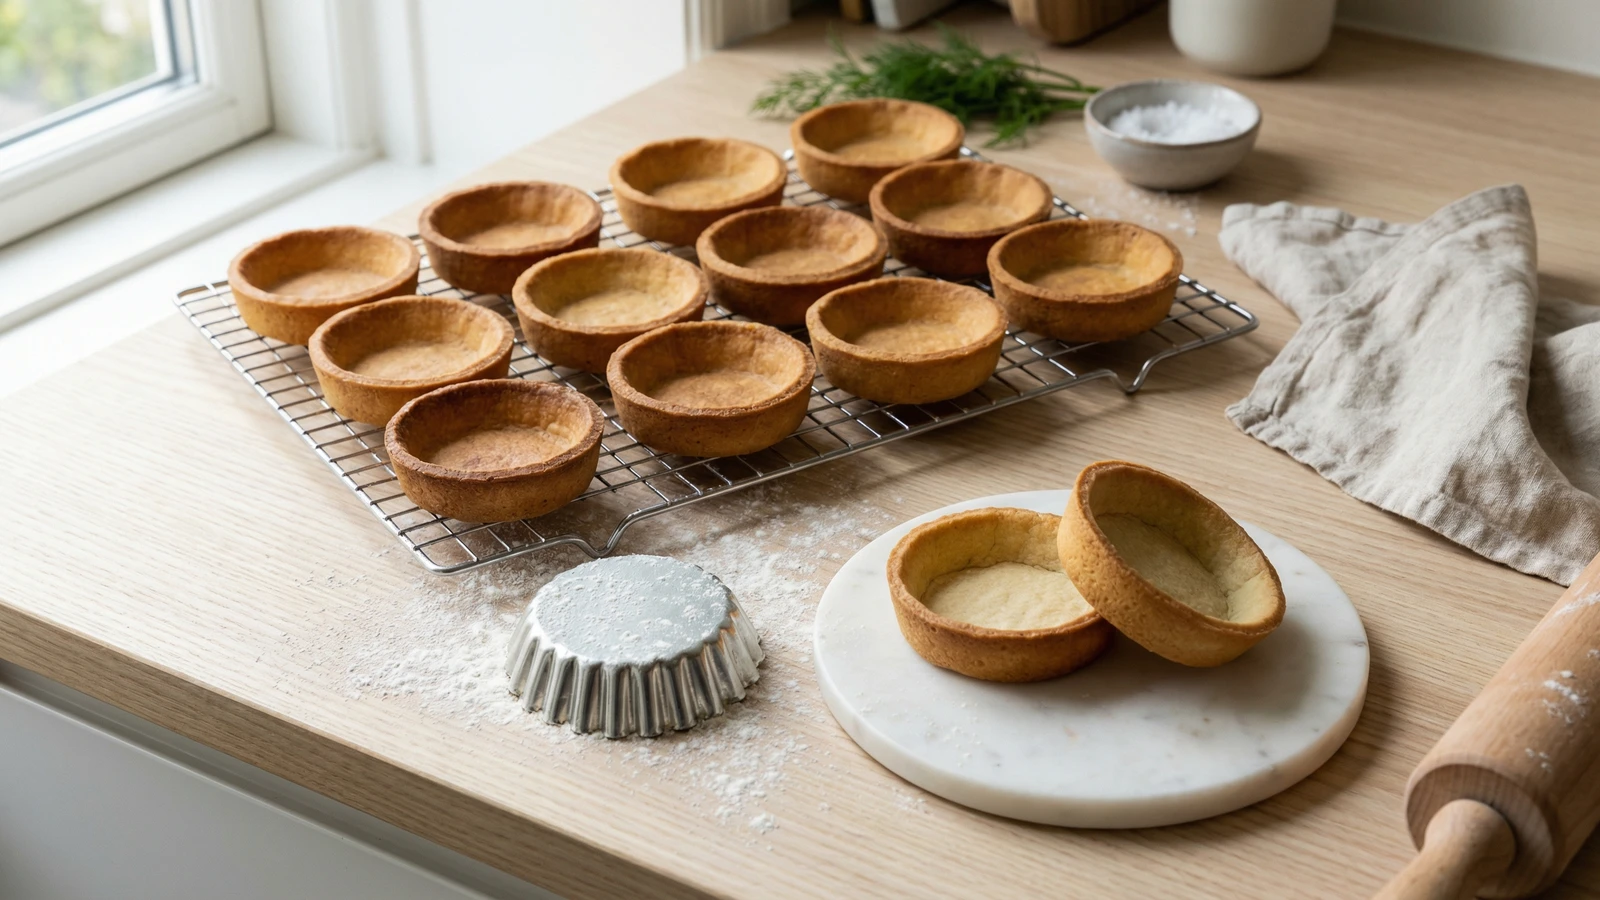
Homemade Danish shortcrust tartelet shells, baked blind until deep gold and crisp. The vessel that turns a weeknight into a celebration and a celebration into a memory.
Tarteletter are celebration food in Denmark. Confirmations in May, birthdays in any month, the Sunday lunch that turns into something more because someone took the trouble. They appear at the table in small fluted shells, golden and crisp, waiting to be filled with the creamy chicken and asparagus stew that has been the partner of the tartelet for over a hundred years. You eat them with a knife and fork and a glass of something cold, and the room gets warmer.
Most Danes buy their tarteletskaller from the supermarket. I won't judge that, supermarket shells are part of the tradition now, but I'll tell you the truth: homemade are not in the same league. Homemade shells are buttery and shatter-crisp where the bought ones are dry and cardboard-pale. The difference is the difference between a meal that arrives and a meal that has been made.
The technique is mordej, the Danish version of French shortcrust, and it has exactly two rules. The butter must stay cold, and the dough must rest. Everything else is straightforward. I'll walk you through every step so you know what you're looking for and why each step matters. Make a double batch. The shells keep beautifully in a tin, and once you have homemade tarteletskaller in the cupboard, you have the foundation of a hyggelig evening any time you want one.
Tarteletter arrived in Denmark in the late 1800s from French haute cuisine, where small pastry cases filled with creamed meats and seafood were a fixture of the formal table. They became Danish household food in the 1930s and 1940s, when the small fluted tins became affordable enough to appear in ordinary kitchens, and the pairing with høns i asparges, chicken in white asparagus cream, became fixed as the classic. The shells themselves were industrialized in the 1960s, and the supermarket tarteletskal became so ubiquitous that the homemade version almost vanished from the Danish kitchen, surviving mainly in the hands of grandmothers and a few stubborn cooks who remembered the difference.
Quantity
250g, plus extra for dusting
Quantity
1 teaspoon
Quantity
1/2 teaspoon
Quantity
150g
cut into small cubes
Quantity
1 large
Quantity
3 to 4 tablespoons
Quantity
for greasing the tins
Quantity
for blind baking
| Ingredient | Quantity |
|---|---|
| plain flour | 250g, plus extra for dusting |
| caster sugar | 1 teaspoon |
| fine sea salt | 1/2 teaspoon |
| cold unsalted buttercut into small cubes | 150g |
| egg yolk | 1 large |
| ice-cold water | 3 to 4 tablespoons |
| soft butter | for greasing the tins |
| dried beans or baking weights | for blind baking |
Take the butter from the fridge and cut it straight into small cubes, about a centimetre across. Put the cubes back in the fridge while you measure the flour. Mordej lives or dies on the temperature of its butter. Warm butter melts into the flour and gives you something dense and bready. Cold butter stays in tiny pockets that steam in the oven and create the layers that shatter when you bite through. Cold is not a suggestion. It is the dish.
Tip the flour, sugar, and salt into a wide mixing bowl. Add the cold butter cubes and toss them through the flour so each one is coated. Now rub the butter into the flour with your fingertips, lifting the mixture and letting it fall back into the bowl as you work. Stop when the texture looks like coarse breadcrumbs with some larger flecks of butter still visible. Those flecks are good. Those are where the flakiness comes from.
Whisk the egg yolk into three tablespoons of ice water. Make a well in the centre of the flour mixture and pour in the liquid. Use a table knife to cut and fold the dough together until it begins to clump. If it still looks dry and won't come together, add the fourth tablespoon of water. Press the dough into a rough disc with your hands. Do not knead it. Kneading develops gluten, and gluten is what you want in bread, not in mordej. The dough should look slightly rough and marbled with butter, not smooth.
Wrap the disc tightly in baking paper or a beeswax wrap and put it in the fridge for at least thirty minutes. This is the step nobody wants to do and the step that makes the difference. The flour needs time to hydrate evenly, and the butter needs to firm back up after the warmth of your hands. Skip this and the dough will tear when you roll it and shrink in the tins.
While the dough rests, brush twelve small fluted tartelet tins with soft butter, getting into every flute and up the sides. Set them on a baking sheet so you can move them as a group. Heat the oven to 200C.
Lightly flour your counter and your rolling pin. Take the dough from the fridge and roll it out to about three millimetres thick. Work from the centre outwards, turning the dough a quarter turn between rolls so it stays even. If it cracks at the edges, the dough is still too cold. Wait two minutes and try again. If it sticks, dust with a little more flour, but be sparing. Too much flour now and the shells will taste dusty later.
Cut circles of dough about two centimetres wider than your tins. Lift each circle and lay it gently into a tin, pressing it carefully into the base and up the fluted sides. Don't stretch the dough. Stretched dough shrinks back when it bakes and you'll end up with shallow shells. Run your rolling pin across the top of each tin to trim the excess cleanly. Prick the bases all over with a fork.
Cut small squares of baking paper and press one into each shell. Fill with dried beans or baking weights, right up to the top edge. The weights hold the dough against the sides while the butter melts and the structure sets. Bake for twelve minutes, until the edges are starting to take on color but the bases are still pale.
Take the tray out of the oven and lift the paper and beans out of each shell. The dough should look set and dry on the surface. Return the shells to the oven for another eight to ten minutes, until the bases and sides are deep golden and smell of toasted butter. This is the moment they go from pastry to tarteletskaller. You'll know when it's right because the smell changes. Nutty, biscuity, warm.
Let the shells cool in their tins for five minutes. They are fragile when they come out of the oven and need that time to firm up. Then turn each tin upside down and tap gently. The shell should drop into your hand. Cool completely on a wire rack before filling or storing. Cold shells, hot filling. That's the rule, and it's what keeps the bottoms from going soft.
1 serving (about 35g)
Culinary guides, cultural storytelling, and the editorial depth that makes cooking meaningful.
Discover Culinary ExplorerChef Freja
Danish puff pastry tartelet shells folded and chilled in patient layers, baked tall and golden until they shatter at the first bite. The architecture that holds a hundred different fillings.

Chef Freja
Danish pork crackling, simmered tender, dried until parchment, then fried until it puffs and shatters. The beer snack of every Danish kro, salty and golden and made for cold pilsner and good company.

Chef Freja
Hard-boiled egg halves heaped with cold-water fjord shrimp, dill mayonnaise, and a single frond of dill standing upright. The piece that disappears first from any Danish julefrokost table.

Chef Freja
Egg halves crowned with creme fraiche and the season's first stenbiderrogn, Danish lumpfish roe. A late-winter ritual along the Danish coasts when the fish come in and the kitchen reorients around them.