Chef Dean
Classic Italian Focaccia
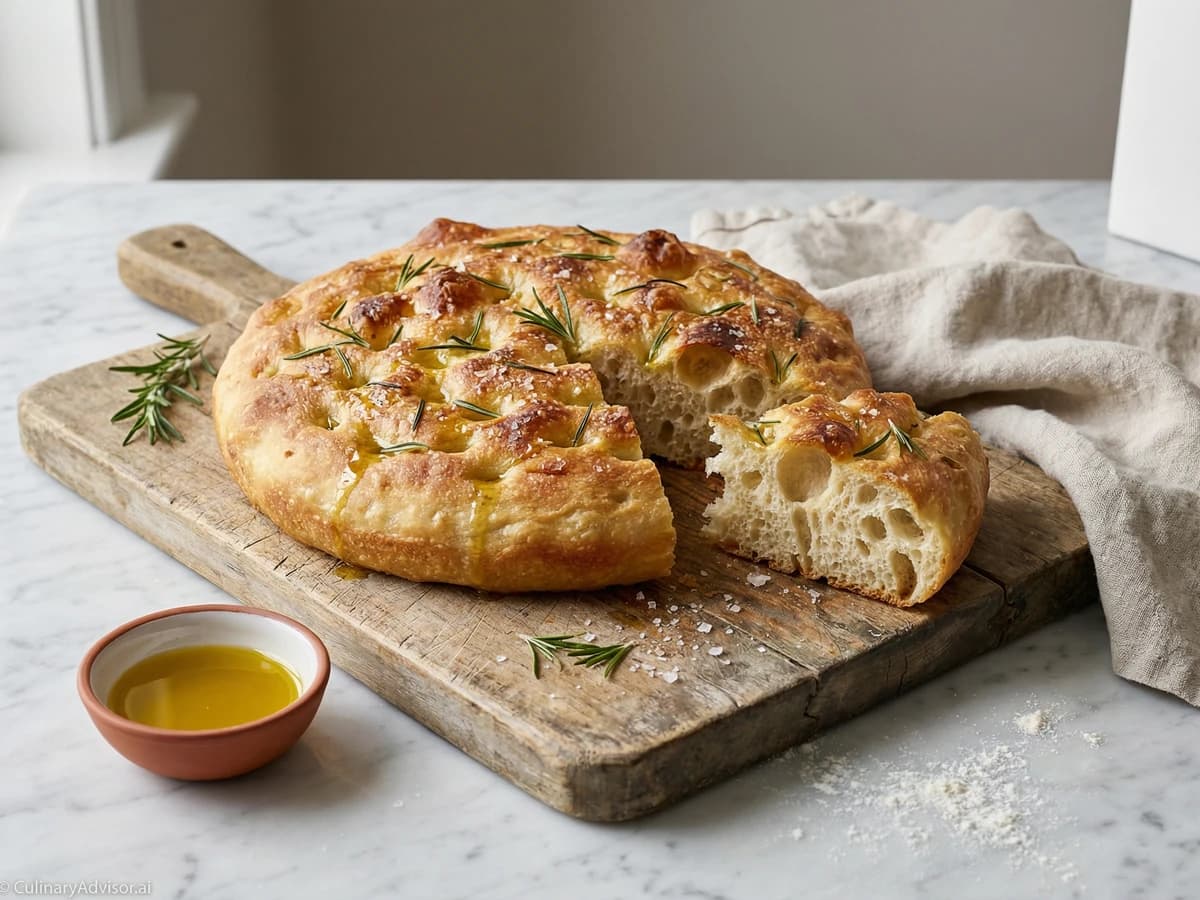
Golden-crusted Ligurian flatbread, generous with olive oil, dimpled by eager fingers, and scattered with rosemary and flaky salt. The bread that proves simplicity requires no apology.
A cooking platform built around craft, culture, and the stories behind what we eat.

Created by
Supple, high-hydration dough stretched thin and kissed by live fire, producing the leopard-spotted char and smoky complexity that no kitchen oven can replicate. This is summer pizza.
The backyard grill is the best pizza oven most Americans will ever own. I've been saying this for decades, and every summer I watch more home cooks discover this truth for themselves. Your charcoal kettle or gas grill reaches temperatures that make your kitchen oven weep with inadequacy. Five hundred degrees, six hundred degrees, sometimes hotter. That's the territory where real pizza happens.
This dough draws from the Italian tradition but embraces the American summer with open arms. High hydration gives you the open, irregular crumb structure of a good Neapolitan crust. The extended fermentation develops complex flavor that quick-rise recipes simply cannot achieve. And when that stretched dough hits the hot grates, something magical occurs: leopard spots of char, a whisper of smoke, and bubbles that puff and blister like a wood-fired pie.
I've served this dough at clambakes in Rhode Island and at ranch cookouts in Hill Country. It works anywhere fire meets summer air. The technique requires attention but not complexity. You'll stretch, you'll grill one side, you'll flip, you'll top, and you'll serve. The whole process takes three minutes once the dough hits the grate. Master this, and you'll never order delivery again.
Quantity
500g (about 4 cups)
plus more for dusting
Quantity
375g (about 1½ cups plus 2 tablespoons)
Quantity
10g (about 1½ teaspoons)
Quantity
7g (about 2¼ teaspoons)
Quantity
15g (about 1 tablespoon)
plus more for coating
Quantity
5g (about 1 teaspoon)
| Ingredient | Quantity |
|---|---|
| bread flourplus more for dusting | 500g (about 4 cups) |
| lukewarm water | 375g (about 1½ cups plus 2 tablespoons) |
| fine sea salt | 10g (about 1½ teaspoons) |
| instant yeast | 7g (about 2¼ teaspoons) |
| extra-virgin olive oilplus more for coating | 15g (about 1 tablespoon) |
| honey or sugar | 5g (about 1 teaspoon) |
Pour the lukewarm water into a large mixing bowl. The water should feel neutral against your wrist, neither warm nor cool, around 100°F. Add the honey and stir to dissolve. Sprinkle the instant yeast over the surface and let it bloom for two minutes. You'll see tiny bubbles forming at the edges. This tells you your yeast is alive and hungry.
Add the bread flour and salt to the bowl. Using a wooden spoon or your hand, mix until a shaggy mass forms. The dough will look rough and uneven. Don't worry. Gluten development comes later. Scrape down the sides of the bowl and gather everything into the center. Add the olive oil and work it through the dough with your fingers, pressing and folding until incorporated.
Turn the dough onto a clean, unfloured work surface. Knead using the stretch-and-fold method: push the dough away from you with the heel of your hand, fold it back over itself, rotate a quarter turn, and repeat. Continue for eight to ten minutes. The dough transforms from sticky and rough to smooth and elastic. It should pass the windowpane test: stretch a small piece thin enough to see light through without tearing.
Shape the dough into a smooth ball and place it in a large bowl coated lightly with olive oil. Turn the dough to coat all sides. Cover tightly with plastic wrap. Let rise at room temperature for one hour, then perform a stretch-and-fold: wet your hands, pull one side of the dough up and fold it over the center. Rotate the bowl 90 degrees and repeat three more times. Cover again and refrigerate for at least eight hours, up to 72 hours.
Remove the dough from the refrigerator three hours before grilling. Turn it onto a lightly floured surface and divide into four equal portions, each roughly 225 grams. Shape each piece into a tight ball: cup your hand over the dough and move in small circles, using the friction of the counter to create surface tension. The ball should feel taut, like a water balloon. Place the balls on an oiled sheet pan, cover loosely, and rest at room temperature until nearly doubled and puffy to the touch.
Set up your grill for high direct heat. If using charcoal, light a full chimney and spread the coals evenly across the grate. If using gas, preheat on high with the lid closed for at least fifteen minutes. Clean and oil the grates thoroughly with a wad of paper towels dipped in vegetable oil, held by tongs. The grate should be hot enough that water droplets vaporize instantly on contact.
Working with one dough ball at a time, press it gently into a disk on a floured surface. Lift the dough and let gravity stretch it, rotating as you go. Use your knuckles to stretch from the center outward, leaving a slightly thicker rim. Work quickly but confidently. Aim for 10 to 12 inches in diameter, thin enough to see your hand through in places. Irregular shapes have character. Accept them.
Drape the stretched dough over your forearms and carry it to the grill. Lay it directly on the hot grates in one confident motion. Close the lid. Listen for the sizzle. After 90 seconds to two minutes, check underneath by lifting an edge with tongs. You want deep golden char marks and bubbles rising across the surface. The top will still look raw. This is correct.
Use tongs or a large spatula to flip the crust onto a sheet pan, grilled side up. This is now your topping surface. Add your toppings quickly: a slick of sauce, cheese, vegetables, meats, whatever the season and your appetite demand. Slide the pizza back onto the grill, close the lid, and cook for two to three minutes more. The bottom will char, the cheese will melt, and the edges will puff and crisp. Remove with confidence.
Transfer the pizza to a cutting board. Let it rest for one minute so the cheese sets slightly. Slice with a sharp chef's knife or pizza wheel. Serve immediately while the crust still crackles. Repeat with remaining dough balls, adjusting heat as needed. The grill is forgiving. Trust your instincts.
1 serving (about 220g)
Culinary guides, cultural storytelling, and the editorial depth that makes cooking meaningful.
Discover Culinary ExplorerChef Dean
Golden-crusted Ligurian flatbread, generous with olive oil, dimpled by eager fingers, and scattered with rosemary and flaky salt. The bread that proves simplicity requires no apology.

Chef Dean
The iconic Italian slipper bread with a shattering golden crust and an interior so open and airy you could lose your car keys in there. High-hydration dough rewards patience with results no bakery can match.

Chef Dean
The legendary Milanese Christmas bread with its golden dome, butter-rich crumb, and jeweled interior of candied citrus and plump raisins. Patient fermentation rewards you with texture like sweet clouds pulled apart by eager hands.

Chef Ally
Four ingredients, twenty-four hours, and a willingness to let time do most of the work. This is dough the way Naples has made it for generations, simple and alive with flavor.