
Chef Thomas
A Bloomer
A proper British bloomer, slashed deep and baked until the cuts open wide and the crust turns deep, glossy gold. The kind of loaf that makes the rest of the day feel deliberate.
A cooking platform built around craft, culture, and the stories behind what we eat.
Created by Chef Thomas
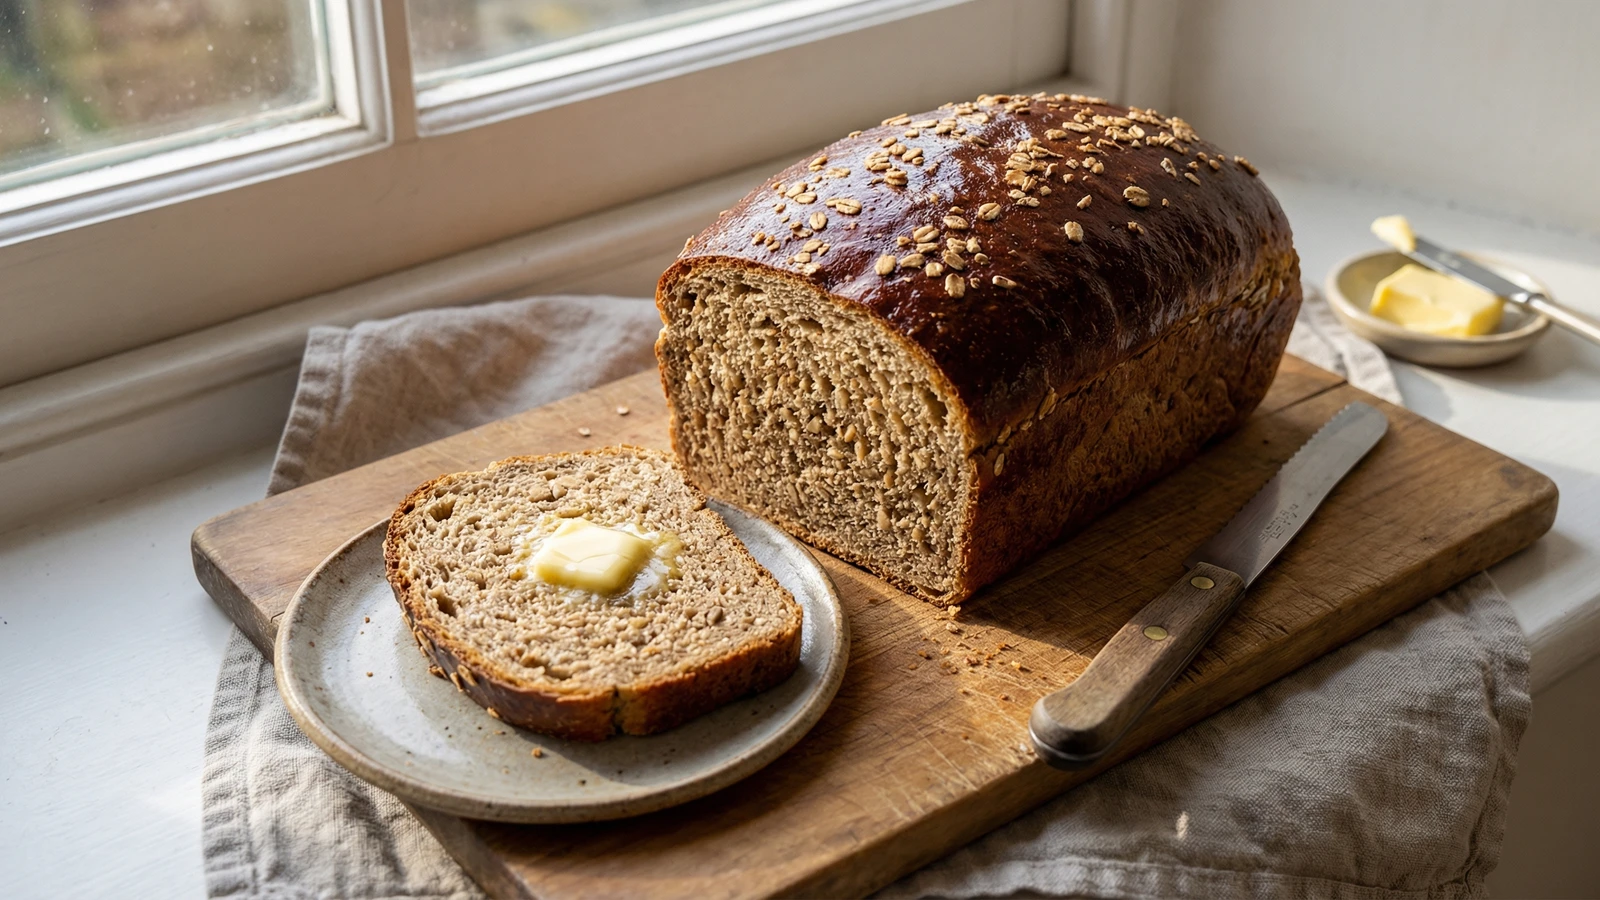
A malted brown loaf with a deep crust and a sweet, nutty crumb, the kind of bread that turns a quiet afternoon into something worth being home for.
There's a particular hour on a Saturday afternoon when the kitchen smells of warm wheat and the windows have started to fog. The loaf is in the oven, the kettle is on, and the rest of the day stretches ahead with nothing more demanding than buttering a slice. This is the bread that makes that hour possible.
Granary flour is one of those quietly British things that doesn't really exist anywhere else. Malted wheat flakes folded into brown flour, giving it a sweet, almost caramel chew and a deep golden crumb that's more interesting than plain wholemeal and more honest than white. It tastes of toast before you've even toasted it. There's nothing fancy about it. There doesn't need to be.
I bake one most weekends through the colder months, partly because the kitchen is the warmest room in the house and partly because there are few better feelings than putting a still-warm loaf on a board with butter and a knife and letting people help themselves. We're only making dinner, but a homemade loaf at the table makes dinner feel like something. I wrote it down in the notebook years ago: bread, butter, Saturday. Still true.
A recipe is a conversation, not a contract. Don't worry if your dough feels a bit wetter or drier than you expected. Don't worry if the rise takes longer than the recipe says. Bread happens on its own time, and the loaf you pull out of the oven will be better for the hour you spent paying attention to it instead of watching the clock.
Quantity
500g
Quantity
7g (1 sachet)
Quantity
10g
Quantity
1 tablespoon
or runny honey
Quantity
1 tablespoon
plus extra for the bowl
Quantity
320ml
Quantity
2 tablespoons
for the top
Quantity
a little
for brushing
| Ingredient | Quantity |
|---|---|
| granary or malted brown bread flour | 500g |
| fast-action dried yeast | 7g (1 sachet) |
| fine sea salt | 10g |
| malt extractor runny honey | 1 tablespoon |
| olive oilplus extra for the bowl | 1 tablespoon |
| warm water | 320ml |
| malted wheat flakes (optional)for the top | 2 tablespoons |
| milk (optional)for brushing | a little |
Tip the flour into a large bowl. Add the yeast on one side and the salt on the other. They get along eventually, but it's kinder to introduce them slowly. Stir the malt extract and olive oil into the warm water until the malt has loosened, then pour it into the flour. Bring it together with a wooden spoon, then with your hand, until you have a shaggy, slightly sticky dough.
Turn the dough out onto a lightly floured surface and knead for ten minutes. It will start out rough and tacky and slowly turn into something smooth and elastic that springs back when you press it. Granary dough never goes as silky as a white loaf, the wheat flakes see to that, but you'll feel the change in your hands when it's ready. Trust your hands.
Oil a clean bowl and turn the dough in it so the surface is lightly slicked. Cover with a damp tea towel or cling film. Leave it somewhere warm for about an hour and a half, until it has roughly doubled in size. There's no rush. A slow rise in a cool kitchen makes better bread than a fast one near a radiator. The dough will tell you when it's ready: poke it gently and the dent should slowly fill back in, but not all the way.
Tip the risen dough onto a lightly floured surface and knock the air out with the heel of your hand. Don't be precious about it. Shape it into a fat oval and tuck the edges under so the top is taut and smooth. Drop it into a greased 900g loaf tin, seam-side down. It should fill the tin about two-thirds of the way up.
Cover loosely and leave for another forty-five minutes to an hour, until the dough has risen above the rim of the tin and looks puffed and proud. While you wait, heat the oven to 220C/200C fan. Just before it goes in, brush the top with a little milk and scatter the malted wheat flakes over so they stick. A few will fall off in the oven. That's allowed.
Slide the tin into the hot oven and bake for thirty to thirty-five minutes. The loaf is done when the top is a deep, glossy mahogany and it sounds hollow when you tip it out and tap the bottom. Your nose will know before the timer does. The kitchen will smell of toasted wheat and warm honey.
Turn the loaf out of the tin and set it on a wire rack. Now leave it alone for at least thirty minutes. I know. The smell is unfair. But cutting into a hot loaf squashes the crumb and lets all the steam out at once, and a granary loaf rewards patience. Cut a thick slice once it's cooled, butter it generously, and call it lunch.
1 serving (about 65g)
Culinary guides, cultural storytelling, and the editorial depth that makes cooking meaningful.
Discover Culinary ExplorerChef Thomas
A proper British bloomer, slashed deep and baked until the cuts open wide and the crust turns deep, glossy gold. The kind of loaf that makes the rest of the day feel deliberate.

Chef Thomas
A simple white loaf made from flour, water, yeast, and salt. The kind of bread that fills the kitchen with the smell of a Saturday morning and teaches you, slowly, everything you need to know about baking.

Chef Thomas
A dark, fruit-heavy Welsh tea loaf, soaked overnight in strong tea and baked slowly until the kitchen smells of spice and orange peel. Sliced thick and buttered cold.

Chef Thomas
Rich, butter-laden Georgian buns from Bath, glazed deep gold and crowned with crushed sugar nibs that crack beneath your teeth, the kind of bake that turns a Sunday afternoon into something deliberate.