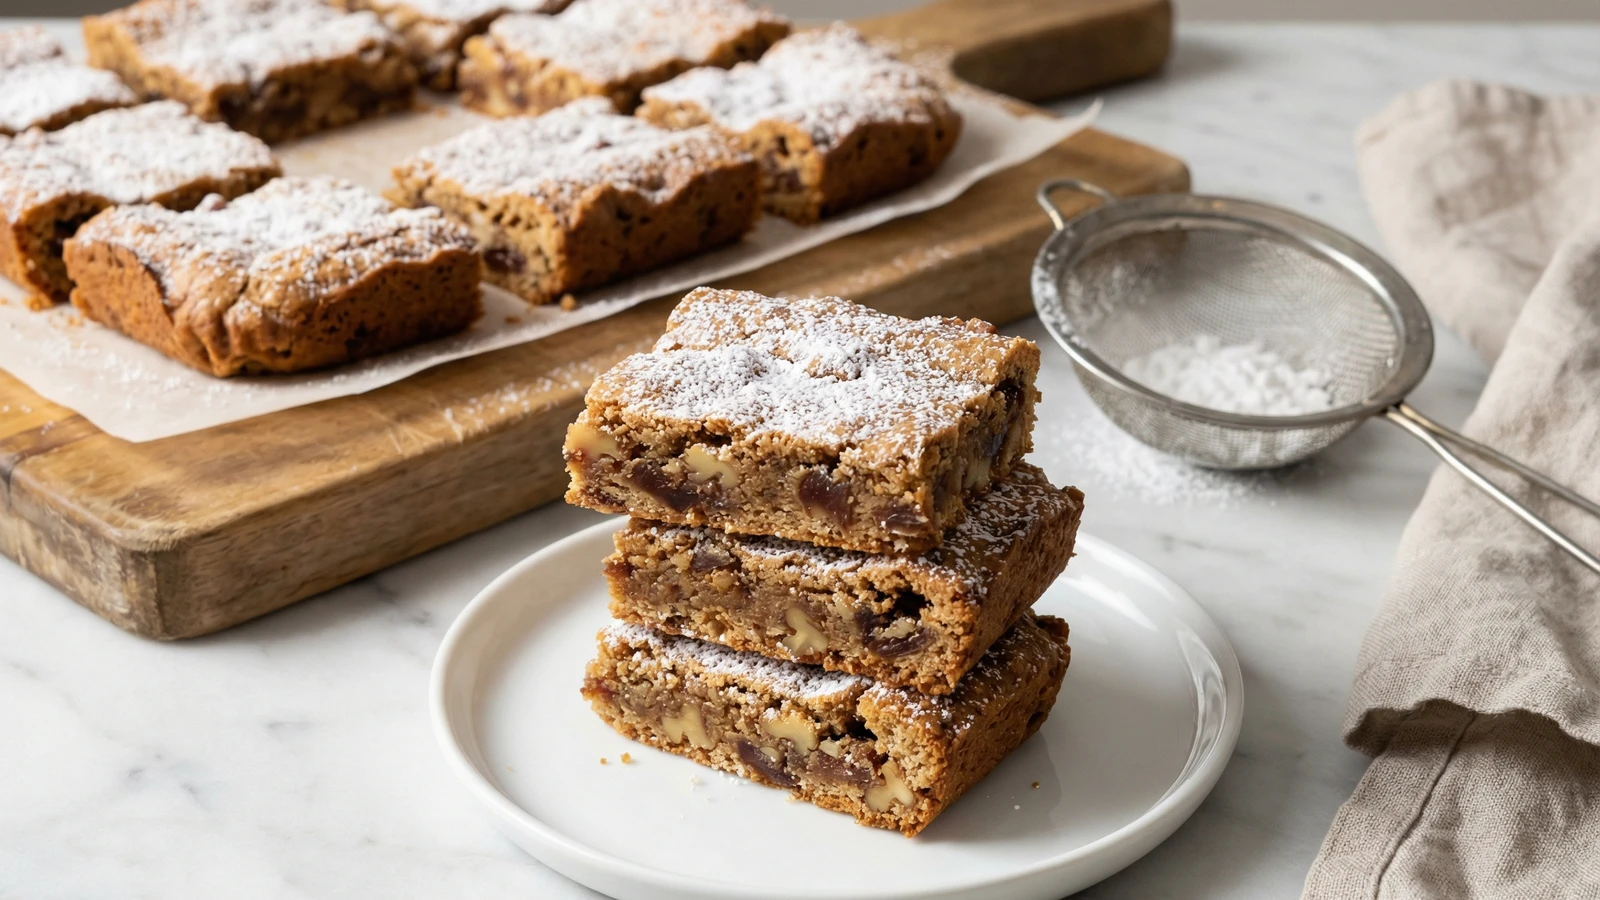
Dense, chewy bars studded with sweet dates and toasted walnuts, wrapped in a brown sugar batter that recalls your grandmother's recipe box and the lost art of honest American baking.
Pastries & Cookies
American
Make Ahead
Holiday
20 min
Active Time
35 min cook•55 min total
Yield24 bars
These bars existed in American kitchens long before anyone called them vintage. During the Second World War, when sugar rationing forced home bakers to improvise, dates became a revelation. Their natural sweetness meant you could produce something worthy of a church social without burning through your ration book. Smart cooks discovered that dates did more than sweeten. They created a chewy, almost sticky texture that no amount of granulated sugar could replicate.
The recipe survived rationing because it deserved to. There's a depth here that modern cookies rarely achieve. Brown sugar brings molasses warmth. Toasted walnuts provide the crunch and bitter edge that keeps the sweetness honest. The dates themselves, when properly chopped and folded through the batter, create pockets of caramel intensity throughout each bar.
I learned this recipe from a woman in Portland who had been making them since 1943. She measured nothing, worked the batter by feel, and produced bars that disappeared within hours of cooling. The version I'm giving you includes measurements because you're learning. But pay attention to the texture descriptions. Once you've made these three or four times, you'll measure by instinct too.
The powdered sugar dusting isn't decoration. It serves a purpose. These bars are sticky when fresh from the oven. The sugar creates a dry surface that lets you stack them for storage or arrange them on a plate without everything fusing together. Form follows function in good baking, just as it does everywhere else.
The technique, the tradition, and the story behind every dish.
Position a rack in the center of your oven and heat to 350°F. Line a 9x13-inch baking pan with parchment paper, leaving a 2-inch overhang on the long sides. This overhang becomes your handle for lifting the bars out cleanly. Lightly butter the parchment. Even with nonstick parchment, a thin film of butter prevents any sticky date bits from clinging.
Metal pans conduct heat better than glass. If using glass, reduce oven temperature by 25°F and add 5 minutes to the bake time.
2
Toast the walnuts
Spread walnut halves on a rimmed baking sheet and toast in the preheating oven for 8 to 10 minutes, stirring once halfway through. You'll smell them before you see the color change. They should be fragrant and just turning golden at the edges. Transfer immediately to a cutting board. Hot nuts on a hot pan continue cooking. Chop roughly once cool enough to handle. You want pieces, not powder.
Toasting transforms walnuts from waxy and bland to rich and aromatic. Never skip this step, even if you're in a hurry.
3
Build the batter base
In a large bowl, whisk together the melted butter and brown sugar until smooth and glossy. The mixture should look like wet sand with a slight sheen. Add the eggs one at a time, whisking well after each addition until the batter turns smooth and somewhat lighter in color. Stir in the vanilla. You're building structure here. Don't rush it.
4
Add the dry ingredients
Whisk together the flour, baking powder, and salt in a separate bowl. Add the dry ingredients to the wet mixture and stir with a wooden spoon or sturdy spatula until just combined. The batter will be thick. Stop when you no longer see dry flour streaks. Overmixing develops gluten and turns bars tough.
5
Fold in dates and walnuts
Add the chopped dates and toasted walnuts to the batter. Fold them through with a spatula, working from the bottom of the bowl upward. The dates will want to clump together. Be patient. Keep folding until the fruit and nuts distribute evenly throughout. You should see them in every spoonful when you scoop the batter.
If your dates are very sticky, toss them with a tablespoon of the measured flour before adding. This prevents clumping.
6
Spread and bake
Scrape the batter into your prepared pan. It will be thick and sticky. Use an offset spatula or the back of a spoon dipped in water to spread it into an even layer, pushing firmly into the corners. The surface doesn't need to be perfect. Bake for 30 to 35 minutes, rotating the pan halfway through. The bars are done when the top is golden brown and a toothpick inserted in the center comes out with just a few moist crumbs clinging to it.
7
Cool completely
Let the bars cool in the pan on a wire rack for at least 2 hours. I know this tests your patience. Cutting them warm produces ragged edges and a gummy texture. They need time to set. Once completely cool, use the parchment overhang to lift the entire slab onto a cutting board.
8
Cut and dust
Use a sharp chef's knife to trim the edges if you want clean lines, then cut into 24 bars (6 rows by 4 columns). Wipe the knife between cuts if dates stick to the blade. Arrange bars on a serving plate or storage container and dust generously with powdered sugar through a fine-mesh sieve. The sugar should coat the top like fresh snow. It will absorb slightly into the bars over time, so dust again before serving if you've stored them.
Chef Tips
•Medjool dates produce the richest, most caramel-like flavor and the softest texture. Deglet Noor dates work but are drier and less sweet. If using Deglet Noor, soak them in warm water for 10 minutes and drain well before chopping.
•Pecans substitute beautifully for walnuts if that's your preference or what your pantry holds. Toast them the same way.
•For a more sophisticated version, add 1 teaspoon of ground cinnamon and 1/4 teaspoon of freshly grated nutmeg to the dry ingredients. The spices echo the dates' natural warmth.
•These bars ship remarkably well. Layer them between sheets of wax paper in a sturdy tin and they'll arrive intact. My students have sent them across the country for holidays.
•A splash of bourbon (2 tablespoons) added with the vanilla creates an adults-only variation that's worth trying at least once.
Advance Preparation
•Bars keep at room temperature in an airtight container for up to 5 days. The texture actually improves after day one as the dates continue to soften the surrounding crumb.
•Freeze bars (before dusting with powdered sugar) layered between parchment in a freezer-safe container for up to 3 months. Thaw at room temperature and dust with sugar before serving.
•The batter can be made and refrigerated overnight. Bring to room temperature for 30 minutes before spreading in the pan, or add 5 minutes to the bake time.
Frequently Asked Questions
Nutrition Information
1 bar (about 52g)
Calories
255 calories
Total Fat
12 g
Saturated Fat
5 g
Trans Fat
0 g
Unsaturated Fat
5 g
Cholesterol
16 mg
Sodium
48 mg
Total Carbohydrates
35 g
Dietary Fiber
2 g
Sugars
12 g
Protein
2 g
Where cooking meets culture.
Culinary guides, cultural storytelling, and the editorial depth that makes cooking meaningful.