Culinary Explorer

A cooking platform built around craft, culture, and the stories behind what we eat.
Discover Culinary Explorer
Colomba Pasquale

Colomba Pasquale

Created by

The dove that lands on Italian tables at Easter, demanding three days of patience in exchange for a crumb so tender it dissolves on the tongue. Topped with almonds and pearl sugar, it proves that festive breads need not be complicated to be profound.

Breads
Italian
Easter
Holiday
1 hr 30 min
Active Time
45 min cook26 hr total
Yield2 colombas (16 servings)

Colomba means dove, and this bread takes the shape of one: wings outstretched, a symbol of peace and resurrection that has graced Italian Easter tables for nearly a century. It is panettone's spring cousin, born from the same enriched dough tradition but lighter, brighter, perfumed with orange rather than studded with raisins.

The technique is demanding. Three stages of dough, each requiring time and attention. The butter must be soft, added slowly, incorporated completely. The proof must be full, the bake must be thorough, the cooling must be upside down. There are no shortcuts. There are no acceptable compromises.

But here is what I want you to understand: millions of Italian home bakers make colomba every spring. Not professional pastry chefs in restaurant kitchens, but grandmothers and mothers in home kitchens, often working from memories rather than written recipes. If they can do this, so can you. What colomba requires is not exceptional skill. It requires time, attention, and the willingness to follow each step without rushing.

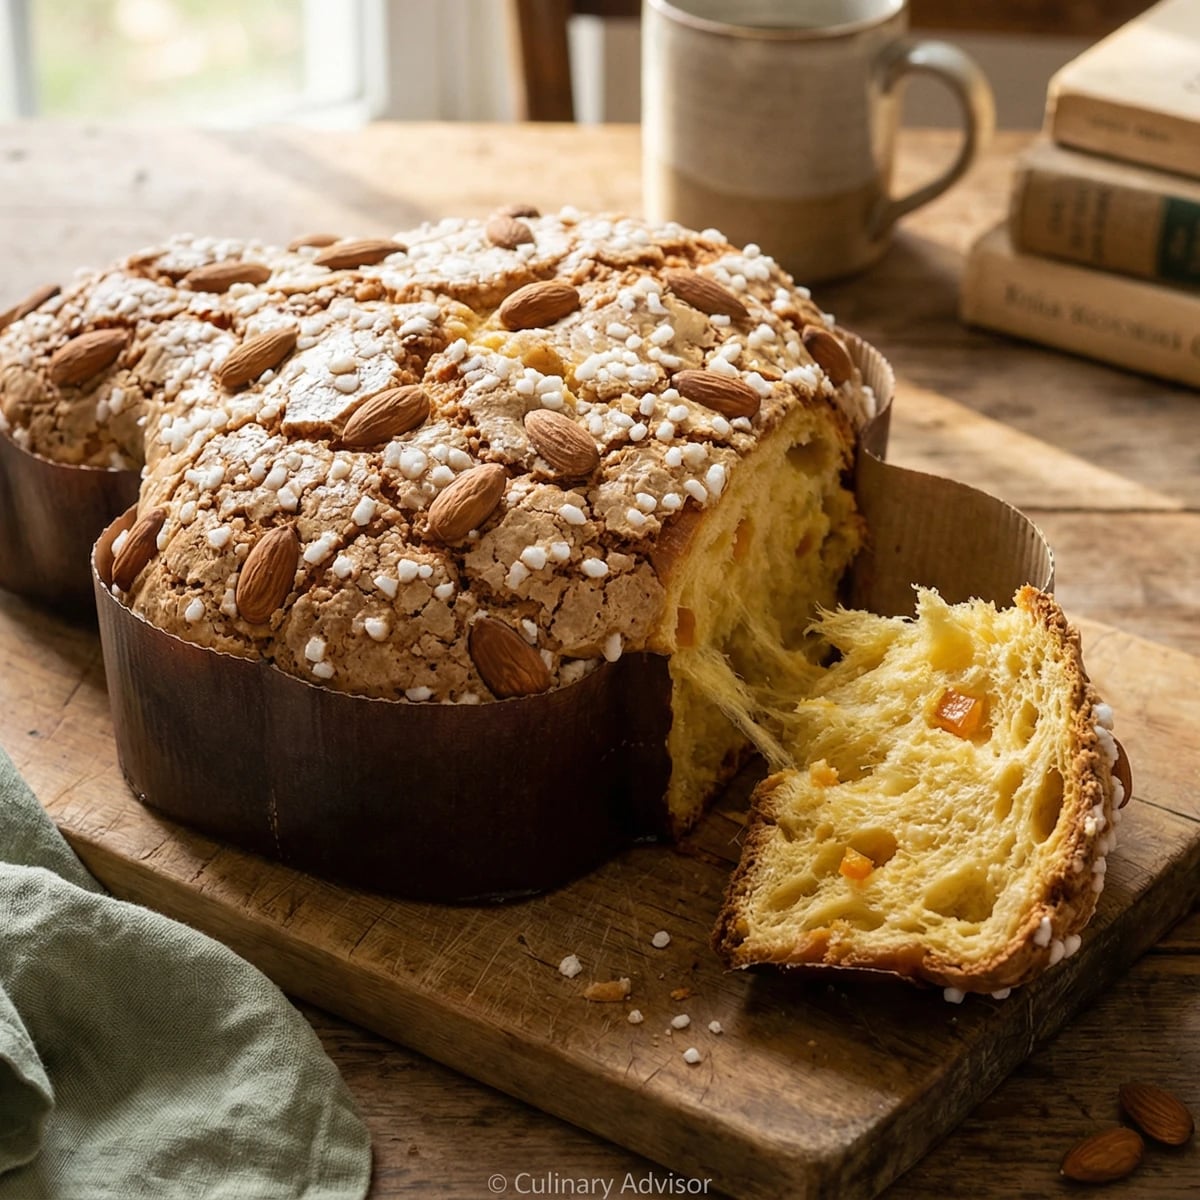
The reward is a bread so tender it pulls apart in long, feathery strands. The candied orange peel provides bursts of sweetness. The almond glassa cracks like a shell, giving way to the impossibly soft crumb beneath. This is what Easter morning tastes like in Italy.

Colomba Pasquale emerged in 1930s Milan, created by Dino Villani at the Motta company. Villani sought to use panettone production equipment year-round and invented the dove-shaped Easter bread to extend the seasonal baking. The legend he attached to the bread, involving the medieval Battle of Legnano in 1176, was pure marketing invention, but the colomba itself became genuinely beloved within a generation.

The technique, the tradition, and the story behind every dish.

Discover Culinary Explorer

Ingredients

bread flour

Quantity

200g

for biga

water

Quantity

100g

room temperature, for biga

instant yeast

Quantity

3g

for biga

bread flour

Quantity

250g

for first dough

granulated sugar

Quantity

100g

for first dough

egg yolks

Quantity

150g (about 8 large)

for first dough

unsalted butter

Quantity

100g

softened, for first dough

fine sea salt

Quantity

5g

orange zest

Quantity

from 1 orange

finely grated

bread flour

Quantity

100g

for second dough

granulated sugar

Quantity

50g

for second dough

egg yolks

Quantity

50g (about 3 large)

for second dough

unsalted butter

Quantity

75g

softened, for second dough

candied orange peel

Quantity

150g

diced into 1/4-inch pieces

whole blanched almonds

Quantity

100g

for glassa

granulated sugar

Quantity

100g

for glassa

egg white

Quantity

1

for glassa

cornstarch

Quantity

1 tablespoon

almond extract

Quantity

1/4 teaspoon

whole blanched almonds

Quantity

50g

for finishing

pearl sugar

Quantity

50g

powdered sugar

Quantity

for dusting

Equipment Needed

  • Stand mixer with dough hook
  • Colomba paper molds (2)
  • Food processor
  • Instant-read thermometer
  • Long wooden skewers for cooling
  • Digital kitchen scale

Instructions

  1. 1

    Make the biga

    In a medium bowl, dissolve the yeast in the room temperature water. Add the flour and mix until a shaggy, stiff dough forms. Cover tightly with plastic wrap and let ferment at room temperature for 12 to 16 hours. The biga is ready when it has tripled in volume and the surface shows deep cracks and bubbles. It should smell pleasantly yeasty, slightly alcoholic.

    The biga provides flavor complexity that instant yeast alone cannot achieve. Do not skip this step. Do not rush it. Begin the biga the evening before you plan to bake.
  2. 2

    Mix the first dough

    Tear the biga into small pieces and place in the bowl of a stand mixer fitted with the dough hook. Add the 250g flour and 100g sugar. Begin mixing on low speed. Add the egg yolks gradually, allowing each addition to be absorbed before adding more. Mix until a rough dough forms, about 5 minutes.

  3. 3

    Develop gluten and add butter

    Increase speed to medium and knead until the dough becomes smooth and elastic, pulling away from the sides of the bowl, about 10 minutes. Add the salt and orange zest. Continue mixing. With the mixer running, add the softened butter one tablespoon at a time. Wait until each piece is fully incorporated before adding the next. This takes patience. The dough will look broken and greasy before it comes together. Keep mixing until it becomes smooth, glossy, and passes the windowpane test: a small piece should stretch thin enough to see light through without tearing.

    The windowpane test is not optional. If you cannot stretch the dough translucent, the gluten is not developed. Keep mixing. This dough requires 20 to 25 minutes of total mixing time.
  4. 4

    First rise

    Transfer the dough to a lightly oiled bowl, cover tightly with plastic wrap, and let rise at warm room temperature (75 to 78°F) until doubled, 2 to 3 hours. The dough should feel airy and pillowy when pressed.

  5. 5

    Mix the second dough

    Return the risen dough to the mixer bowl. Add the remaining 100g flour and 50g sugar. Mix on low speed until combined. Add the egg yolks gradually, mixing until absorbed. Add the softened butter, again one tablespoon at a time. Mix until smooth and elastic, another 10 to 15 minutes.

  6. 6

    Add the candied peel

    Toss the diced candied orange peel with a tablespoon of flour to prevent clumping. Add to the dough and mix on low speed just until evenly distributed, no more than 2 minutes. The peel should be suspended throughout, not crushed.

  7. 7

    Rest the dough

    Cover the bowl and let the dough rest at room temperature for 30 minutes. This relaxes the gluten and makes shaping easier.

  8. 8

    Shape the colomba

    Divide the dough in half (each piece approximately 600g). For each colomba: divide one portion into two pieces, roughly 400g for the body and 200g for the wings. Shape the larger piece into an oval log about 10 inches long, slightly fatter in the middle. This is the body. Shape the smaller piece into a log about 8 inches long. Lay the body piece in a colomba paper mold. Place the wing piece across the body, perpendicular, positioning it slightly toward what will be the head end. Press gently where they meet to seal.

    Colomba paper molds are essential. They support the dough's rise and create the traditional shape. Find them at Italian specialty shops or online. Do not attempt this in a standard baking pan.
  9. 9

    Final proof

    Cover the shaped colombas loosely with plastic wrap and let rise at warm room temperature until the dough reaches just below the rim of the paper molds and feels extremely light when touched, 4 to 6 hours. The dough should jiggle when the pan is gently shaken. Do not rush this rise. Under-proofed colomba will be dense and heavy.

  10. 10

    Make the glassa

    While the colombas proof, prepare the almond topping. In a food processor, grind the 100g almonds with the 100g sugar until very fine, almost like flour. Add the egg white, cornstarch, and almond extract. Process until a thick paste forms. The glassa should be spreadable but hold its shape. If too thick, add a few drops of water. If too thin, add more ground almonds.

  11. 11

    Top and bake

    Preheat the oven to 350°F (175°C). Spread the glassa generously over the top of each proofed colomba, covering the surface evenly. Scatter the whole almonds across the top, pressing lightly so they adhere. Sprinkle the pearl sugar over all. Bake until deeply golden brown and an instant-read thermometer inserted in the center reads 190°F (88°C), 40 to 45 minutes. If the tops brown too quickly, tent loosely with foil after 25 minutes.

    The internal temperature is crucial. Under-baked colomba will collapse as it cools. The crumb must be fully set, even if the crust looks done.
  12. 12

    Cool properly

    Remove from the oven and immediately insert two long wooden skewers horizontally through the base of each colomba, near the bottom. Invert the colombas and suspend them between two tall objects (cans, jars, pot handles) so they hang upside down. This prevents the delicate crumb from collapsing under its own weight. Cool completely upside down, at least 8 hours or overnight.

  13. 13

    Finish and serve

    Once completely cool, turn the colombas right side up. Dust lightly with powdered sugar if desired. The texture should be deeply golden on the outside, incredibly soft and stringy on the inside, with the candied peel distributed throughout. Slice into wedges to serve.

Chef Tips

  • Weigh your ingredients precisely. Bread baking, especially enriched bread baking, is chemistry. A few grams of flour or butter in either direction changes the texture significantly.
  • Use genuine candied orange peel, not the artificially colored supermarket variety. Italian grocers and specialty shops carry the real thing. The difference is substantial.
  • The upside-down cooling is not optional. The structure of enriched dough cannot support itself while warm. Skip this step and you will have a collapsed, dense bread.
  • Colomba keeps beautifully for five to seven days wrapped in plastic at room temperature. Do not refrigerate. The cold accelerates staling.
  • If you cannot find pearl sugar (granella di zucchero), crush sugar cubes roughly with a rolling pin. Swedish pearl sugar works as a substitute.

Advance Preparation

  • The biga requires 12 to 16 hours of fermentation. Begin it the evening before you plan to mix the first dough.
  • The entire process spans approximately 26 hours from biga to cooled colomba. Plan accordingly.
  • The glassa can be made up to 3 days ahead and refrigerated. Bring to room temperature before using.
  • Finished colomba keeps well for one week at room temperature, wrapped tightly. It can be frozen for up to 2 months; thaw overnight at room temperature before serving.

Frequently Asked Questions

Nutrition Information

1 serving (about 95g)

Calories
415 calories
Total Fat
17 g
Saturated Fat
7 g
Trans Fat
0 g
Unsaturated Fat
10 g
Cholesterol
160 mg
Sodium
120 mg
Total Carbohydrates
58 g
Dietary Fiber
2 g
Sugars
28 g
Protein
8 g

Note: Chef personas and recipes are created with AI assistance. Cook with care: follow safe food-handling practices, check doneness with a thermometer when needed, and adapt for allergies and your kitchen.

Where cooking meets culture.

Culinary guides, cultural storytelling, and the editorial depth that makes cooking meaningful.

Discover Culinary Explorer

More from Chef Graziella's Italian Bread Collection

Browse the full collection